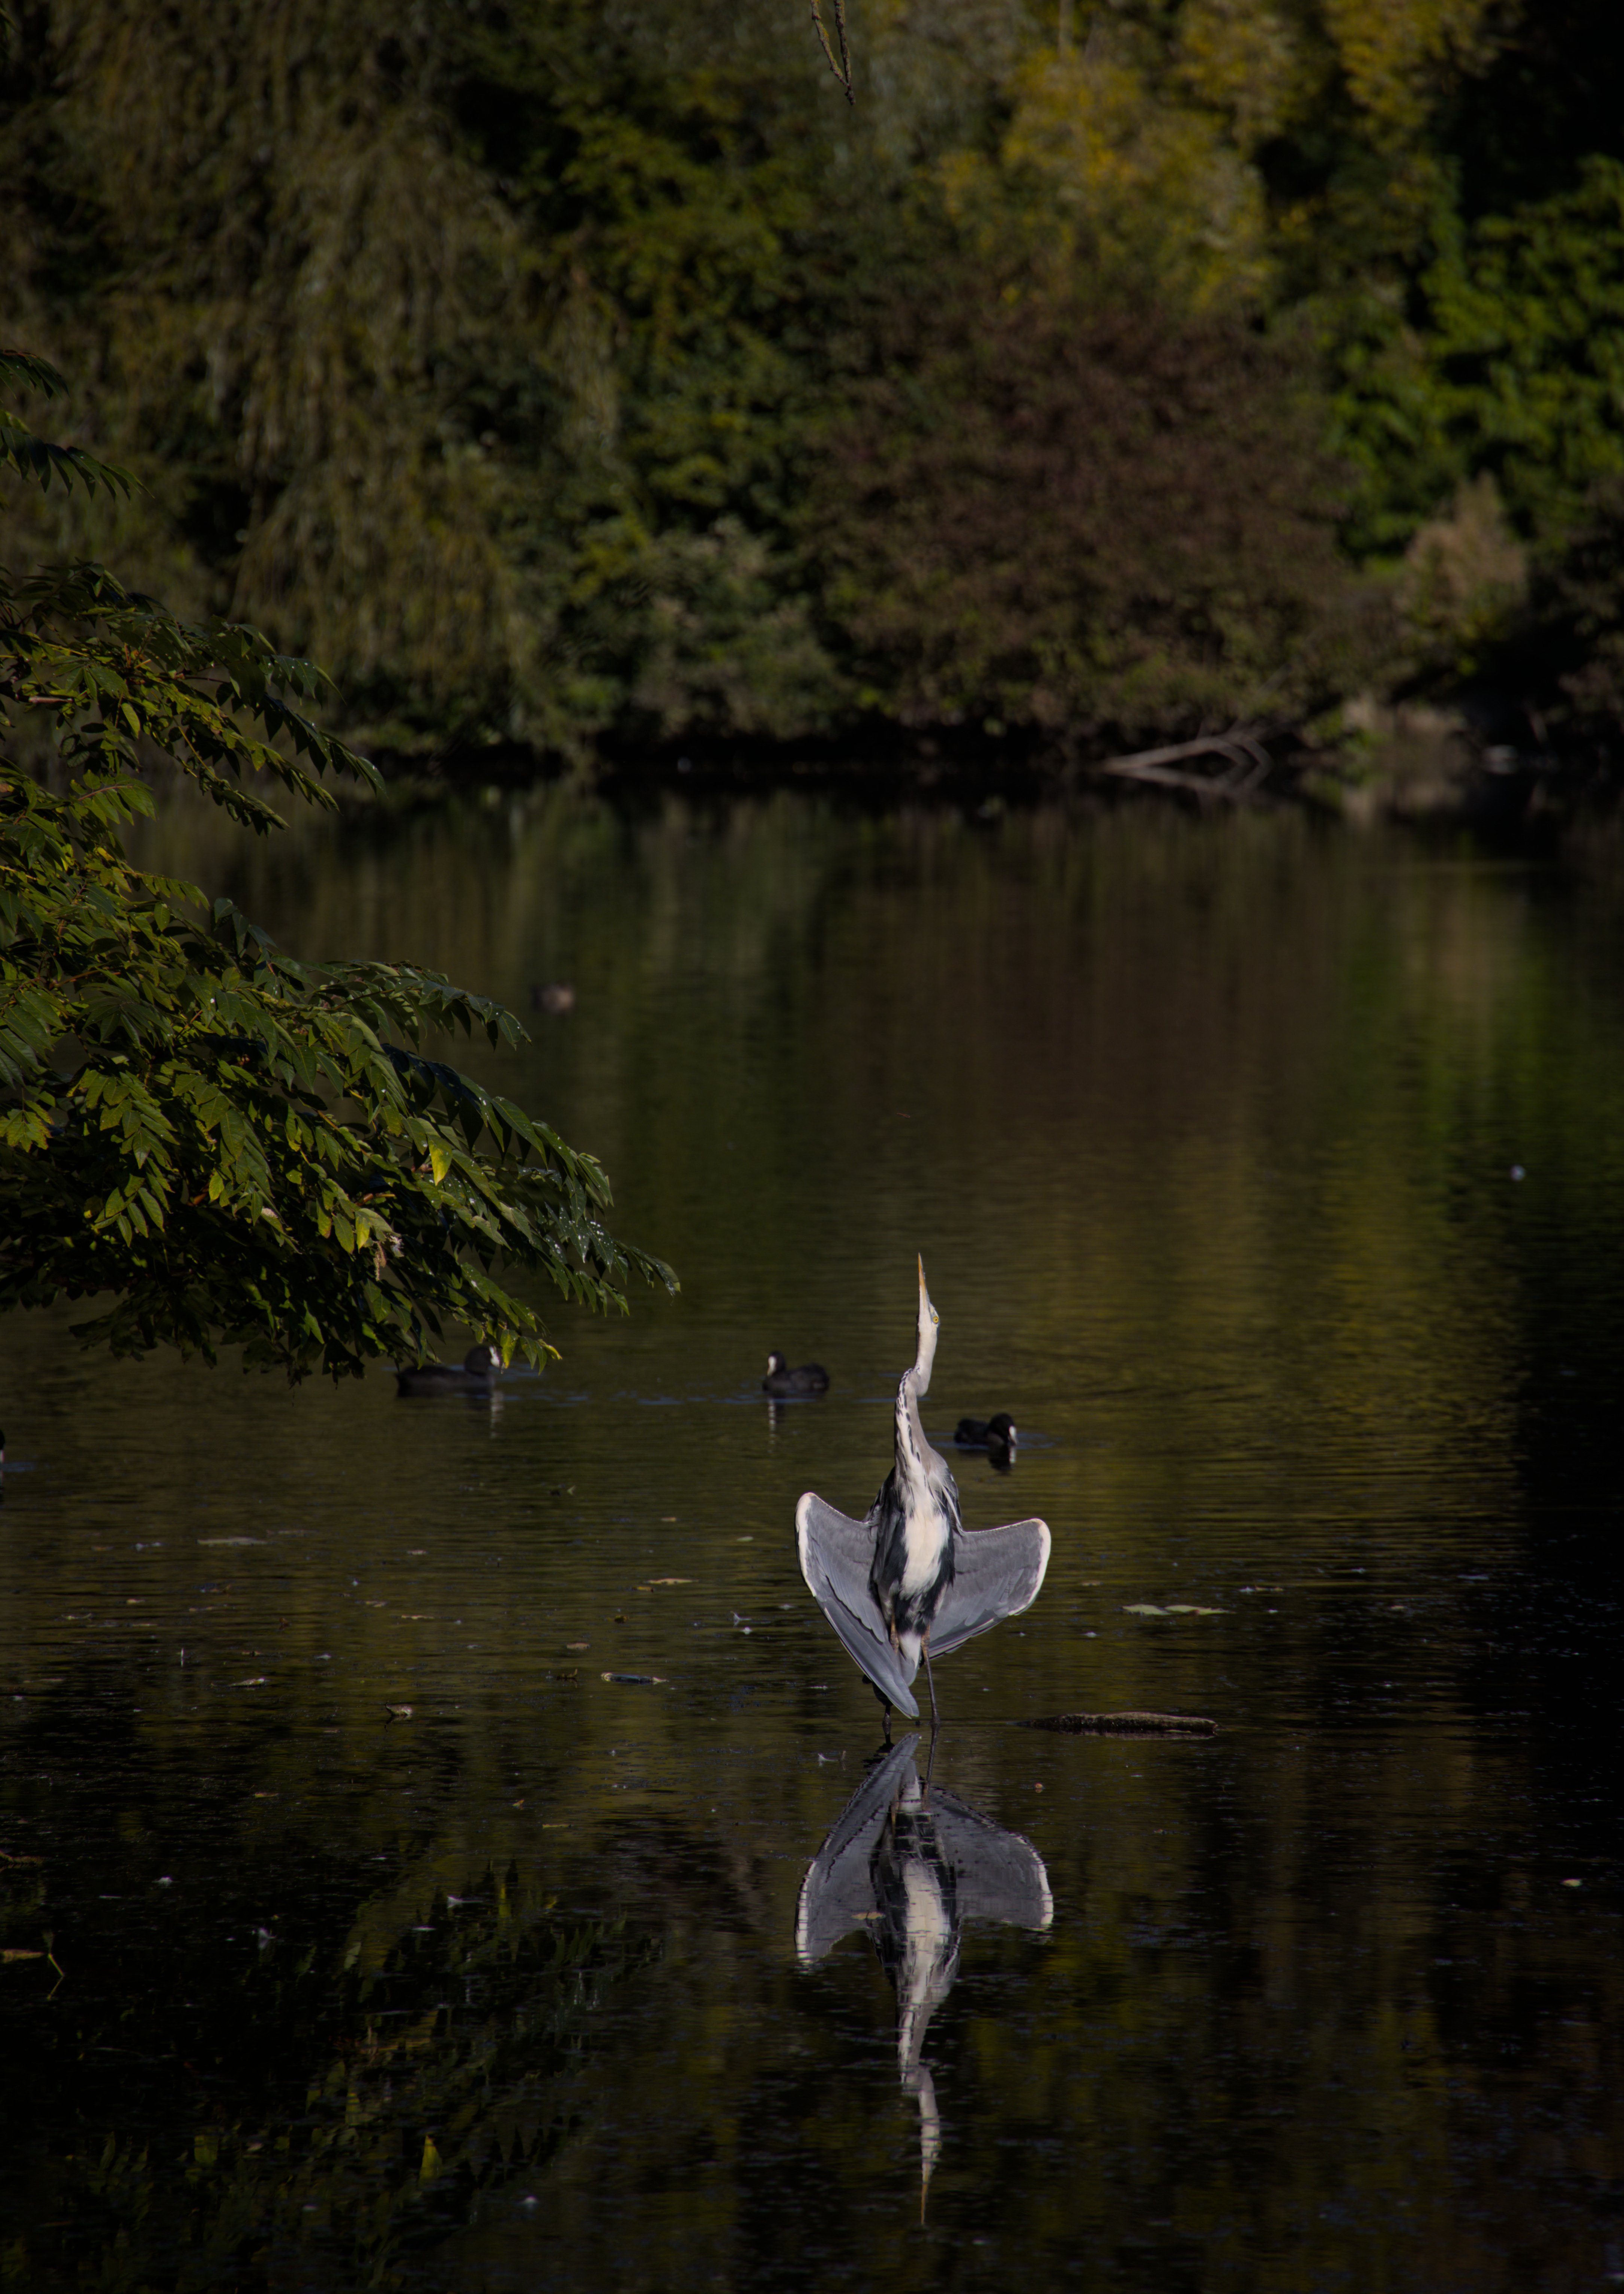
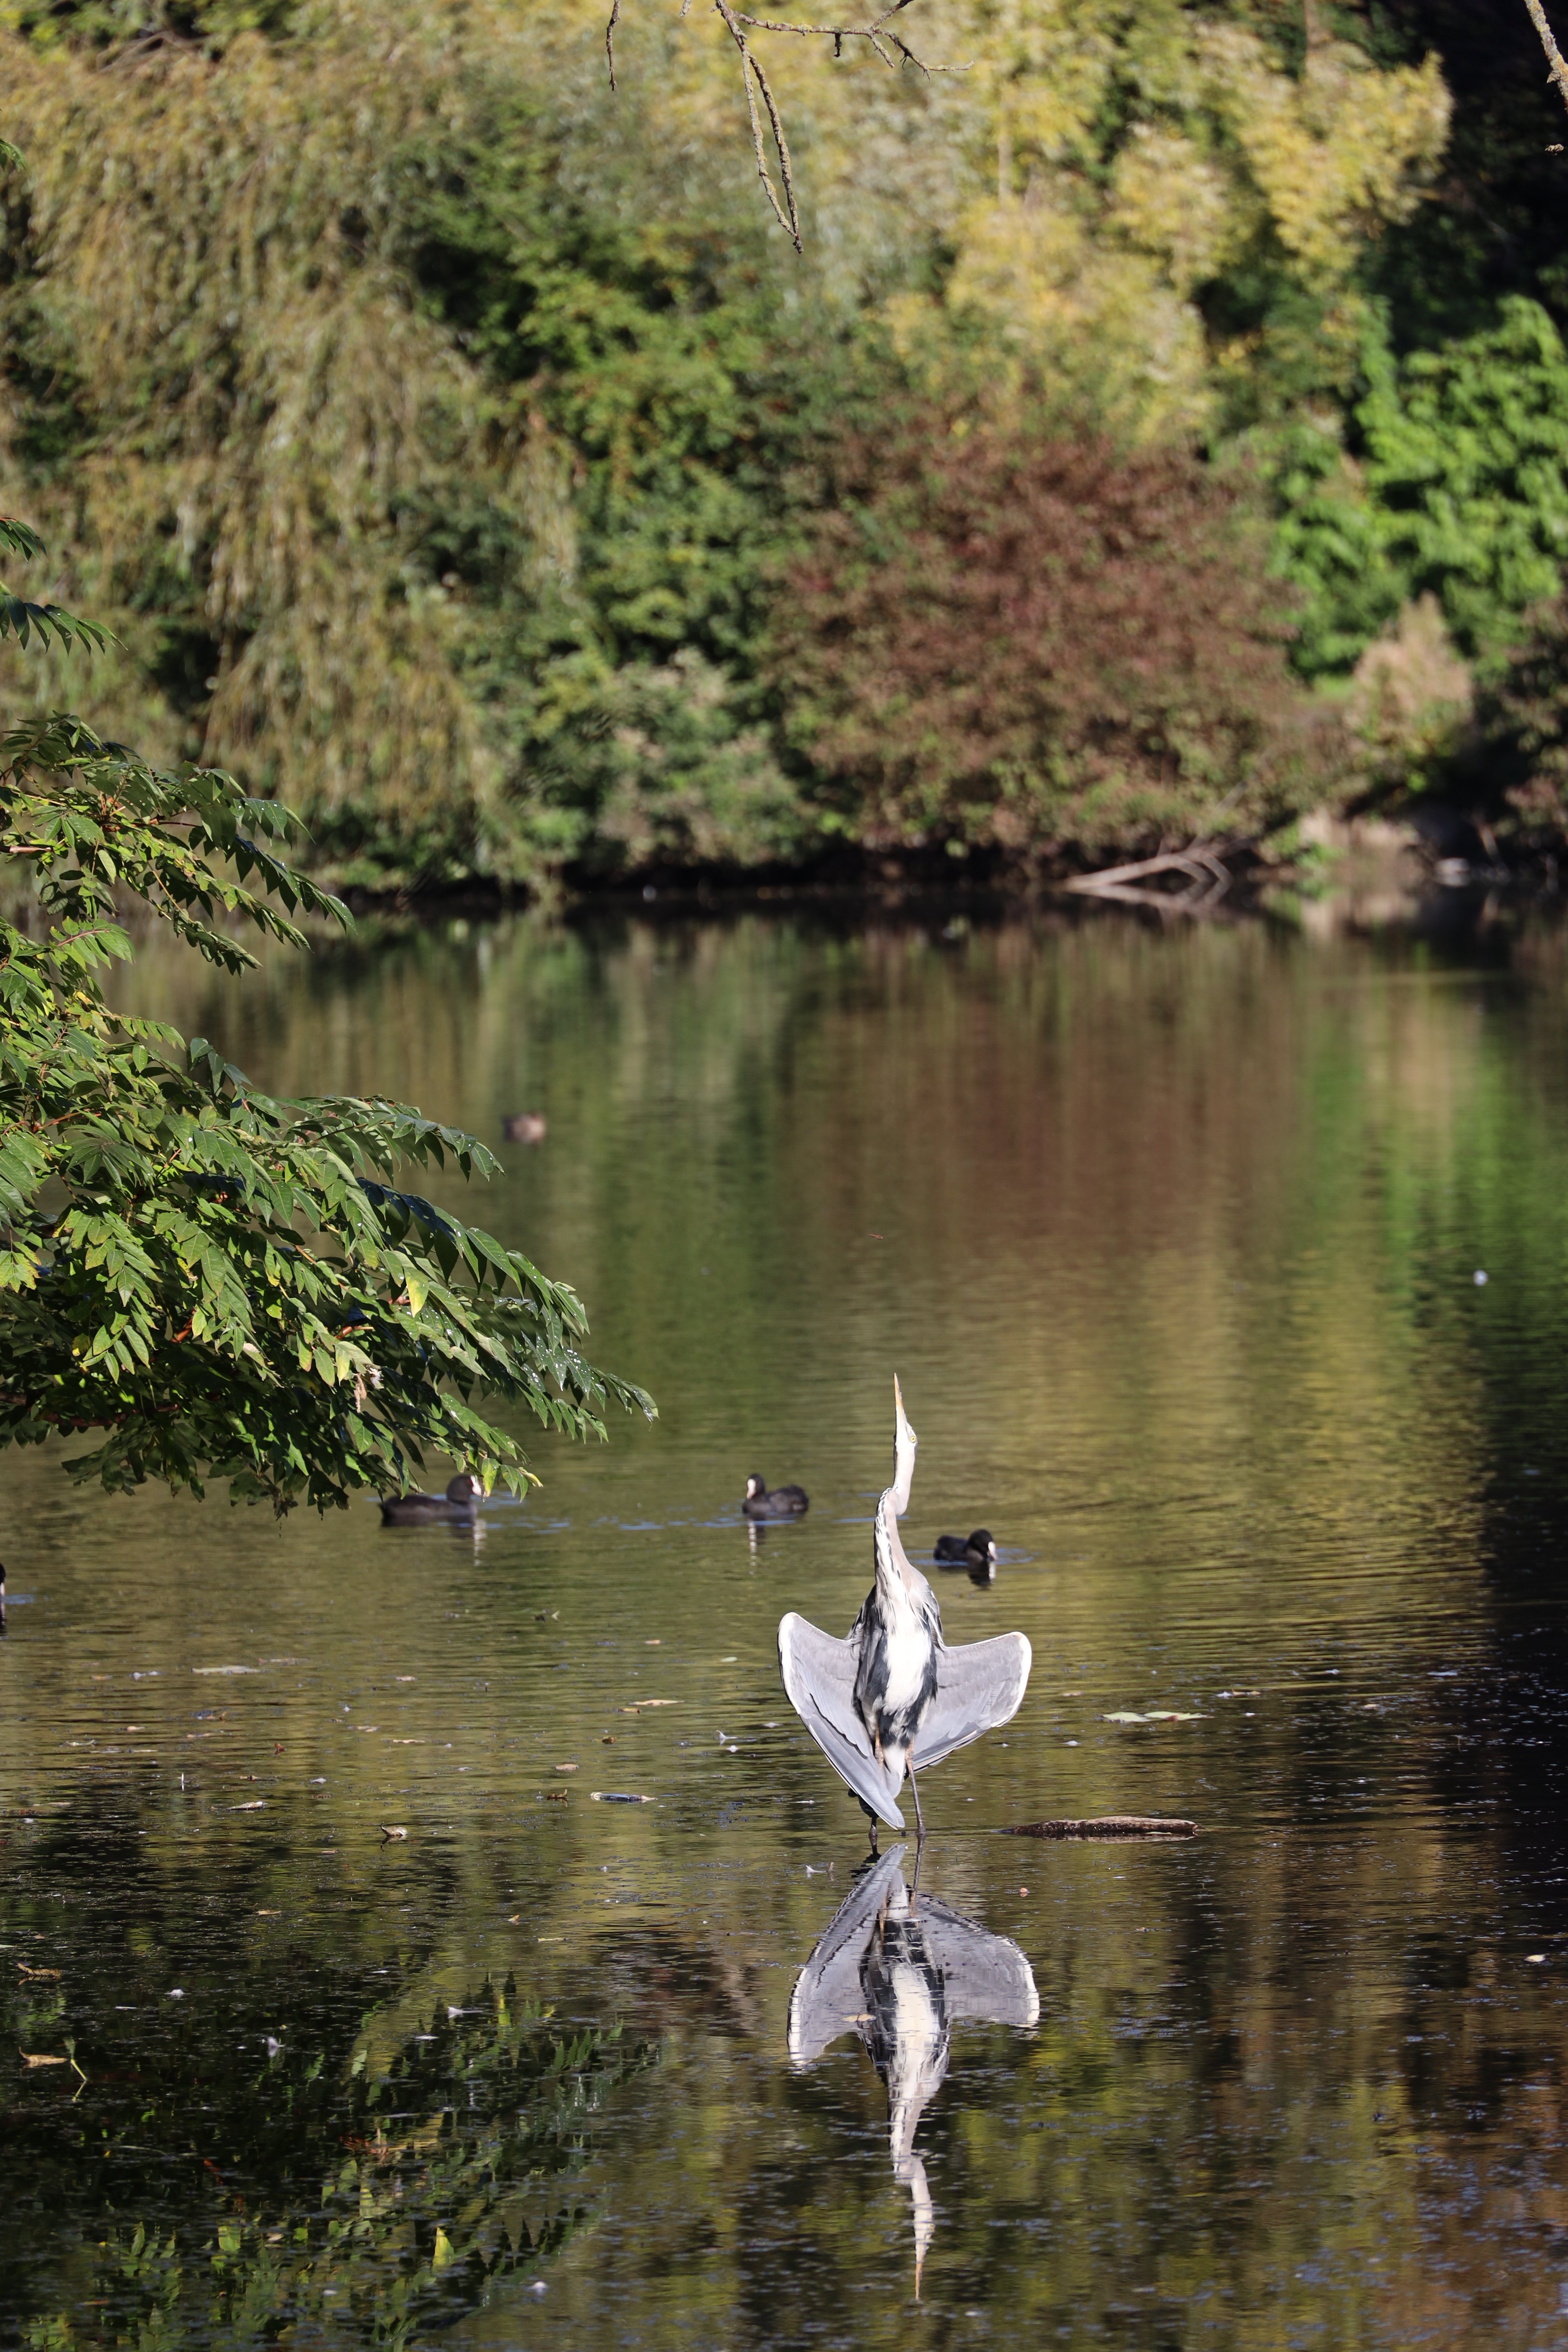
Nice photo because of the unusual pose + reflection + framing anyway, but a good example of why RAW format is so useful - I'm pretty sure you'd be able to recover the over-exposed areas with the info in a RAW format version (experience suggests at least one stops worth of recovery should be available).
Photography
A community to post about photography:
We allow a wide range of topics here including; your own images, technical questions, gear talk, photography blogs etc. Please be respectful and don't spam.
I should have the RAW file somewhere. Since editing myself usually ends in disaster... Should I just lower overall exposure until the bird stops appearing overoxposed or should I try lowering highlights separately or something?
Tips would be appreciated.
Personally, I found Darktable to be the by far best raw editor I've ever used, and I used quite a few.
I used to think, that digital editing was hard and that I was quite bad at it until I tried Darktable. Darktable is easier and it gives you more consistent and predictable results than any other raw editor. Reason is that other raw editors basically just try to make it look good on the screen and then apply any transformations on top of the "good-looking" copy (Display-Referred workflow), which leads to unpredictable results. I can speak from experience when I say Darktable saves me countless hours in my job. Software really makes a massive difference in your photos and workflow and Darktable's FOSS. So no harm in trying. Yes, I'm shilling Darktable hard because it is so good. Believe me, if you ever had to do any sort of advanced editing in Lightroom or Capture One, you know what I'm talking about when you try twisting the programme's arm into giving you something acceptable and then trying making it look consistent with other pictures.
Best example is highlight recovery. Most programmes don't do real highlight recovery. They just give you back what the camera has already recorded, but have deliberately thrown away to give you a good looking copy right when you load the image the first time. Thanks to applying a curve first, and then everything else on top of said base curve. So if you continue to multiply on top of other transformations, you'll essentially multiply more and more errors, and it will really show.
For starting out, stick to the predefined workflow and modules and work away. There's your active modules and then you can add more modules to your active ones. There is a basic workflow when you load every image that gives you a good-looking result, but thanks to everything being exposed to you, the user, you have full control of all of it. Each module completes processing and hands off the result to the next module from bottom to top. So you always know what is going on in your raw workflow and in what order, which is very important. Funnily enough, other raw editors mostly don't tell you what's happening in what order, so you kind of have to make a guess, and just try and see what you get. It doesn't have to be this way, it can be better. If you want to go really deeply into raw editing, read the excellent manual. But if you just want to keep it surface level, that's alright as well. Just stick to the predefined modules and their order and you'll be golden.
TLDR: Darktable good.
Edit: Fixed typo.
Yeah Darktable is the way to go from what I've gathered so far. At the very least in terms of freeware. I can tell that it does a lot of things very well and offers endless features. I've already played around with it previously and use it exclusively now since I've switched my mainOS to Ubuntu and can't use Lightroom anymore. I did enjoy Lightroom's pre-sets that are offered by default. Filters and such. It helps getting some inspiration in what way the image could be modified to convey itself better.
I'm sure similar filters exist for Darktable as well but it's not as much point-and-click as Lightroom I guess.
Do you know if there are camera (manufacturer) specific modules for Darkroom that can be used? Would be nice to 1-click-recreate what my camera did for the .jpg and go from there. I think it'd help me a lot to adjust the image I've already evaluated instead of starting 'from scratch' regarding pretty much all image data, you know?
Well, Darktable by default gives you a proper looking input without having to do anything. It will look boring, but right. So there's nothing you need to do to make it look like a normal picture. Also, if you want, there are manufacturer-specific presets directly built in, which make it look a bit nicer.
Also you can use 3D LUTs files. They are essentially like program agnostic styles. Be sure to set the colour space properly to the colour space of the LUT when you use them, however.
Here's an article with a download link that gives you a few very high quality ones. They're all strictly scene-referred, not display-referred like the other programmes, so they are consistent across pictures.
https://onecameraonelens.com/2022/10/13/a-selection-of-darktable-styles/
Also, if you want to do white balance with Darktable, do not do it with the white balance module, but with the color calibration module. The white balance module does something very different in a scene referred process.
Lastly, I highly recommend you also do your own ones because it's fun and it will make your pictures look unique, since it will be your own unique creative colour grade.
If you have any questions, DM me.
Edit: Fixed typo.
Thank you very much. I'll check it out and try to get used to it when the next photo needs retouching.
https://onecameraonelens.com/2022/08/02/quickly-get-a-workable-image-in-darktable/ seems promising as well. I guess I already figured that out myself at some point but maybe following a guide will show me what I might've been doing wrong or in a wrong order or something...
So, here I would say the background is about the right exposure, so a global change in brightness probably won't be right.
Have you tried what Canon DPP calls Gamma Adjustment, or what I think of as “the Histogram Tool”? This is still a global change, but with finer control. It may also present as a "leaning/squashed S curve" What I would first try is:
Use your settings to highlight over (and under!) exposed areas as you work.
The rightmost slider probably controls the brighter end of the histogram - try moving it further right so that it is past the histogram and in the flat area. I don't think it would hold with this photo, but if you had a lot of white/bright sky, move the slider so that your subject is not over exposed, and accept over exposed sky. You should then see that your subject is no longer over-exposed, yet the rest of the photo is not much changed. If, as in this case, there's only a small over exposed area, you may need to send the slider even further to the right as the subject doesn't really show up in the histogram.
Sometimes if you do this, you get an unwelcome colour cast to the previously over-exposed areas. This is a hint this is not going to be a success!
If however the above has had a positive effect, you may have thrown off the rest of the photo. Try moving the central slider left and right - to the right deals with "washed out", to the left deals with "too much in shadow". Choose the position that most appeals to you - perhaps zoomed in on the subject.
For completeness, move the leftmost slider to where the histogram goes flat (or possibly further to the right if there's background shadows you don't care about).
As you play with the tool (assuming some parallel is present at all) you will realise:
- You can roughly mimic a global brightness increase of one stop by moving each slider (left, centre, right) one stop to the left.
- Any "Shadows" and "Highlights" (and perhaps others) sliders are doing variations on the above theme as well.
Your histogram tool may even allow more refined tweaks of the histogram (especially if its the curve type). Probably not facilities you need.
People who are good at post processing (not me!) will play with masks to keep these sort of effects to just the subject.
It may be worth getting to understand what the underlying logic of all this is. very loosely - RAW counts photons per pixel. To convert this to an image, the pixel count is assigned to a bucket of a particular display brightness (0-255 or whatever) that is associated with a range of pixel counts. The leftmost bucket is "0 to m" photons and black, the rightmost bucket is "n and above" photons and white, and the buckets in between are the greys. The histogram tool is altering the range of pixel counts for each bucket and recalculating the bucket for each pixel. Obviously, extrapolate this nonsense to RGB! A JPG already has chosen the buckets for each pixel, and lost the photon count, meaning there's a lot less info to work with.
(One day I'll save a copy of "Kevin's Histogram Approach" and tweak it for posts like this!)
Tried something with Darktable. As usual, I got quite frustrated with my ability to change things in a way I feel to be in control of. Well at least monsieur le bird seems to be shown in a less exposed way:

Well, I think I like that more than the original one, so if it was me, I'd count the post-processing as a win. There might be settings that are marginally better, but you could spend a lot of time for little gain (judging which picture is overall better when you've only moved "one notch" is really hard).
I like it way more than the original. Yes, the background's darker, but the heron is the correct exposure. And only the heron, so you have a point where the eye is drawn to. I think with one of the presets in the article it would be even better.
Thank you for the reply.
Moving the sliders of the histogram is the one thing I've been able to do myself without 'messing up' the image. Will try it for this pic as well.
Working with masks is something that really makes sense for such instances but it kind of feels like cheating to edit this way. Maybe I'm just to hung up on the idea to keep photos close to the real thing, whatever that might be.
Using the .jpg my camera creates already contains lots of adjustments....
Yes, for bird photography, where I want "truth" as well as "beauty", I'd share your suspicion of masks - playing with the histogram is doing little more than saying "I know better than the camera does how to globally assign brightness" which strikes me as entirely proper.
Lovely shot!
49.23742334324064,-122.96899542117264 ?
Just a few thousand kilometers off, though I might make it there one day and check it out! :)
