Linux Admin : Resources for Linux SysAdmin

629 readers
4 users here now

General Discussion for topics for Linux SysAdmin

founded 1 year ago
MODERATORS
1


Hello r/linuxadmin reddit refugees to c/linuxadmin.

I moved to Lemmy and was missing one of my favorite sub.

After missing it, I decided to create and make it available to others like me.

Welcome all and let's create a healthy environment for discussion and sharing tips.

2


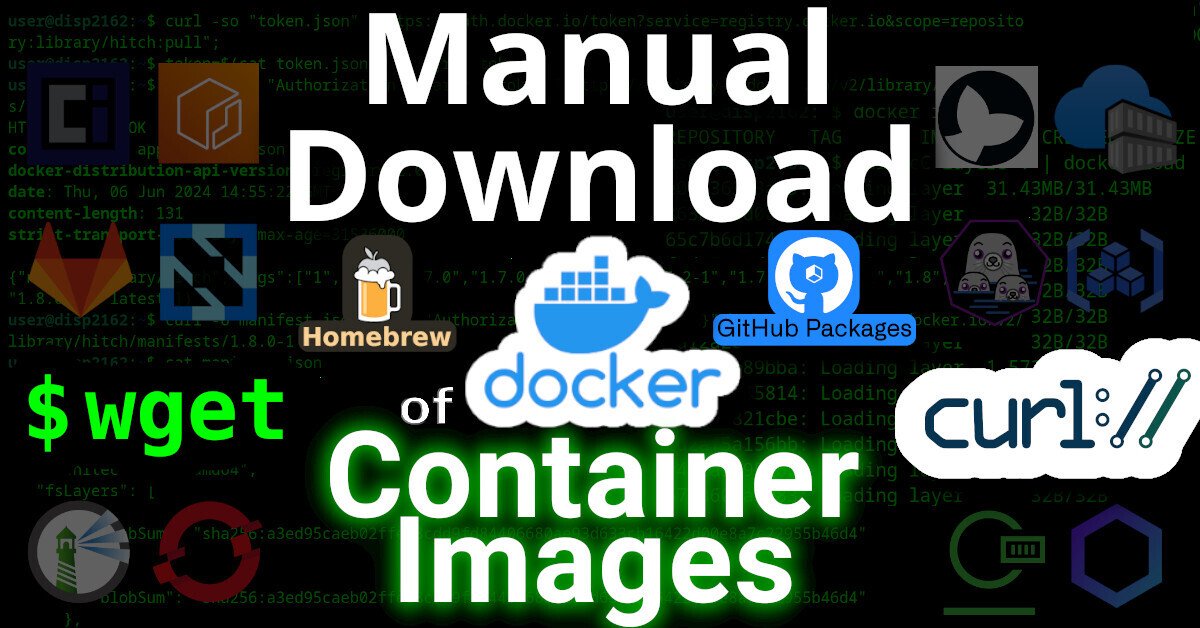
This article will describe how to download an image from a (docker) container registry.

Manual Download of Container Images with wget and curl

Intro

Remember the good `'ol days when you could just download software by visiting a website and click "download"?

Even apt and yum repositories were just simple HTTP servers that you could just curl (or wget) from. Using the package manager was, of course, more secure and convenient -- but you could always just download packages manually, if you wanted.

But have you ever tried to curl an image from a container registry, such as docker? Well friends, I have tried. And I have the scars to prove it.

It was a remarkably complex process that took me weeks to figure-out. Lucky you, this article will break it down.

Examples

Specifically, we'll look at how to download files from two OCI registries.

  1. Docker Hub
  2. GitHub Packages

Terms

First, here's some terminology used by OCI

  1. OCI - Open Container Initiative
  2. blob - A "blob" in the OCI spec just means a file
  3. manifest - A "manifest" in the OCI spec means a list of files

Prerequisites

This guide was written in 2024, and it uses the following software and versions:

  1. debian 12 (bookworm)
  2. curl 7.88.1
  3. OCI Distribution Spec v1.1.0 (which, unintuitively, uses the '/v2/' endpoint)

Of course, you'll need 'curl' installed. And, to parse json, 'jq' too.

sudo apt-get install curl jq

What is OCI?

OCI stands for Open Container Initiative.

OCI was originally formed in June 2015 for Docker and CoreOS. Today it's a wider, general-purpose (and annoyingly complex) way that many projects host files (that are extremely non-trivial to download).

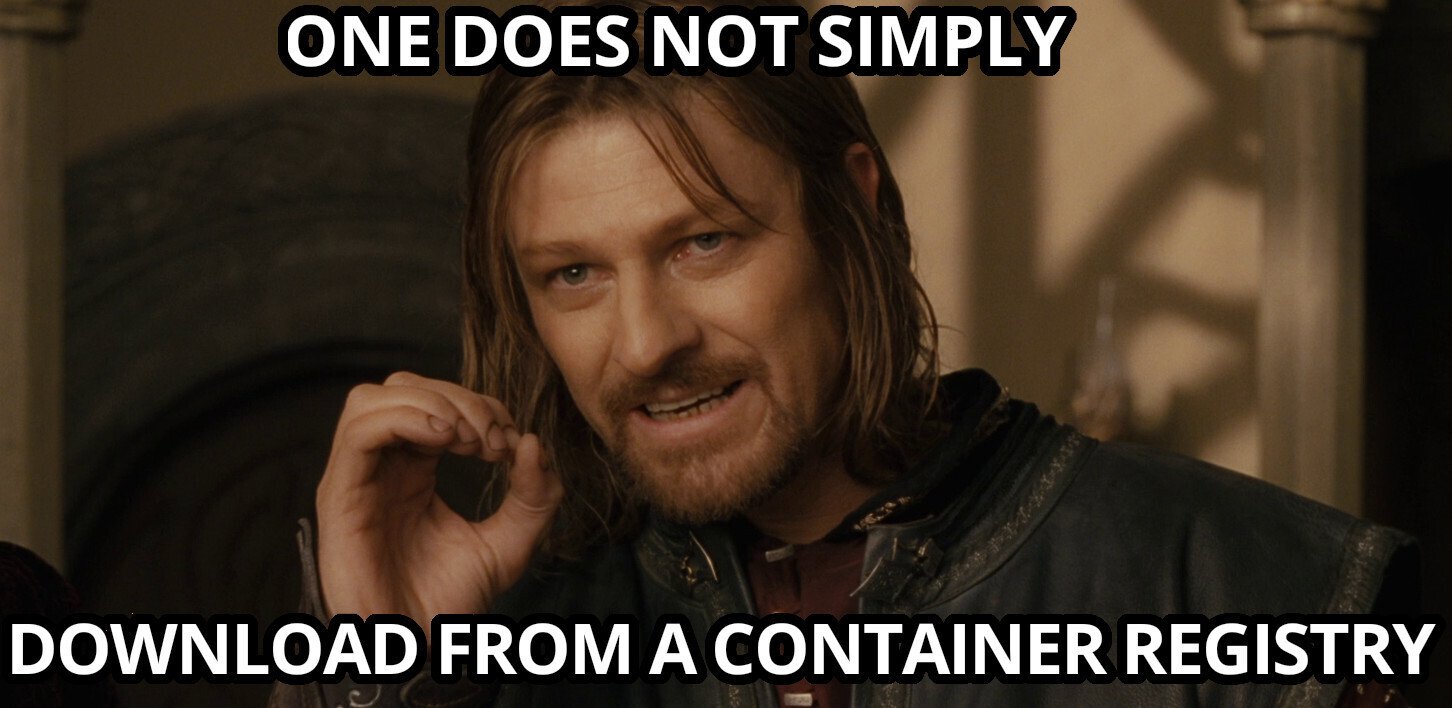
One does not simply download a file from an OCI-complianet container registry. You must:

  1. Generate an authentication token for the API
  2. Make an API call to the registry, requesting to download a JSON "Manifest"
  3. Parse the JSON Manifest to figure out the hash of the file that you want
  4. Determine the download URL from the hash
  5. Download the file (which might actually be many distinct file "layers")
One does not simply download from a container registry

In order to figure out how to make an API call to the registry, you must first read (and understand) the OCI specs here.

OCI APIs

OCI maintains three distinct specifications:

  1. image spec
  2. runtime spec
  3. distribution spec

OCI "Distribution Spec" API

To figure out how to download a file from a container registry, we're interested in the "distribution spec". At the time of writing, the latest "distribution spec" can be downloaded here:

The above PDF file defines a set of API endpoints that we can use to query, parse, and then figure out how to download a file from a container registry. The table from the above PDF is copied below:

ID Method API Endpoint Success Failure
end-1 GET /v2/ 200 404/401
end-2 GET / HEAD /v2/<name>/blobs/<digest> 200 404
end-3 GET / HEAD /v2/<name>/manifests/<reference> 200 404
end-4a POST /v2/<name>/blobs/uploads/ 202 404
end-4b POST /v2/<name>/blobs/uploads/?digest=<digest> 201/202 404/400
end-5 PATCH /v2/<name>/blobs/uploads/<reference> 202 404/416
end-6 PUT /v2/<name>/blobs/uploads/<reference>?digest=<digest> 201 404/400
end-7 PUT /v2/<name>/manifests/<reference> 201 404
end-8a GET /v2/<name>/tags/list 200 404
end-8b GET /v2/<name>/tags/list?n=<integer>&last=<integer> 200 404
end-9 DELETE /v2/<name>/manifests/<reference> 202 404/400/405
end-10 DELETE /v2/<name>/blobs/<digest> 202 404/405
end-11 POST /v2/<name>/blobs/uploads/?mount=<digest>&from=<other_name> 201 404
end-12a GET /v2/<name>/referrers/<digest> 200 404/400
end-12b GET /v2/<name>/referrers/<digest>?artifactType=<artifactType> 200 404/400
end-13 GET /v2/<name>/blobs/uploads/<reference> 204 404

In OCI, files are (cryptically) called "blobs". In order to figure out the file that we want to download, we must first reference the list of files (called a "manifest").

The above table shows us how we can download a list of files (manifest) and then download the actual file (blob).

Examples

Let's look at how to download files from a couple different OCI registries:

  1. Docker Hub
  2. GitHub Packages

Docker Hub

To see the full example of downloading images from docker hub, click here

GitHub Packages

To see the full example of downloading files from GitHub Packages, click here.

Why?

I wrote this article because many, many folks have inquired about how to manually download files from OCI registries on the Internet, but their simple queries are usually returned with a barrage of useless counter-questions: why the heck would you want to do that!?!

The answer is varied.

Some people need to get files onto a restricted environment. Either their org doesn't grant them permission to install software on the machine, or the system has firewall-restricted internet access -- or doesn't have internet access at all.
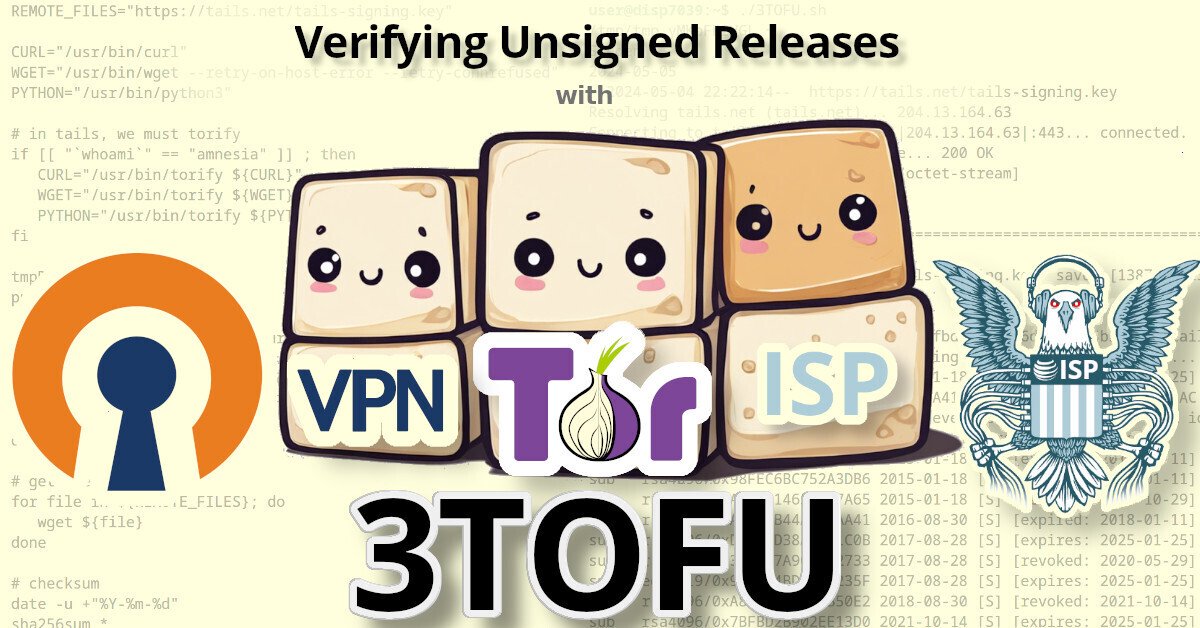
3TOFU

Personally, the reason that I wanted to be able to download files from an OCI registry was for 3TOFU.

Verifying Unsigned Releases with 3TOFU

Unfortunaetly, most apps using OCI registries are extremely insecure. Docker, for example, will happily download malicious images. By default, it doesn't do any authenticity verifications on the payloads it downloaded. Even if you manually enable DCT, there's loads of pending issues with it.

Likewise, the macOS package manager brew has this same problem: it will happily download and install malicious code, because it doesn't use cryptography to verify the authenticity of anything that it downloads. This introduces watering hole vulnerabilities when developers use brew to install dependencies in their CI pipelines.

My solution to this? 3TOFU. And that requires me to be able to download the file (for verification) on three distinct linux VMs using curl or wget.

⚠ NOTE: 3TOFU is an approach to harm reduction.

It is not wise to download and run binaries or code whose authenticity you cannot verify using a cryptographic signature from a key stored offline. However, sometimes we cannot avoid it. If you're going to proceed with running untrusted code, then following a 3TOFU procedure may reduce your risk, but it's better to avoid running unauthenticated code if at all possible.

Registry (ab)use

Container registries were created in 2013 to provide a clever & complex solution to a problem: how to package and serve multiple versions of simplified sources to various consumers spanning multiple operating systems and architectures -- while also packaging them into small, discrete "layers".

However, if your project is just serving simple files, then the only thing gained by uploading them to a complex system like a container registry is headaches. Why do developers do this?

In the case of brew, their free hosing provider (JFrog's Bintray) shutdown in 2021. Brew was already hosting their code on GitHub, so I guess someone looked at "GitHub Packages" and figured it was a good (read: free) replacement.

Many developers using Container Registries don't need the complexity, but -- well -- they're just using it as a free place for their FOSS project to store some files, man.

3
20
submitted 1 year ago* (last edited 1 year ago) by [email protected] to c/[email protected]


Inspired by another post here -> https://lemmy.run/post/46724

Introduction to Tmux

Tmux is a terminal multiplexer that allows you to run multiple terminal sessions within a single window. It enhances your productivity by enabling you to create and manage multiple panes and windows, detach and reattach sessions, and more. In this tutorial, we'll cover the basic usage of Tmux.

Installation

To install Tmux, follow the instructions below:

macOS

brew install tmux

Ubuntu/Debian

sudo apt-get install tmux

CentOS/Fedora

sudo dnf install tmux

Starting a Tmux Session

To start a new Tmux session, open your terminal and enter the following command:

tmux new-session

This will create a new Tmux session with a single window.

Key Bindings

Tmux uses key bindings to perform various actions. By default, the prefix key is Ctrl + b, which means you need to press Ctrl + b before executing any command.

For example, to split the current window vertically, you would press Ctrl + b followed by %.

Panes

Panes allow you to split the current window into multiple sections, each running its own command. Here are some commonly used pane commands:

  • Split the window vertically: Ctrl + b followed by %
  • Split the window horizontally: Ctrl + b followed by "
  • Switch between panes: Ctrl + b followed by an arrow key (e.g., Ctrl + b followed by Left Arrow)
  • Resize panes: Ctrl + b followed by Ctrl + arrow key

Windows

Windows in Tmux are like tabs in a web browser or editor. They allow you to have multiple terminal sessions within a single Tmux session. Here are some window commands:

  • Create a new window: Ctrl + b followed by c
  • Switch between windows: Ctrl + b followed by a number key (e.g., Ctrl + b followed by 0 to switch to window 0)
  • Close the current window: Ctrl + b followed by &

Session Management

Tmux allows you to detach and reattach sessions, which is useful when you need to switch between different machines or disconnect from your current session.

  • Detach from the current session: Ctrl + b followed by d
  • List all sessions: tmux list-sessions
  • Reattach to a detached session: tmux attach-session -t <session-name>

Configuration

Tmux can be customized by creating a .tmux.conf file in your home directory. You can modify key bindings, customize the status bar, and more. Here's an example of how to change the prefix key to Ctrl + a:

  1. Create or edit the .tmux.conf file in your home directory.
  2. Add the following line to the file: set-option -g prefix C-a
  3. Save the file and exit.

After making changes to your configuration file, you can either restart Tmux or reload the configuration by running the following command within a Tmux session:

tmux source-file ~/.tmux.conf

Conclusion

Congratulations! You've learned the basics of using Tmux. With Tmux, you can work more efficiently by managing multiple terminal sessions within a single window. Explore more features and commands by referring to the Tmux documentation.

4


cross-posted from: https://lemmy.ml/post/1840209

cross-posted from: https://lemmy.ml/post/1840134

This is a changeset adding encryption to btrfs. It is not complete; it
does not support inline data or verity or authenticated encryption. It
is primarily intended as a proof that the fscrypt extent encryption
changeset it builds on work. 

As per the design doc refined in the fall of last year [1], btrfs
encryption has several steps: first, adding extent encryption to fscrypt
and then btrfs; second, adding authenticated encryption support to the
block layer, fscrypt, and then btrfs; and later adding potentially the
ability to change the key used by a directory (either for all data or
just newly written data) and/or allowing use of inline extents and
verity items in combination with encryption and/or enabling send/receive
of encrypted volumes. As such, this change is only the first step and is
unsafe.

This change does not pass a couple of encryption xfstests, because of
different properties of extent encryption. It hasn't been tested with
direct IO or RAID. Because currently extent encryption always uses inline
encryption (i.e. IO-block-only) for data encryption, it does not support
encryption of inline extents; similarly, since btrfs stores verity items
in the tree instead of in inline encryptable blocks on disk as other
filesystems do, btrfs cannot currently encrypt verity items. Finally,
this is insecure; the checksums are calculated on the unencrypted data
and stored unencrypted, which is a potential information leak. (This
will be addressed by authenticated encryption).

This changeset is built on two prior changesets to fscrypt: [2] and [3]
and should have no effect on unencrypted usage.

[1] https://docs.google.com/document/d/1janjxewlewtVPqctkWOjSa7OhCgB8Gdx7iDaCDQQNZA/edit?usp=sharing
[2]
https://lore.kernel.org/linux-fscrypt/[email protected]/
[3]
https://lore.kernel.org/linux-fscrypt/[email protected]
5


cross-posted from: https://latte.isnot.coffee/post/256982

A discovered vulnerability for privilage escalation https://thehackernews.com/2023/07/researchers-uncover-new-linux-kernel.html?m=1

If system security is the most important criteria above everything else, switch to using BSD.

6
7


cross-posted from: https://lemmy.world/post/1076087

cross-posted from: https://lemmy.world/post/1076049

Linux Unplugged had a pretty good discussion IMHO about some of the more nuanced details behind the RedHat drama that I haven't seen being covered elsewhere as much. The final opinion about RedHat I leave as an exercise to the listener.

8
9


cross-posted from: https://lemmy.ml/post/1776020

A while ago I used to listen to the Linux outlaws which covered a lot of gtopics in Linux and FOSS. The show has discontinued and I'm looking for your recommendations.

What podcasts do you listen to, and what do you like about them?

10


cross-posted from: https://lemmy.ca/post/1188311

Native NVMe support - among other things

11
12


In this tutorial, we will learn how to write basic shell scripts using Markdown. Shell scripting allows us to automate tasks and execute commands in a sequential manner. Markdown is a lightweight markup language that provides an easy way to write formatted documentation.

Table of Contents

Getting Started

Before we begin, make sure you have a shell environment available on your machine. Common shell environments include Bash, Zsh, and PowerShell.

Creating a Shell Script

  1. Open a text editor and create a new file. Give it a meaningful name, such as myscript.sh.
  2. Add the following shebang at the top of the file to specify the shell to be used:
  #!/bin/bash

Make sure to replace bash with the appropriate shell if you're using a different one. 3. Now you can start writing your shell script using Markdown syntax. You can include headers, lists, code blocks, and other formatting elements as needed. 4. Save the file when you're done.

Here's an example of a simple shell script written in Markdown:

# My First Shell Script

This is my first shell script written in Markdown.

## Script

```bash
#!/bin/bash

echo "Hello, World!"

## Running a Shell Script

To execute a shell script, you need to make it executable first. Open a terminal and navigate to the directory where your script is located. Then run the following command:

```bash
chmod +x myscript.sh

Replace myscript.sh with the name of your script.

To run the script, use the following command:

./myscript.sh

Replace myscript.sh with the name of your script.

Variables

Variables in shell scripts are used to store data and manipulate values. Here's an example of defining and using a variable in Markdown:

# Variables

To define a variable, use the following syntax:

```bash
variable_name=value

For example:

name="John"

To use the variable, prefix it with a dollar sign ($):

echo "Hello, $name!"

## User Input

Shell scripts can interact with the user by reading input from the keyboard. Here's an example of reading user input and using it in a script:

```markdown
# User Input

To read user input, use the `read` command followed by the variable name:

```bash
read -p "Enter your name: " name

The user's input will be stored in the name variable. You can then use it in your script:

echo "Hello, $name!"

## Conditional Statements

Conditional statements allow you to execute different code blocks based on certain conditions. Here's an example of an if statement in Markdown:

```markdown
# Conditional Statements

To use conditional statements, you can use the `if` statement followed by the condition and the code block:

```bash
if [ condition ]; then
    # code to execute if the condition is true
else
    # code to execute if the condition is false
fi

For example:

if [ $age -ge 18 ]; then
   

 echo "You are an adult."
else
    echo "You are a minor."
fi

## Loops

Loops allow you to repeat a block of code multiple times. Here's an example of a for loop in Markdown:

```markdown
# Loops

To use loops, you can use the `for` loop followed by the variable, the list of values, and the code block:

```bash
for variable in list; do
    # code to execute for each value
done

For example:

for fruit in apple banana cherry; do
    echo "I like $fruit"
done

## Functions

Functions allow you to define reusable blocks of code. Here's an example of defining and using a function in Markdown:

```markdown
# Functions

To define a function, use the following syntax:

```bash
function_name() {
    # code to execute
}

For example:

greet() {
    echo "Hello, $1!"
}

To call a function, use its name followed by any arguments:

greet "John"

## Conclusion

Congratulations! You've learned how to write basic shell scripts using Markdown. Shell scripting is a powerful way to automate tasks and improve your productivity. Explore more advanced features and commands to create more complex scripts. Happy scripting!
13


In this tutorial, we will explore how to use sed (stream editor) with examples in the Markdown language. sed is a powerful command-line tool for text manipulation and is widely used for tasks such as search and replace, line filtering, and text transformations. What is described below barely scratches the surface what sed can do.

Table of Contents

  1. Installing Sed
  2. Basic Usage
  3. Search and Replace
  4. Deleting Lines
  5. Inserting and Appending Text
  6. Transformations
  7. Working with Files
  8. Conclusion

1. Installing Sed

Before we begin, make sure sed is installed on your system. It usually comes pre-installed on Unix-like systems (e.g., Linux, macOS). To check if sed is installed, open your terminal and run the following command:

sed --version

If sed is not installed, you can install it using your package manager. For example, on Ubuntu or Debian-based systems, you can use the following command:

sudo apt-get install sed

2. Basic Usage

To use sed, you need to provide it with a command and the input text to process. The basic syntax is as follows:

sed 'command' input.txt

Here, 'command' represents the action you want to perform on the input text. It can be a search pattern, a substitution, or a transformation. input.txt is the file containing the text to process. If you omit the file name, sed will read from the standard input.

3. Search and Replace

One of the most common tasks with sed is search and replace. To substitute a pattern with another in Markdown files, use the s command. The basic syntax is:

sed 's/pattern/replacement/' input.md

For example, to replace all occurrences of the word "apple" with "orange" in input.md, use the following command:

sed 's/apple/orange/' input.md

4. Deleting Lines

You can also delete specific lines from a Markdown file using sed. The d command is used to delete lines that match a particular pattern. The syntax is as follows:

sed '/pattern/d' input.md

For example, to delete all lines containing the word "banana" from input.md, use the following command:

sed '/banana/d' input.md

5. Inserting and Appending Text

sed allows you to insert or append text at specific locations in a Markdown file. The i command is used to insert text before a line, and the a command is used to append text after a line. The syntax is as follows:

sed '/pattern/i\inserted text' input.md
sed '/pattern/a\appended text' input.md

For example, to insert the line "This is a new paragraph." before the line containing the word "example" in input.md, use the following command:

sed '/example/i\This is a new paragraph.' input.md

6. Transformations

sed provides various transformation commands that can be used to modify Markdown files. Some useful commands include:

  • y: Transliterate characters. For example, to convert all uppercase letters to lowercase, use:

    sed 'y/ABCDEFGHIJKLMNOPQRSTUVWXYZ/abcdefghijklmnopqrstuvwxyz/' input.md
    
  • p: Print lines. By default, sed only prints the modified lines. To print all lines, use:

    sed -n 'p' input.md
    
  • r: Read and insert the contents of a file. For example, to insert the contents of insert.md after the line containing the word "insertion point" in input.md, use:

    sed '/insertion point/r insert.md' input.md
    

These are just a few examples of the transformation commands available in sed.

7. Working with Files

By default, sed modifies the input in-place. To make changes to a file and save the output to a new file, you can use input/output redirection:

sed 'command' input.md > output.md

This command runs sed on input.md and saves the output to output.md. Be cautious when using redirection, as it will overwrite the contents of output.md if it already exists.

8. Conclusion

In this tutorial, we have explored the basics of using sed with Markdown files. You have learned how to perform search and replace operations, delete lines, insert and append text, apply transformations, and work with files. sed offers a wide range of capabilities, and with practice, you can become proficient in manipulating Markdown files using this powerful tool.

14
7
submitted 1 year ago* (last edited 1 year ago) by [email protected] to c/[email protected]


In this tutorial, we will walk through the process of using the grep command to filter Nginx logs based on a given time range. grep is a powerful command-line tool for searching and filtering text patterns in files.

Step 1: Access the Nginx Log Files First, access the server or machine where Nginx is running. Locate the log files that you want to search. Typically, Nginx log files are located in the /var/log/nginx/ directory. The main log file is usually named access.log. You may have additional log files for different purposes, such as error logging.

Step 2: Understanding Nginx Log Format To effectively search through Nginx logs, it is essential to understand the log format. By default, Nginx uses the combined log format, which consists of several fields, including the timestamp. The timestamp format varies depending on your Nginx configuration but is usually in the following format: [day/month/year:hour:minute:second timezone].

Step 3: Determine the Time Range Decide on the time range you want to filter. You will need to provide the starting and ending timestamps in the log format mentioned earlier. For example, if you want to filter logs between June 24th, 2023, from 10:00 AM to 12:00 PM, the time range would be [24/Jun/2023:10:00:00 and [24/Jun/2023:12:00:00.

Step 4: Use Grep to Filter Logs With the log files and time range identified, you can now use grep to filter the logs. Open a terminal or SSH session to the server and execute the following command:

grep "\[24/Jun/2023:10:00:" /var/log/nginx/access.log | awk '$4 >= "[24/Jun/2023:10:00:" && $4 <= "[24/Jun/2023:12:00:"'

Replace starting_timestamp and ending_timestamp with the appropriate timestamps you determined in Step 3. The grep command searches for lines containing the starting timestamp in the log file specified (access.log in this example). The output is then piped (|) to awk, which filters the logs based on the time range.

Step 5: View Filtered Logs After executing the command, you should see the filtered logs that fall within the specified time range. The output will include the entire log lines matching the filter.

Additional Tips:

  • If you have multiple log files, you can either specify them individually in the grep command or use a wildcard character (*) to match all files in the directory.
  • You can redirect the filtered output to a file by appending > output.log at the end of the command. This will create a file named output.log containing the filtered logs.

That's it! You have successfully filtered Nginx logs using grep based on a given time range. Feel free to explore additional options and features of grep to further refine your log analysis.

15


Running Commands in Parallel in Linux

In Linux, you can execute multiple commands simultaneously by running them in parallel. This can help improve the overall execution time and efficiency of your tasks. In this tutorial, we will explore different methods to run commands in parallel in a Linux environment.

Method 1: Using & (ampersand) symbol

The simplest way to run commands in parallel is by appending the & symbol at the end of each command. Here's how you can do it:

command_1 & command_2 & command_3 &

This syntax allows each command to run in the background, enabling parallel execution. The shell will immediately return the command prompt, and the commands will execute concurrently.

For example, to compress three different files in parallel using the gzip command:

gzip file1.txt & gzip file2.txt & gzip file3.txt &

Method 2: Using xargs with -P option

The xargs command is useful for building and executing commands from standard input. By utilizing its -P option, you can specify the maximum number of commands to run in parallel. Here's an example:

echo -e "command_1\ncommand_2\ncommand_3" | xargs -P 3 -I {} sh -c "{}" &

In this example, we use the echo command to generate a list of commands separated by newline characters. This list is then piped (|) to xargs, which executes each command in parallel. The -P 3 option indicates that a maximum of three commands should run concurrently. Adjust the number according to your requirements.

For instance, to run three different wget commands in parallel to download files:

echo -e "wget http://example.com/file1.txt\nwget http://example.com/file2.txt\nwget http://example.com/file3.txt" | xargs -P 3 -I {} sh -c "{}" &

Method 3: Using GNU Parallel

GNU Parallel is a powerful tool specifically designed to run jobs in parallel. It provides extensive features and flexibility. To use GNU Parallel, follow these steps:

  1. Install GNU Parallel if it's not already installed. You can typically find it in your Linux distribution's package manager.

  2. Create a file (e.g., commands.txt) and add one command per line:

    command_1
    command_2
    command_3
    
  3. Run the following command to execute the commands in parallel:

    parallel -j 3 < commands.txt
    

    The -j 3 option specifies the maximum number of parallel jobs to run. Adjust it according to your needs.

For example, if you have a file called urls.txt containing URLs and you want to download them in parallel using wget:

parallel -j 3 wget {} < urls.txt

GNU Parallel also offers numerous advanced options for complex parallel job management. Refer to its documentation for further information.

Conclusion

Running commands in parallel can significantly speed up your tasks by utilizing the available resources efficiently. In this tutorial, you've learned three methods for running commands in parallel in Linux:

  1. Using the & symbol to run commands in the background.
  2. Utilizing xargs with the -P option to define the maximum parallelism.
  3. Using GNU Parallel for advanced parallel job management.

Choose the method that best suits your requirements and optimize your workflow by executing commands concurrently.

16


Beginner's Guide to grep

grep is a powerful command-line tool used for searching and filtering text in files. It allows you to find specific patterns or strings within files, making it an invaluable tool for developers, sysadmins, and anyone working with text data. In this guide, we will cover the basics of using grep and provide you with some useful examples to get started.

Installation

grep is a standard utility on most Unix-like systems, including Linux and macOS. If you're using a Windows operating system, you can install it by using the Windows Subsystem for Linux (WSL) or through tools like Git Bash, Cygwin, or MinGW.

Basic Usage

The basic syntax of grep is as follows:

grep [options] pattern [file(s)]
  • options: Optional flags that modify the behavior of grep.
  • pattern: The pattern or regular expression to search for.
  • file(s): Optional file(s) to search within. If not provided, grep will read from standard input.

Examples

Searching in a Single File

To search for a specific pattern in a single file, use the following command:

grep "pattern" file.txt

Replace "pattern" with the text you want to search for and file.txt with the name of the file you want to search in.

Searching in Multiple Files

If you want to search for a pattern across multiple files, use the following command:

grep "pattern" file1.txt file2.txt file3.txt

You can specify as many files as you want, separating them with spaces.

Ignoring Case

By default, grep is case-sensitive. To perform a case-insensitive search, use the -i option:

grep -i "pattern" file.txt

Displaying Line Numbers

To display line numbers along with the matching lines, use the -n option:

grep -n "pattern" file.txt

This can be helpful when you want to know the line numbers where matches occur.

Searching Recursively

To search for a pattern in all files within a directory and its subdirectories, use the -r option (recursive search):

grep -r "pattern" directory/

Replace directory/ with the path to the directory you want to search in.

Using Regular Expressions

grep supports regular expressions for more advanced pattern matching. Here's an example using a regular expression to search for email addresses:

grep -E "\b[A-Za-z0-9._%+-]+@[A-Za-z0-9.-]+\.[A-Za-z]{2,}\b" file.txt

In this case, the -E option enables extended regular expressions.

Conclusion

grep is a versatile tool that can greatly enhance your text searching and filtering capabilities. With the knowledge you've gained in this beginner's guide, you can start using grep to quickly find and extract the information you need from text files. Experiment with different options and explore more advanced regular expressions to further expand your skills with grep. Happy grepping!

17


cross-posted from: https://lemmy.run/post/10475

Testing Service Accounts in Kubernetes

Service accounts in Kubernetes are used to provide a secure way for applications and services to authenticate and interact with the Kubernetes API. Testing service accounts ensures their functionality and security. In this guide, we will explore different methods to test service accounts in Kubernetes.

1. Verifying Service Account Existence

To start testing service accounts, you first need to ensure they exist in your Kubernetes cluster. You can use the following command to list all the available service accounts:

kubectl get serviceaccounts

Verify that the service account you want to test is present in the output. If it's missing, you may need to create it using a YAML manifest or the kubectl create serviceaccount command.

2. Checking Service Account Permissions

After confirming the existence of the service account, the next step is to verify its permissions. Service accounts in Kubernetes are associated with roles or cluster roles, which define what resources and actions they can access.

To check the permissions of a service account, you can use the kubectl auth can-i command. For example, to check if a service account can create pods, run:

kubectl auth can-i create pods --as=system:serviceaccount:<namespace>:<service-account>

Replace <namespace> with the desired namespace and <service-account> with the name of the service account.

3. Testing Service Account Authentication

Service accounts authenticate with the Kubernetes API using bearer tokens. To test service account authentication, you can manually retrieve the token associated with the service account and use it to authenticate requests.

To get the token for a service account, run:

kubectl get secret <service-account-token-secret> -o jsonpath="{.data.token}" | base64 --decode

Replace <service-account-token-secret> with the actual name of the secret associated with the service account. This command decodes and outputs the service account token.

You can then use the obtained token to authenticate requests to the Kubernetes API, for example, by including it in the Authorization header using tools like curl or writing a simple program.

4. Testing Service Account RBAC Policies

Role-Based Access Control (RBAC) policies govern the access permissions for service accounts. It's crucial to test these policies to ensure service accounts have the appropriate level of access.

One way to test RBAC policies is by creating a Pod that uses the service account you want to test and attempting to perform actions that the service account should or shouldn't be allowed to do. Observe the behavior and verify if the access is granted or denied as expected.

5. Automated Testing

To streamline the testing process, you can create automated tests using testing frameworks and tools specific to Kubernetes. For example, the Kubernetes Test Framework (KTF) provides a set of libraries and utilities for writing tests for Kubernetes components, including service accounts.

Using such frameworks allows you to write comprehensive test cases to validate service account behavior, permissions, and RBAC policies automatically.

Conclusion

Testing service accounts in Kubernetes ensures their proper functioning and adherence to security policies. By verifying service account existence, checking permissions, testing authentication, and validating RBAC policies, you can confidently use and rely on service accounts in your Kubernetes deployments.

Remember, service accounts are a critical security component, so it's important to regularly test and review their configuration to prevent unauthorized access and potential security breaches.

18


Beginner's Guide to nc (Netcat)

Welcome to the beginner's guide to nc (Netcat)! Netcat is a versatile networking utility that allows you to read from and write to network connections using TCP or UDP. It's a powerful tool for network troubleshooting, port scanning, file transfer, and even creating simple network servers. In this guide, we'll cover the basics of nc and how to use it effectively.

Installation

To use nc, you first need to install it on your system. The installation process may vary depending on your operating system. Here are a few common methods:

Linux

On most Linux distributions, nc is usually included by default. If it's not installed, you can install it using your package manager. For example, on Ubuntu or Debian, open a terminal and run:

sudo apt-get install netcat

macOS

macOS doesn't come with nc pre-installed, but you can easily install it using the Homebrew package manager. Open a terminal and run:

brew install netcat

Windows

For Windows users, you can download the official version of nc from the Nmap project's website. Choose the appropriate installer for your system and follow the installation instructions.

Basic Usage

Once you have nc installed, you can start using it to interact with network connections. Here are a few common use cases:

Connect to a Server

To connect to a server using nc, you need to know the server's IP address or domain name and the port number it's listening on. Use the following command:

nc <host> <port>

For example, to connect to a web server running on example.com on port 80, you would run:

nc example.com 80

Send and Receive Data

After establishing a connection, you can send and receive data through nc. Anything you type will be sent to the server, and any response from the server will be displayed on your screen. Simply type your message and press Enter.

File Transfer

nc can also be used for simple file transfer between two machines. One machine acts as the server and the other as the client. On the receiving machine (server), run the following command:

nc -l <port> > output_file

On the sending machine (client), use the following command to send a file:

nc <server_ip> <port> < input_file

The receiving machine will save the file as output_file. Make sure to replace <port>, <server_ip>, input_file, and output_file with the appropriate values.

Port Scanning

Another useful feature of nc is port scanning. It allows you to check if a particular port on a remote machine is open or closed. Use the following command:

nc -z <host> <start_port>-<end_port>

For example, to scan ports 1 to 100 on example.com, run:

nc -z example.com 1-100

Conclusion

Congratulations! You've learned the basics of nc and how to use it for various network-related tasks. This guide only scratches the surface of nc's capabilities, so feel free to explore more advanced features and options in the official documentation or online resources. Happy networking!

19
 
 
  1. Introduction to awk:

    awk is a powerful text processing tool that allows you to manipulate structured data and perform various operations on it. It uses a simple pattern-action paradigm, where you define patterns to match and corresponding actions to be performed.

  2. Basic Syntax:

    The basic syntax of awk is as follows:

    awk 'pattern { action }' input_file
    
    • The pattern specifies the conditions that must be met for the action to be performed.
    • The action specifies the operations to be carried out when the pattern is matched.
    • The input_file is the file on which you want to perform the awk operation. If not specified, awk reads from standard input.
  3. Printing Lines:

    To start with, let's see how to print lines in Markdown using awk. Suppose you have a Markdown file named input.md.

    • To print all lines, use the following command:
      awk '{ print }' input.md
      
    • To print lines that match a specific pattern, use:
      awk '/pattern/ { print }' input.md
      
  4. Field Separation:

    By default, awk treats each line as a sequence of fields separated by whitespace. You can access and manipulate these fields using the $ symbol.

    • To print the first field of each line, use:
      awk '{ print $1 }' input.md
      
  5. Conditional Statements:

    awk allows you to perform conditional operations using if statements.

    • To print lines where a specific field matches a condition, use:
      awk '$2 == "value" { print }' input.md
      
  6. Editing Markdown Files:

    Markdown files often contain structured elements such as headings, lists, and links. You can use awk to modify and manipulate these elements.

    • To change all occurrences of a specific word, use the gsub function:
      awk '{ gsub("old_word", "new_word"); print }' input.md
      
  7. Saving Output:

    By default, awk prints the result on the console. If you want to save it to a file, use the redirection operator (>).

    • To save the output to a file, use:
      awk '{ print }' input.md > output.md
      
  8. Further Learning:

    This guide provides a basic introduction to using awk for text manipulation in Markdown. To learn more advanced features and techniques, refer to the awk documentation and explore additional resources and examples available online.

Remember, awk is a versatile tool, and its applications extend beyond Markdown manipulation. It can be used for various text processing tasks in different contexts.

20


Basic Linux Command Cheat Sheet

Navigation

  • cd [directory]: Change directory.
  • pwd: Print the current working directory.
  • ls [options] [directory]: List files and directories.
  • mkdir [directory]: Create a new directory.
  • rmdir [directory]: Remove an empty directory.
  • cp [options] [source] [destination]: Copy files and directories.
  • mv [options] [source] [destination]: Move or rename files and directories.

File Operations

  • touch [file]: Create a new empty file or update the timestamp of an existing file.
  • cat [file]: Concatenate and display the contents of a file.
  • head [options] [file]: Output the first part of a file.
  • tail [options] [file]: Output the last part of a file.
  • less [file]: View file contents interactively.
  • rm [options] [file]: Remove files and directories.
  • chmod [options] [mode] [file]: Change file permissions.

File Searching

  • find [path] [expression]: Search for files and directories.
  • grep [options] [pattern] [file]: Search for text patterns in files.
  • locate [file]: Find files by name.
  • which [command]: Show the location of a command.

Process Management

  • ps [options]: Display information about active processes.
  • top: Monitor system processes in real-time.
  • kill [options] [PID]: Terminate a process.
  • killall [options] [process]: Terminate all processes by name.

System Information

  • uname [options]: Print system information.
  • whoami: Print the username of the current user.
  • hostname: Print the name of the current host.
  • df [options]: Display disk space usage.
  • free [options]: Display memory usage.
  • uptime: Show system uptime.

File Compression

  • tar [options] [file]: Create or extract tar archives.
  • gzip [options] [file]: Compress files using gzip compression.
  • gunzip [options] [file]: Decompress files compressed with gzip.

Network

  • ping [options] [host]: Send ICMP echo requests to a host.
  • ifconfig: Display network interface information.
  • ip [options]: Show or manipulate routing, devices, and policy routing.
  • ssh [user@]host: Connect to a remote server using SSH.
  • wget [options] [URL]: Download files from the web.

System Administration

  • sudo [command]: Execute a command with superuser privileges.
  • su [username]: Switch to another user account.
  • passwd [username]: Change a user's password.
  • apt [options] [command]: Package management command for APT.
  • systemctl [options] [command]: Control the systemd system and service manager.

Conclusion

This cheat sheet covers some of the basic Linux commands for navigation, file operations, process management, system information, file searching, network-related tasks, file compression, and system administration. It serves as a handy reference for both beginners and experienced users.

Feel free to explore these commands further and refer to the command's manual page (man [command]) for more detailed information.

Happy Linux command line exploration!

21


Beginner's Guide to htop

Introduction

htop is an interactive process viewer and system monitor for Linux systems. It provides a real-time overview of your system's processes, resource usage, and other vital system information. This guide will help you get started with htop and understand its various features.

Installation

We are assuming that you are using ubuntu or debain based distros here.

To install htop, follow these steps:

  1. Open the terminal.
  2. Update the package list by running the command: sudo apt update.
  3. Install htop by running the command: sudo apt install htop.
  4. Enter your password when prompted.
  5. Wait for the installation to complete.

Launching htop

Once htop is installed, you can launch it by following these steps:

  1. Open the terminal.
  2. Type htop and press Enter.

Understanding the htop Interface

After launching htop, you'll see the following information on your screen:

  1. A header displaying the system's uptime, load average, and total number of tasks.
  2. A list of processes, each represented by a row.
  3. A footer showing various system-related information.

Navigating htop

htop provides several keyboard shortcuts for navigating and interacting with the interface. Here are some common shortcuts:

  • Arrow keys: Move the cursor up and down the process list.
  • Enter: Expand or collapse a process to show or hide its children.
  • Space: Tag or untag a process.
  • F1: Display the help screen with a list of available shortcuts.
  • F2: Change the setup options, such as columns displayed and sorting methods.
  • F3: Search for a specific process by name.
  • F4: Filter the process list by process owner.
  • F5: Tree view - display the process hierarchy as a tree.
  • F6: Sort the process list by different columns, such as CPU usage or memory.
  • F9: Send a signal to a selected process, such as terminating it.
  • F10: Quit htop and exit the program.

Customizing htop

htop allows you to customize its appearance and behavior. You can modify settings such as colors, columns displayed, and more. To access the setup menu, press the F2 key. Here are a few options you can modify:

  • Columns: Select which columns to display in the process list.
  • Colors: Customize the color scheme used by htop.
  • Meters: Choose which system meters to display in the header and footer.
  • Sorting: Set the default sorting method for the process list.

Exiting htop

To exit htop and return to the terminal, press the F10 key or simply close the terminal window.

Conclusion

Congratulations! You now have a basic understanding of how to use htop on the Linux bash terminal. With htop, you can efficiently monitor system processes, resource usage, and gain valuable insights into your Linux system. Explore the various features and options available in htop to get the most out of this powerful tool.

Remember, you can always refer to the built-in help screen (F1) for a complete list of available shortcuts and commands.

Enjoy using htop and happy monitoring!

22
 
 
$ netstat -an | awk '/tcp/ {print $6}' | sort | uniq -c
     92 ESTABLISHED
      1 FIN_WAIT2
     13 LISTEN
   7979 TIME_WAIT
$ grep processor /proc/cpuinfo | wc -l
4
$ grep -r keep.*alive /etc/
/etc/ufw/sysctl.conf:#net/ipv4/tcp_keepalive_intvl=1800
/etc/nginx/nginx.conf:    keepalive_timeout     5 5;
$ free -m
             total       used       free     shared    buffers     cached
Mem:         14980       1402      13577          0        113        831
-/+ buffers/cache:        458      14521
Swap:
 $ uptime
 02:17:14 up 18:20,  1 user,  load average: 2.77, 2.39, 2.21
$ dstat
You did not select any stats, using -cdngy by default.
----total-cpu-usage---- -dsk/total- -net/total- ---paging-- ---system--
usr sys idl wai hiq siq| read  writ| recv  send|  in   out | int   csw 
 46   2  51   0   0   1|4432B   10k|   0     0 |   0     0 |4346  1870 
 51   3  46   0   0   1|   0    56k|2679k  191k|   0     0 |5130  2318 
 40   3  57   0   0   1|   0     0 |1566k  211k|   0     0 |4825  2141 
 46   2  52   0   0   0|   0     0 |1311k  136k|   0     0 |4606  1997 
 27   2  71   0   0   1|   0     0 | 234k  144k|   0     0 |3278  1693 
 23   2  76   0   0   0|   0   152k| 286k  123k|   0     0 |3094  1683 
 23   2  74   1   0   0|   0    28k| 146k  131k|   0     0 |3103  1576 
 30   2  67   0   0   1|   0     0 | 668k  177k|   0     0 |4023  2020 
 31   2  67   0   0   0|   0     0 | 326k  197k|   0     0 |4330  2273 
 23   2  75   0   0   0|   0     0 | 339k  121k|   0     0 |3020  1428 
 30   2  67   0   0   0|   0     0 |1930k  180k|   0     0 |4487  1947 
 38   3  59   0   0   1|   0    12k| 340k  155k|   0     0 |4403  1994 
 29   2  68   0   0   1|   0     0 | 187k  117k|   0     0 |3449  1729 
 35   4  59   2   0   1|   0     0 | 478k  314k|   0     0 |4415  2338 
 49   4  46   0   0   1|   0     0 |2263k  210k|   0     0 |5153  2289 
 49   2  49   0   0   1|   0    60k|2921k  118k|   0     0 |5063  1532 
 52   2  46   0   0   0|   0    24k|2823k  161k|   0     0 |4842  1740 
 72   2  26   0   0   1|   0     0 |2361k  141k|   0     0 |4715  1600 
 62   3  34   0   0   1|   0     0 |3414k  147k|   0     0 |5487  1863 
 48   2  49   0   0   1|   0     0 |1501k  117k|   0     0 |4211  1722 
 49   4  46   0   0   1|   0     0 |4675k  207k|   0     0 |5660  2286 
 46   2  51   0   0   0|   0     0 | 182k  169k|   0     0 |4178  2373 
 43   1  55   0   0   0|   0    12k| 172k  168k|   0     0 |3407  1843 
 29   2  69   0   0   0|   0     0 | 376k  175k|   0     0 |4013  2216 
 29   2  68   0   0   0|   0     0 | 613k  238k|   0     0 |4885  2628 
 25   2  72   0   0   1|   0     0 | 272k  215k|   0     0 |5105  3126 
 33   3  63   0   0   1|   0     0 |3692k  228k|   0     0 |5978  2397
$ cat /etc/sysctl.conf
# Avoid a smurf attack
net.ipv4.icmp_echo_ignore_broadcasts = 1

# Turn on protection for bad icmp error messages
net.ipv4.icmp_ignore_bogus_error_responses = 1

# Turn on syncookies for SYN flood attack protection
net.ipv4.tcp_syncookies = 1

# Turn on and log spoofed, source routed, and redirect packets
net.ipv4.conf.all.log_martians = 1
net.ipv4.conf.default.log_martians = 1

# No source routed packets here
net.ipv4.conf.all.accept_source_route = 0
net.ipv4.conf.default.accept_source_route = 0

# Turn on reverse path filtering
net.ipv4.conf.all.rp_filter = 1
net.ipv4.conf.default.rp_filter = 1

# Make sure no one can alter the routing tables
net.ipv4.conf.all.accept_redirects = 0
net.ipv4.conf.default.accept_redirects = 0
net.ipv4.conf.all.secure_redirects = 0
net.ipv4.conf.default.secure_redirects = 0

# Don't act as a router
net.ipv4.ip_forward = 0
net.ipv4.conf.all.send_redirects = 0
net.ipv4.conf.default.send_redirects = 0


# Turn on execshild
kernel.exec-shield = 1
kernel.randomize_va_space = 1

# Tuen IPv6
net.ipv6.conf.default.router_solicitations = 0
net.ipv6.conf.default.accept_ra_rtr_pref = 0
net.ipv6.conf.default.accept_ra_pinfo = 0
net.ipv6.conf.default.accept_ra_defrtr = 0
net.ipv6.conf.default.autoconf = 0
net.ipv6.conf.default.dad_transmits = 0
net.ipv6.conf.default.max_addresses = 1

# Optimization for port usefor LBs
# Increase system file descriptor limit
fs.file-max = 65535

# Allow for more PIDs (to reduce rollover problems); may break some programs 32768
kernel.pid_max = 65536

# Increase system IP port limits
net.ipv4.ip_local_port_range = 2000 65000

# Increase TCP max buffer size setable using setsockopt()
net.ipv4.tcp_rmem = 4096 87380 8388608
net.ipv4.tcp_wmem = 4096 87380 8388608

# Increase Linux auto tuning TCP buffer limits
# min, default, and max number of bytes to use
# set max to at least 4MB, or higher if you use very high BDP paths
# Tcp Windows etc
net.core.rmem_max = 8388608
net.core.wmem_max = 8388608
net.core.netdev_max_backlog = 5000
net.ipv4.tcp_window_scaling = 1
$ 2>/dev/null sysctl -a | grep \
    'tcp_syncookies\|tcp_max_syn_backlog\|tcp_synack_retries'
net.ipv4.tcp_synack_retries = 5
net.ipv4.tcp_syncookies = 1
net.ipv4.tcp_max_syn_backlog = 2048

Question: What might cause high number of TIME_WAIT?

Answer:

# This setting allows sockets reusing.
$ echo 'net.ipv4.tcp_tw_recycle = 1' >> /etc/sysctl.conf
$ sysctl -p /etc/sysctl.conf
23


Linux Command Line Cheat Sheet