The Legend of Zelda: Breath of the Wild

48 readers
1 users here now

The Legend of Zelda: Breath of the Wild is a videogame developed by Nintendo for the Switch and Wii U, published in 2017.


♦ Rules ♦


1. Stay Civil

This is a place for friendly discussion, memes, guides, art, gameplay questions, screenshots and the like. Discrimination and harrassment won't be tolerated.


2. Mark Spoilers

It is okay to post about "related games" (such as Age of Calamity and Tears of the Kingdom) but please use the spoiler "censor" and do not put spoilers directly into the title, as the censor doesn't work this way. Posts about other Zelda games might be suited better in general Zelda communities, like the ones listed at the bottom of the sidebar.


3. Offtopic Posts

Anything not related to BotW, like politics, religion, non-Zelda games etc. is better suited elsewhere and will be removed. The same goes for NSFW material.


4. No Advertisements

It is okay to post about merchandise, but links to those "design your own merch" sites will be removed, as those are almost always scams featuring stolen art. Affliate links will be removed as well. This isn't Etsy.


5. Provide Sources

If you're going to post art, comics, guides, screenshots etc. that are not your own OC, please mention the name of the original creator and ideally also a link to their portfolio/website. (Pinterest is almost never the original source)


6. Suggestions are Welcome!

Feedback, requests for improvements and constructive criticism are always appreciated ;)


Other communities that might interest you:

Breath of the Wild:

Tears of the Kingdom:

General Zelda:

You like fantasy/adventure games but Zelda isn't "dark" enough?


Legal Disclaimer: This community is not endorsed by, directly affiliated with, maintained, authorized, or sponsored by Nintendo.

founded 1 year ago
MODERATORS
51


Original Source (twitter): https://twitter.com/kichiarts/status/1092999472521441280?lang=en

This seems to be the only place where the artist has hosted this particular image, but they also have accounts on:

... with various different artworks scattered across accounts. Not all of them related to the Zelda franchise, but neat stuff nonetheless ;)

52


... yeah I know, "eww twitter!" but I couldn't find the artist elsewhere and posting artwortks without a source is a big no-no. =P

53


The site in question: https://www.guideofthewild.com/

It includes:

  • an armor preview and upgrade materials tracker

  • a cooking simulator that includes selling price, effect duration, health restoration etc.

  • a complete Hyrule Compendium with the "default" pictures, descriptions, loot

  • an interactive map that can even be toggled between vanilla game and DLC

... and you do not need to download an app or create an account to use it. No fee either.

54


Main Guide: https://gamefaqs.gamespot.com/switch/189707-the-legend-of-zelda-breath-of-the-wild/faqs/74764/best-horses

Stat Dump: https://gamefaqs.gamespot.com/boards/189707-the-legend-of-zelda-breath-of-the-wild/76109671

An in-depth guide pack based on the datamined game code, containing:

  • All horse stats incl. hidden stats and unregisterable mounts

  • Locations for the best herds

  • How to unlock all Saddles & Bridles

  • Stable locations

  • Special / Unique horses

All credit goes to HylianAngel

55


https://hyruleguessr.com/

HyruleGuessr is a game inspired by GeoGuessr, taking place in The Legend of Zelda: Breath of The Wild world map.

The original idea of developing HyruleGuessr comes from a game of the same name set up on the Discord of French streamer Farore (check her channel out, she's really cool).

In-game distances are measured hylian meters (Hm). The world map dimensions are estimates based on this Reddit post by EngineeringHyrule.

This site is not affiliated with Nintendo or GeoGuessr.

(Thanks to [email protected] for the link!)

56


A lot of other NPCs also have extra dialogue when you're naked and/or standing on their desks. Most will either get angry or politely ask you to stop being weird, but some actively embrace the weirdness - Hestu for example has a very happy reaction to a naked Link ;)

57


Just in case you want video proof as well: https://www.youtube.com/watch?v=seTqNI_2DV0

(And yes, I did get both the star fragment and the Korok in the end)

58


Flames - Lightning - Glacier

59
232
submitted 1 year ago* (last edited 11 months ago) by [email protected] to c/[email protected]
60
131
submitted 1 year ago* (last edited 11 months ago) by [email protected] to c/[email protected]
61


The Adventure Log can be a bit confusing if you're trying to find out which memories you're missing for the quest, as the log lists ALL cutscenes in chronological order - including the cutscenes that are irrelevant to the quest.

For that reason, the numbers of the memories do NOT correspond to the number of the cutscenes in the Adventure Log, and it happens sometimes that people see an empty space in the sixth slot of the log and automatically assume that the sixth memory goes into that space, when in reality the sixth slot in the Adventure Log isn't even a memory from the quest in the first place and the cutscene they're trying to find goes in slot number nine.

It is easy to see which memories you already found by looking at the pictures on the Sheikah Slate - the ones that you already found have a little film strip icon on them in the lower right corner, and the ones that you didn't find yet lack this icon.


The Memories:

The five cutscenes marked as "EX" only appear in the Adventure Log if you actually have the DLC installed (EXpansion pass). They are neither present in the vanilla game, nor do they count for the Captured Memories quest.

# Adv. Log Name / Title Captured Memories Where/How to find
EX 1 Champion Revali's Song Defeat Illusory Windblight
EX 2 Champion Daruk's Song Defeat Illusory Fireblight
EX 3 Champion Mipha's Song Defeat Illusory Waterblight
EX 5 The Champions' Ballad Defeat Maz Koshia
1 Subdued Ceremony Picture 1 Sacred Ground Ruins
2 Revali's Flap Speak with Saki in Rito Village
3 Resolve and Grief Picture 2 West of Lake Kolomo
4 Daruk's Mettle Rescue Yunobo, then talk to Bludo
5 Zelda's Resentment Picture 3 Ancient Columns
6 Urbosa's Hand Retrieve the Thunder Helm
7 Blades of the Yiga Picture 4 Kara Kara Bazaar
8 A Premonition Picture 5 Death Mountain
9 Silent Princess Picture 6 West of the Castle (Irch Plain)
10 Mipha's Touch Speak with Muzu in front of Mipha's Statue
11 Shelter from the Storm Picture 7 West of Deya Village Ruins
12 Father and Daughter Picture 8 Zelda's Study (Hyrule Castle)
13 Slumbering Power Picture 9 Spring of Power
14 To Mount Lanayru Picture 10 Sanidin Park Ruins
15 Return of Calamity Ganon Picture 11 Lanayru Road East(!) Gate[^1]
16 Despair Picture 12 Southwest of Wetland Stable
17 Zelda's Awakening Picture 13[^2] Ash Swamp (near Fort Hateno)
18 The Master Sword Pull the Master Sword

Extra Troubleshooting:

The glowing spots will only appear after the "Captured Memories" quest has actually been started. If you're trying to find the memories earlier than that (second playthrough, using guides, etc.) then you simply won't find any. You HAVE to let Purah repair the Sheikah Slate and then show the pictures to Impa in order to start the quest and make the glowing spots appear.

All non-quest memories can be unlocked earlier.


Footnotes:

[^1]: There is also a WEST Gate, but there is no memory there. If you're in a spot that looks like the picture but no glowing spot can be found, you might be at the wrong end of the road.

[^2]: You can only find Memory no.13 after you have found the other 12 and spoke to Impa. If you search that area too early, you won't find anything.

62
63


The artist also has a tumblr account but I wasn't able to find this particular comic strip on that site.

64


Contrary to popular belief, the Blood Moon does not flat-out "respawn everything". In fact, there are only 2 things it respawns: equipment and enemies, and not even ALL of them as there are a lot of exceptions and special cases (listed farther down).


When and how do Blood Moons happen:

Blood Moons are on a strict schedule of 2 hours and 48 minutes of active IRL playtime. "Inactive" playtime, like when you're in a menu, loading screen, cutscene or dialogue, do not count for this, so you sadly can't just pause the game for 3 hours to force a Blood Moon to happen.

Nothing ever speeds up that timer:

There are still a bunch of long disproven rumors floating around the internet that you can allegedly make the Blood Moon come faster by killing a lot of enemies or using up a lot of resources (like breaking ore deposits, picking fruit, breaking barrels) but this does not influence the timer at all. And some other "tricks" even make the entire process take LONGER, like repeatedly skipping nights at a campfire - the little "Link crouches down in front of the fire and the screen goes dark" thing counts as a cutscene, which means that the Blood Moon timer STOPS during those few seconds and only continues to run after you gain control of Link again... and if you then immediatly interact with the campfire again, the timer won't have advanced at all. It's an easy way to turn a 3 hour waiting period into a frustrating 17 hour fiasco.

You can however delay the Blood Moon:

If you are inside of a shrine, Divine Beast or any other area that prevents the Blood Moon from actually happening (like Hyrule Castle, the Trial of the Sword, the DLC One-Hit Obliterator trial, certain minigames etc.) then the red moon will rise but simply fade into a regular full moon at midnight (regardless of which moon phase was actually due that night - it was probably just easier to animate). No cutscene, no revival. The event is then automatically rescheduled to the following night, where the Blood Moon will attempt to happen again.

In theory, you can infinitely repeat this as long as you just skip each and every Blood Moon. I've once skipped 101 in a row for a challenge run and nothing out of the ordinary happened (the run went super boring super fast tho as you're running out of enemies and equipment after a while).

There is also a slight glitch(?) with fast travel:

This one requires precise timing. If you manage to teleport the very moment the Blood Moon cutscene would otherwise start - at midnight sharp - then you won't get the cutscene at all. The game then pretends that the cutscene HAS happened (malice particles still rising from the ground for a few seconds) and the timer starts over again (meaning you now have 2 hours and 48 minutes before the next Blood Moon happens) but since the actual cutscene was skipped, nothing respawned.


What does and does not respawn?

The Blood Moon is responsible for regular non-boss enemies, as well as weapons/bows/shields that are NOT inside of a chest. That's it. Everything else either respawns under a myriad of wildly different other conditions, or not at all.

And there are a lot of exceptions and special cases as well:


Exceptions: Monsters/Enemies

  • Master Kohga and the Blights never respawn. You are able to refight the Blights in the "illusory" rematches from the DLC Champions' Ballad as often as you want tho, because those never actually DEspawn, meaning that you don't need to wait for a Blood Moon in order to fight them again and again. The same goes for Ganon and Monk Maz Koshia: they never actually vanish and can be refought as often as you want, whenever you want, independendly from the Blood Moon cycle.

  • MINIbosses like Hinoxes and Taluses however respawn every Blood Moon, including DLC minibosses like the Molduking and Igneo Talus Titan.

  • Some enemies perpetually respawn without the need for a Blood Moon, like the monsters inside the Trial of the Sword (revive every time you restart the trial) and Eventide Island (revive very time the zone is reloaded). The latter still happens after the trial, so every time you save & reload ALL monsters on the island will be back immediatly.

  • Enemies that are generated randomly, like most Stals, Chuchus or Octoroks, do not need a Blood Moon either. Basically everything that pops out of the ground falls into this category.

  • The same goes for SOME Lizalfoes. Most of them have stationary spawn locations (need a Blood Moon) but there are also randomly generated ones swimming in the ocean and rivers / lakes (mostly blue ones) and the Electric Lizals jumping out of the ground in the Gerudo Desert. The latter two do not need the Blood Moon to spawn.

  • The disguised "Travelers" that turn out to be Yiga Footsoldiers need the Blood Moon to respawn, as they are stationary. Yiga Archers and Blademasters ambushing you without warning are randomly generated and do NOT need the Blood Moon to respawn.

  • Even tho Bokoblins normally revive: The Rider Bokoblins from the "Horseback Hoodlums" quest stay dead once you completed the quest. This is likely because they would otherwise interfere with the hurdle jumping minigame you unlock, as it takes place in their former territory.

  • ...an amusing/awkward non-exception is that those are the ONLY quest-related enemies that stay dead. There are a lot of quests that require you to wipe out entire enemy camps (Take Back the Sea, The Sheep Rustlers etc.) or even minibosses (Face the Frost Talus, the Giant at Rali's Pond etc.) but it is enough to have killed the respective foe(s) at least once. The questgiver will give you the same loot and dialogue anyway even if the monsters are alive again by the time you collect your reward.

  • All Guardian Scouts inside of shrines respawn, no matter whether it is a puzzle shrine or a "Test of Strength" one - except for the tutorial scout in Kakariko. Once you completed Ta'Loh Naeg's Teaching, that scout will never reappear.

  • There is a single Bokoblin next to the Great Plateau Tower, who vanishes entirely after you activated the tower. You don't even need to defeat him.

  • Hostile animals like bears / wolves, despite attacking the player, do not count as "enemies" and aren't affected by the Blood Moon.


Exceptions: Equipment

  • The Master Sword doesn't respawn in the pedestral once you obtained it, otherwise you could get multiple indestructible weapons permanently blocking inventory slots.

  • The Ceremonial Trident under the bridge in Zora's Domain. If you want a replacement, you need to reforge it, just like with the Lightscale Trident.

  • Even tho BOWS respawn, ARROWS will not. If you, for example, pick all Shock Arrows from the trees on Ploymus Mountain, they will be gone for the remainder of the playthrough.

  • Equipment on Eventide Island respawns every time the zone is reloaded. This is likely a safety measure so the player can't run out of resources during the trial. It still works AFTER the trial as well, but that might be an oversight.

  • The same goes for items and enemies in the Trial of the Sword.

  • If an item is inside of a chest, the chest overrides the respawn mechanic. A looted chest[^1] will never respawn, regardless of whether or not the item inside was actually programmed a different way. For example, the Hylian Shield WOULD normally respawn every Blood Moon, but since it is inside of a chest and chests never respawn, the shield won't either.


Bonus: Guaranteed Critical Success while Cooking

Another useful thing the Blood Moon does, is provide guaranteed crits for every meal that is able to crit[^2]. Any eligible meal cooked between 23:30 and 00:15 on a Blood Moon night[^3] will get one of the following:

  • +3 additional red hearts

  • +1 additional yellow heart

  • +2 "units" extra stamina (green or yellow, depending on the dish)

  • +5 min extra duration

  • +1 tier extra effect (like Lv.2 Flame Res instead of Lv.1)

Which ones are possible depends on the dish. A "hearty" meal for example is already fullheal 100% guaranteed so it won't get extra red hearts on top of that, and it doesn't have a timed effect so no extra tier or extra duration. A meal with a timed effect (like Shock Res, Cold Res etc.) can get extra duration, an extra tier OR red hearts, but won't ever get the stamina boost ... and the tier will never exceed the limit, so you won't get things like Lv.4 Attack Up. It sill caps at Lv.3 either way.


For the "Under a Red Moon" quest:

...there is already an extra guide. ;)


Footnotes:

[^1]: A chest will count as "looted" only if you actually took the item out of it. If you open the chest while your inventory is already full, Link will close the chest again and the game will act as if you never touched the chest. It will not DEspawn until you actually loot it. An exception to this are amiibo chests, which will vanish every time the zone is reloaded, regardless of whether or not you looted them. And chests always only respawn in their default positions, meaning that if you move an unlooted metal chest with magesis halfway across the map and then save & reload, the chest will be back where you originally obtained it, NOT where you dropped it.

[^2]: It does not work with Dubious Food, Rock-Hard Food, and for whatever reason, Fairy Tonic. Using Monster Extract randomizes the attributes and prevents crits from happening. And there are also items that guarantee crits already (Dragon Horn Shards, Star Fragments) and you can only get ONE crit at a time, so using those for Blood Moon cooking is a waste.

[^3]: The guaranteed crit window is from 23:30 to 00:15 but if you save & reload after midnight, the effect will end early and meals will no longer recieve guaranteed crits (tho you may get a "random" one if you're lucky)

65
16
submitted 1 year ago* (last edited 1 year ago) by [email protected] to c/[email protected]


Disclaimer: everything listed here is based on the cracked, analyzed and reverse-engineered game code, so there was no trial-and-error involved. All credit for this goes to leoetlino AKA Léo Lam, and their way more in-depth and well-sourced guide can be found here: https://zeldamods.org/wiki/Object_respawning


Breath of the Wild has a ton of different materials, weapons, enemies, etc. and most of them respawn. A couple of them are sadly still permanently missable but compared to other games of that scale, it's mostly foolproof.

A common misconception is that the Blood Moon resets everything - but you can easily disprove that by just breaking an ore deposit or cutting down a tree before the cutscene hits - it will not have respawned afterwards. The ONLY things the Blood Moon resets are weapons / bows / shields in the overworld and non-boss monsters. Everything else either respawns by one of a myriad of wildly different other conditions, or not at all.

Just an example:

There is an Eightfold Blade in a rock on a hill near Kakariko. If you take the sword and toss the rock away, both are gone. If you now get a Blood Moon without leaving the area, the blade will respawn, but the rock won't, resulting in a floating sword.


Also, for many of the mechanics, it is important whether or not Link is on the same map unit as the item. Those map units are mega large, each one about the size of the Great Plateau, so when the code calls for Link being on a different map unit than the item, you have to be far, FAR away - not just out of sight or out of spawning distance.


Now for the actual respawn mechanics:


Shop items:

Items sold by merchants, wandering traders, Beedle etc. respawn every in-game midnight, but only the ones that are on a different map grid as Link: e.g. if you spend the night in the Lost Woods (F-2 on the map above) all shops in Hyrule restock EXCEPT the ones inside the Deku Tree. You can just skip time at a fire/inn and it will still count.

Exceptions:

  • Shops that never "use up" items, like the Akkala Tech Lab, do not need to restock.

  • Granté's Hylian Shield replacement only restocks if you owned the original Hylian Shield before AND broke/lost it.

  • Arrows only restock if the player currently owns less than 50 of a certain kind

  • Also, the game treats the 16 Beedles on the map as separate, individual merchants, so if you made Woodland Stable Beedle restock, then Kara Kara Bazaar Beedle might still not have new items.


Blood Moons (RevivalBloodyMoon)

See here:

(I had to make room because Lemmy.World posts aren't allowed to be more than 10k characters long)


No automatic revival (RevivalNone)

This is exactly what it sounds like: actors that just flat-out never respawn, like Master Kohga and the Blights. Some "one time use" items are the metal cubes for Korok Puzzles or shrine puzzle orbs, which vanish once you complete the puzzle.

Less obvious is that this also applies to treasure chests, regardless of whether or not the item INSIDE would otherwise respawn. The Hylian Shield for example is actually prorammed to respawn and would do so if it was lying around in the overworld. But the chest never respawns, so the shield won't either.

Once you won one of Selmie's Shields from the respective shield surf course, it vanishes from the wall inside her hut permanently. The next time you win, you'll get rupees instead of a new shield.

Exceptions:

  • Chests only count as "looted" if you actually took the item(s). If you open a chest with a full inventory, Link will close it again and the chest will not despawn.


No drop revival (RevivalNoneForDrop)

This is basically the "RevivalNone" mechanic, but it only applies to items inside of certain "containers". For example, you can loot every broken Guardian only once, and the ones that can be flipped over also generate their extra loot only once. Broken wagons usually have 2 treasure spots, so you can loot each "end" of the wagon once.


No revival for use (RevivalNoneForUsed)

Again it's the "RevivalNone" mechanic, but for actors without loot. For example, you can activate every Sheikah Tower only once - the terminals will never revert to their un-activated state. Likewise you can only complete each Korok Puzzle only once, and use every key inside of shrines only once.


Random revival (RevivalRandom)

This applies to the vast majority of items, and contrary to popular belief, this is completely unrelated to the Blood Moon. Fruit, mushrooms, herbs, flowers, critters and insects with fixed spawn locations, most regular animals like fish, crabs, snails and and some "breakable containers" like ore deposits belong into this category.

These items have a 1% chance to respawn for every minute of active playtime, but only the ones that are not on the same map unit as Link.

The most common situation where this can screw you over are the "Three Trees" Korok puzzles. If you have picked the wrong fruit or the environment messed up the puzzle, it depends entirely on this "playtime and RNG" combo how long it will take for the puzzle to fix itself.

Exceptions:


Random drop revival (RevivalRandomForDrop)

This is the same as "RandomRevival", but applies only to items inside of specific containers, like pots, barrels and crates. The containers respawn every time the zone is reloaded, but if you crack a recently looted barrel again "too early", it will be empty until the loot inside has respawned.


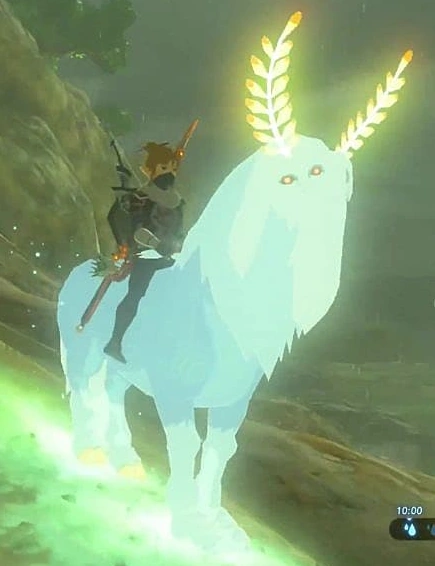
The Lord of the Mountain (RevivalUnderGodTime)

Whenever the Lord of the Mountain appears, the top of Satori Mountain will glow green/blue. During that time, a lot of rare critters are present on the mountain (like a tree full of beetles). These vanish along with the LotM after a while, so you have to be quick to gather them.

At the same time, ALL Blupees on the map respawn, but those stay spawned until Link startles or hits them.


Not listed:

Everything not listed doesn't have special respawn conditions and will reappear every time the zone is reloaded. Barrels and crates, trees, rocks and boulders and certain animals like Cuccos, Sand Seals and horses just constantly respawn. This can be used to your advantage:

  • If you're farming wood for Tarrey Town, bomb the log piles near Rito Stable, collect the wood, save & reload, repeat. The logs always respawn and will geenrate a few bundles of wood each time.

  • If you want a horse with a specific coat color, save near a wild herd and reload until the desired horse shows up. The Royal White Stallion and Giant Horse won't won't spawn again while you already own them.

  • Rock ring / boulder golf Korok Puzzles. If you save & reload, all rocks/boulders are back at their starting positions. The same applies to (unused!) metal cubes and shrine puzzle orbs, so mistakes are easy to fix.


DEspawning items:

Items you dropped will vanish if you walk away, fast travel or reload. The same goes for enemy loot & equipment you don't pick up and meat dropped by animals. Items with fixed spawn locations (like mushrooms, herbs etc.) will not vanish if left alone, but if you cut / hit them so they turn into "loose" items, they will vanish once you go away.

This also happens if there are too many loose items at once (ca. 10). If you drop 15 swords on the ground, you'll only be able to pick up the 10 most recently dropped ones as the first 5 will have vanished.

The only exceptions are items on the weapon/bow/shield mounts inside your hourse - those will NOT vanish on their own. Items dropped on the ground inside your house will still go poof, so you can only store 9 items total.


Source:

66
 
 
67
68


A common misconception is that Satori (the Lord of the Mountain) appears randomly and that the player doesn't have influence over whether or not the mountaintop will glow. While a little bit of RNG is indeed involved in the process, not all of it is random:

The LotM appears during a random hour of the day/night of the waxing crescent[^1]. The in-game moon phases follow a strict pattern (independently from the Blood Moon BTW) so you can just skip a couple of days at a campfire to get the desired result. An easy way to check for the current moon phase is by talking to Hino at the Dueling Peaks Stable, provided you don't want to wait for nightfall to check the moon phase yourself.

Once you fast-forwarded to the correct day/night, you need to let time pass naturally - no more campfire time skipping for now.

You need to stay far enough away from Mount Satori that you're not on the same map unit, but close enough that you'll notice the green glow once it appears. The IMHO easiest place to wait is atop one of the Sheikah Towers as you'll be able to see the mountaintop from most of them, and enemies won't bother you while you wait (no keese / stals up there).

Once the mountaintop glows in that northern-lights-like sheen, it is safe to warp to the mountain (or run/ride there if you're close enough for that). You'll be greeted with an eerie music, blueish-green haze and a ton of Blupees gathered around the cherry blossom tree, where the LotM is either already present or will appear shortly after. He sometimes disappears briefly, but will reappear as long as the eerie music is still playing. If you scare him away, he'll despawn for real, the music will fade and the haze will vanish, and then you'll have to wait for the next crescent moon before he appears again.


Why would you want to "summon" Satori?

He can be caught and tamed, but not registered, so forget about keeping him as a permanent mount. And unlike Blupees, he won't drop any rupees (or other loot for that matter) if you hit/shoot him, so you won't gain anything by attacking him.

He does however have an unique Hyrule Compendium entry, so if you're interested in reading up on the in-game lore or just want to complete your compendium collection with personal pictures, you need to encounter him at least once during the playthrough.

A common misconception is that he allegedly has perfect stats (5/5/5) but datamining has disproven this claim: he is actually "just" a 1/3/5 mount with 100 HP and the unique feature that his spurs regenerate immediatly so you can make him sprint infinitely without a penalty. As a tradeoff, he is prone to just disappearing if you dismount for even a couple of seconds, so don't leave him unattended for too long.

(All credit for that map goes to HylianAngel)

As for the mountain itself, that's where things get interesting, because even tho the mountain already has a ton of neat, rare materials availiable (Endura Carrots and Silent Princesses for example), there will be even MORE rare items/animals (like an entire tree full of beetles) and a flock of Blupees present during that time. Plus, all Blupees across the rest of the map respawn and stay until you scare them away or hit/shoot them, making it possible to farm them for rupees again. Also, the stal-monsters normally present on the mountain simply won't wake up.


PS: The game does check for whether or not the LotM already exists, meaning that you can not spawn a second one while you're still riding the one you formerly caught. You have to release and despawn the first one, otherwise the mountain simply won't glow.


[^1]: In-depth guide on Zeldamods

69


Just an in-game picture I found neat enough to bother clearing up the annoying blue lines.

70


Fairies count as "insects" in the game code, and insects with fixed spawn locations (like for example the Energetic Rhino Beetles in Kakariko) have a 1% chance to respawn for every minute of IRL active playtime ("Random Revival"). This means that you can collect every such insect once every 3-4 hours on average, and the same applies to Fairies - in theory.

Nintendo apparently doesn't want players to just stock up on a hundred Fairies in addition to Mipha's Grace, "Hearty" meals and the ability to heal whenever you want without a penalty. But instead of lowering the max count you can carry (999 in theory) they implemented a different mechanic: a spawn limit.

If the player already has 3 or more Fairies in their inventory, the "wild" Fairies around the fountains won't show up even if they're already respawned. Think of them as being there, but invisible. They should exist, but you can neither see nor catch them right now.

The game only checks for the Fairies in your current inventory tho, and there are some neat tricks to use this to your advantage.


Up to 11 Fairies (Difficulty: Easy)


Find a Fairy Fountain that hasn't been looted recently, and stay close enough that you can see the Fountain but not so close that you would immediatly scare away freshly spawned Fairies. Open your menu and hold up to 5 Fairies in your arms, then close the menu while sill holding them. If you had less than 3 in your inventory for a couple of seconds, the "invisible" Fairies around the fountain will pop into existence, and you can then put the ones you're currently holding back into your inventory and go catch the freshly spawned ones.

This only works if you can get the "inventory Fairy count" below 3 while holding them in your arms, so it might even be benefcial to release excess Fairies, as counter-intuitive as it may sound. If you, for example, have 8 Fairies at the moment and you hold 5, the inventory count only drops down to 3 and no new ones will spawn. If you release one of them and then hold 5 in your arms, the inventory count will be below 3, the "invisible" Fairies will appear, and if you catch them you'll end up with 11 total (2 inventory + 5 held Fairies + 4 new ones) so by releasing one you gained three more than you formerly had.


Up to 16 Fairies (Difficulty: Medium)


A bit more risky but still possible, is that you release some excess Fairies, hold 5 more in your arms, immediatly open the menu again once the invisible fairies pop into existence, and then quickly catch the released ones again. Triple Stealth and careful movements help with this, but it is still risky as the released Fairies are prone to zooming off as soon as they can.

If you start out with 12 Fairies, "release" 5 of them, hold 5 more, and then catch the 4 newly spawned ones in addition to the ten that were "on hold", you'll end up with 16 total as the max.


Up to 21 Fairies (Difficulty: Expert)


This requires precise timing, and it is advised to save the game before attempting it, so you can reload if you mess up - otherwise you might end up losing a bunch of Fairies in the process.

Stay a bit farther away from the fountain but within sight range, and make sure that there is empty space (and no cliff!) behind you and that you have one of the bomb runes equipped... and enough health to survive 1-2 blasts. Place down a (cube) bomb, hold up to 5 Fairies in your arms. Release them, and immediatly blow up the bomb.

This will hurl Link away from the Fairies, which will continue floating around where he dropped them, oblivious to the explosion. There is a grace period of approximately one second in which the Fairies can not be harmed or even startled, and since Link is too far away after the explosion, they won't flee.

You can then do this a second time to "release" up to 10 Fairies at once, and then hold 5 more in your arms - but do not release those 5 as well, because if Link drops more than 10 "items" at once, the oldest ones will vanish and this would delete the first 5 Fairies from existence.

If done right, 4 more Fairies will spawn, 10 "released" ones will be floating around you and can be caught again, 5 are in your arms, and 2 are in your inventory, for a total of 21 Fairies.


Please note that, whatever method you end up using, the Fairies will still need to respawn first in order to farm them again. You can not just immediatly release all inventory Fairies again and expect new ones to appear a second time. After you collected the ones you made appear, you have to wait around 3-4 hours for them to respawn into that "present but invisible" state or find a different Fountain that hasn't been looted recently.


Additional fun fact: While you have less than 3 Fairies in your inventory, there is a small chance (IIRC 0.2%) for any random insect on the map to be swapped with a fairy, meaning that you can find them while cutting grass and lifting rocks, but also chilling in darner swarms and fluttering around where butterflies or Restless Crickets may appear. This simply doesn't happen while you have 3+ Fairies already, and since players usually stock up on Fairies as soon as they can and maintain a decent supply, it almost never happens to them ... unless you're doing a Fairy-free challenge run, then those pesky pink puffballs won't leave you alone.

71
 
 
72


(the only edits: I removed the heart containers, MM Triforce and the Lynel health bar)

73


These little guys are equal parts adorable and annoying ... and yes, Link died directly after this shot was taken

74


I'm rather proud since it was just taken with my phone camera to show my wife the sky doggo

75


It can be a bit annoying to stock up on arrows if the merchants in your game are not selling them at the moment. Luckily there are a couple of workarounds, at least for some arrow types.


Eventide Island Treasure Chest

Normally, looted treasure chests do not respawn - ever. On Eventide Island however, a whole lot of stuff just constantly reappears every time the zone is reloaded, likely to prevent the player from running out of materials during the shrine trial. I have no idea whether or not it was intended that these items continue to respawn even after the trial was completed, but if it was just an oversight then Nintendo never bothered to fix it.

There is a small isle directly east of the main island, with a mini lake in the middle. Submerged in that oversized puddle is a metal treasure chest containing 10x regular arrows, that you can fish out with the Magnesis rune. It's exactly where the red dot is in the picture above.

After you opened the chest, save & reload on the spot. The chest will be underwater again, unopened, but you still have the 10x regular arrows you obtained. You can repeat this infinitely.

Tip: If you have the DLC, it is a bit faster to place the Travel Medallion on that mini island and just repeatedly warp to the island. This also resets the zone but doesn't require you to save the game every time you opened the chest.


Multishot Bow exploit

This was definitely not intended by the developers, but since they never bothered to fix it, it will still work if done right. The only prequisites are that you have at least one multishot bow and at least one regular arrow to get started, as well as access to one of these places:

Stand directly in front of the lantern so that the arrow immediatly catches fire once you draw your bow. Shoot the tip of the lantern and quickly pick up the arrows again. The picture above is the approximate setup, but you don't have to be pixel-perfect for it to work.

Equip your Multishot Bow, select regular arrows, and stand close enough to the pot that the arrow catches fire. Then shoot at the pot (around the rim) and immediatly pick up the arrows.

Repeat this until you're satisfied, bored or your bow breaks.

Why does this work?

Multishot bows only "consume" one arrow per shot, even if they shoot 2, 3 or 5 arrows at once. Under normal circumstances, the arrows vanish after they hit something to prevent the player from easily cloning their arrows by just repeatedly shooting the ground.

Setting the arrows on fire messes up that cheat prevention just long enough for the player to quickly pick up the cloned arrows before they can disappear.

In theory, it works with every source of fire as long as the arrow catches fire shortly before you shoot it at something and you can pick up the cloned arrows fast enough, but those two locations yield predictatble results. If you just use a random campfire and shoot at a random tree, it might or might not work, even if the setup is the same.


Bomb Arrow Farming

Wet Bomb Arrows do not explode. If you find an enemy equipped with Bomb Arrows and a single-shot bow, then wait for rainfall and pester the enemy, they will start shooting Bomb Arrows at you. Just stay out of range so the arrow doesn't hit you directly, and pick up the wet, unexploded arrows lying on the ground before you.

It is recommended to do this with the regular HUD setting instead of the Pro HUD, as the weather may switch from rainfall to sunshine while you're distracted, and the in-game visuals are a tiny bit slower than the weather indicator next to the minimap.

One easy location is a tree camp in North Akkala, close to Skull Lake. The camp has 3 Bokoblins, all equipped with Bomb Arrows, and it rains frequently in that area. Eventually the Bomb Arrows will stop getting stuck in the ground even if the Bokoblins continue to shoot at you - in that case, simply save & reload to reset the "restriction" on farming.


Sadly I am not aware of any similar exploits for Fire, Ice or Shock Arrows. If you want to get a lot of these, you need to either repeatedly kill a lot of enemies that have elemental arrows equipped and hope that they drop some bundles as loot (for example, a lot of the Lizalfos Archers on the road through Zora's Domain have shock arrows equipped), or repeatedly scan amiibo figurines/cards that are able to drop elemental arrows. Just buying them in shops will eventually trigger the same 50-arrow-limit restriction as for regular arrows.

view more: ‹ prev next ›