1
Did you make something? Do you want the fleeting rush of endorphins that come with affirmation from strangers? Do you think what you made is neat? Share it here!
Paintings, movies, music, drawings, models, gardens, houses, snowmen, sandcastles - if you made it, you can post it.
RULES:
Some things you make are not to be shared. These include:
Do not be a jerk.
- No racism, sexism, homophobia, transphobia, ableism, classism, or bigotry of any kind.
- Don't try to sell stuff unless people ask. You can post your Etsy (or similar) if someone prompts you. No spamming self-promotion.
<3


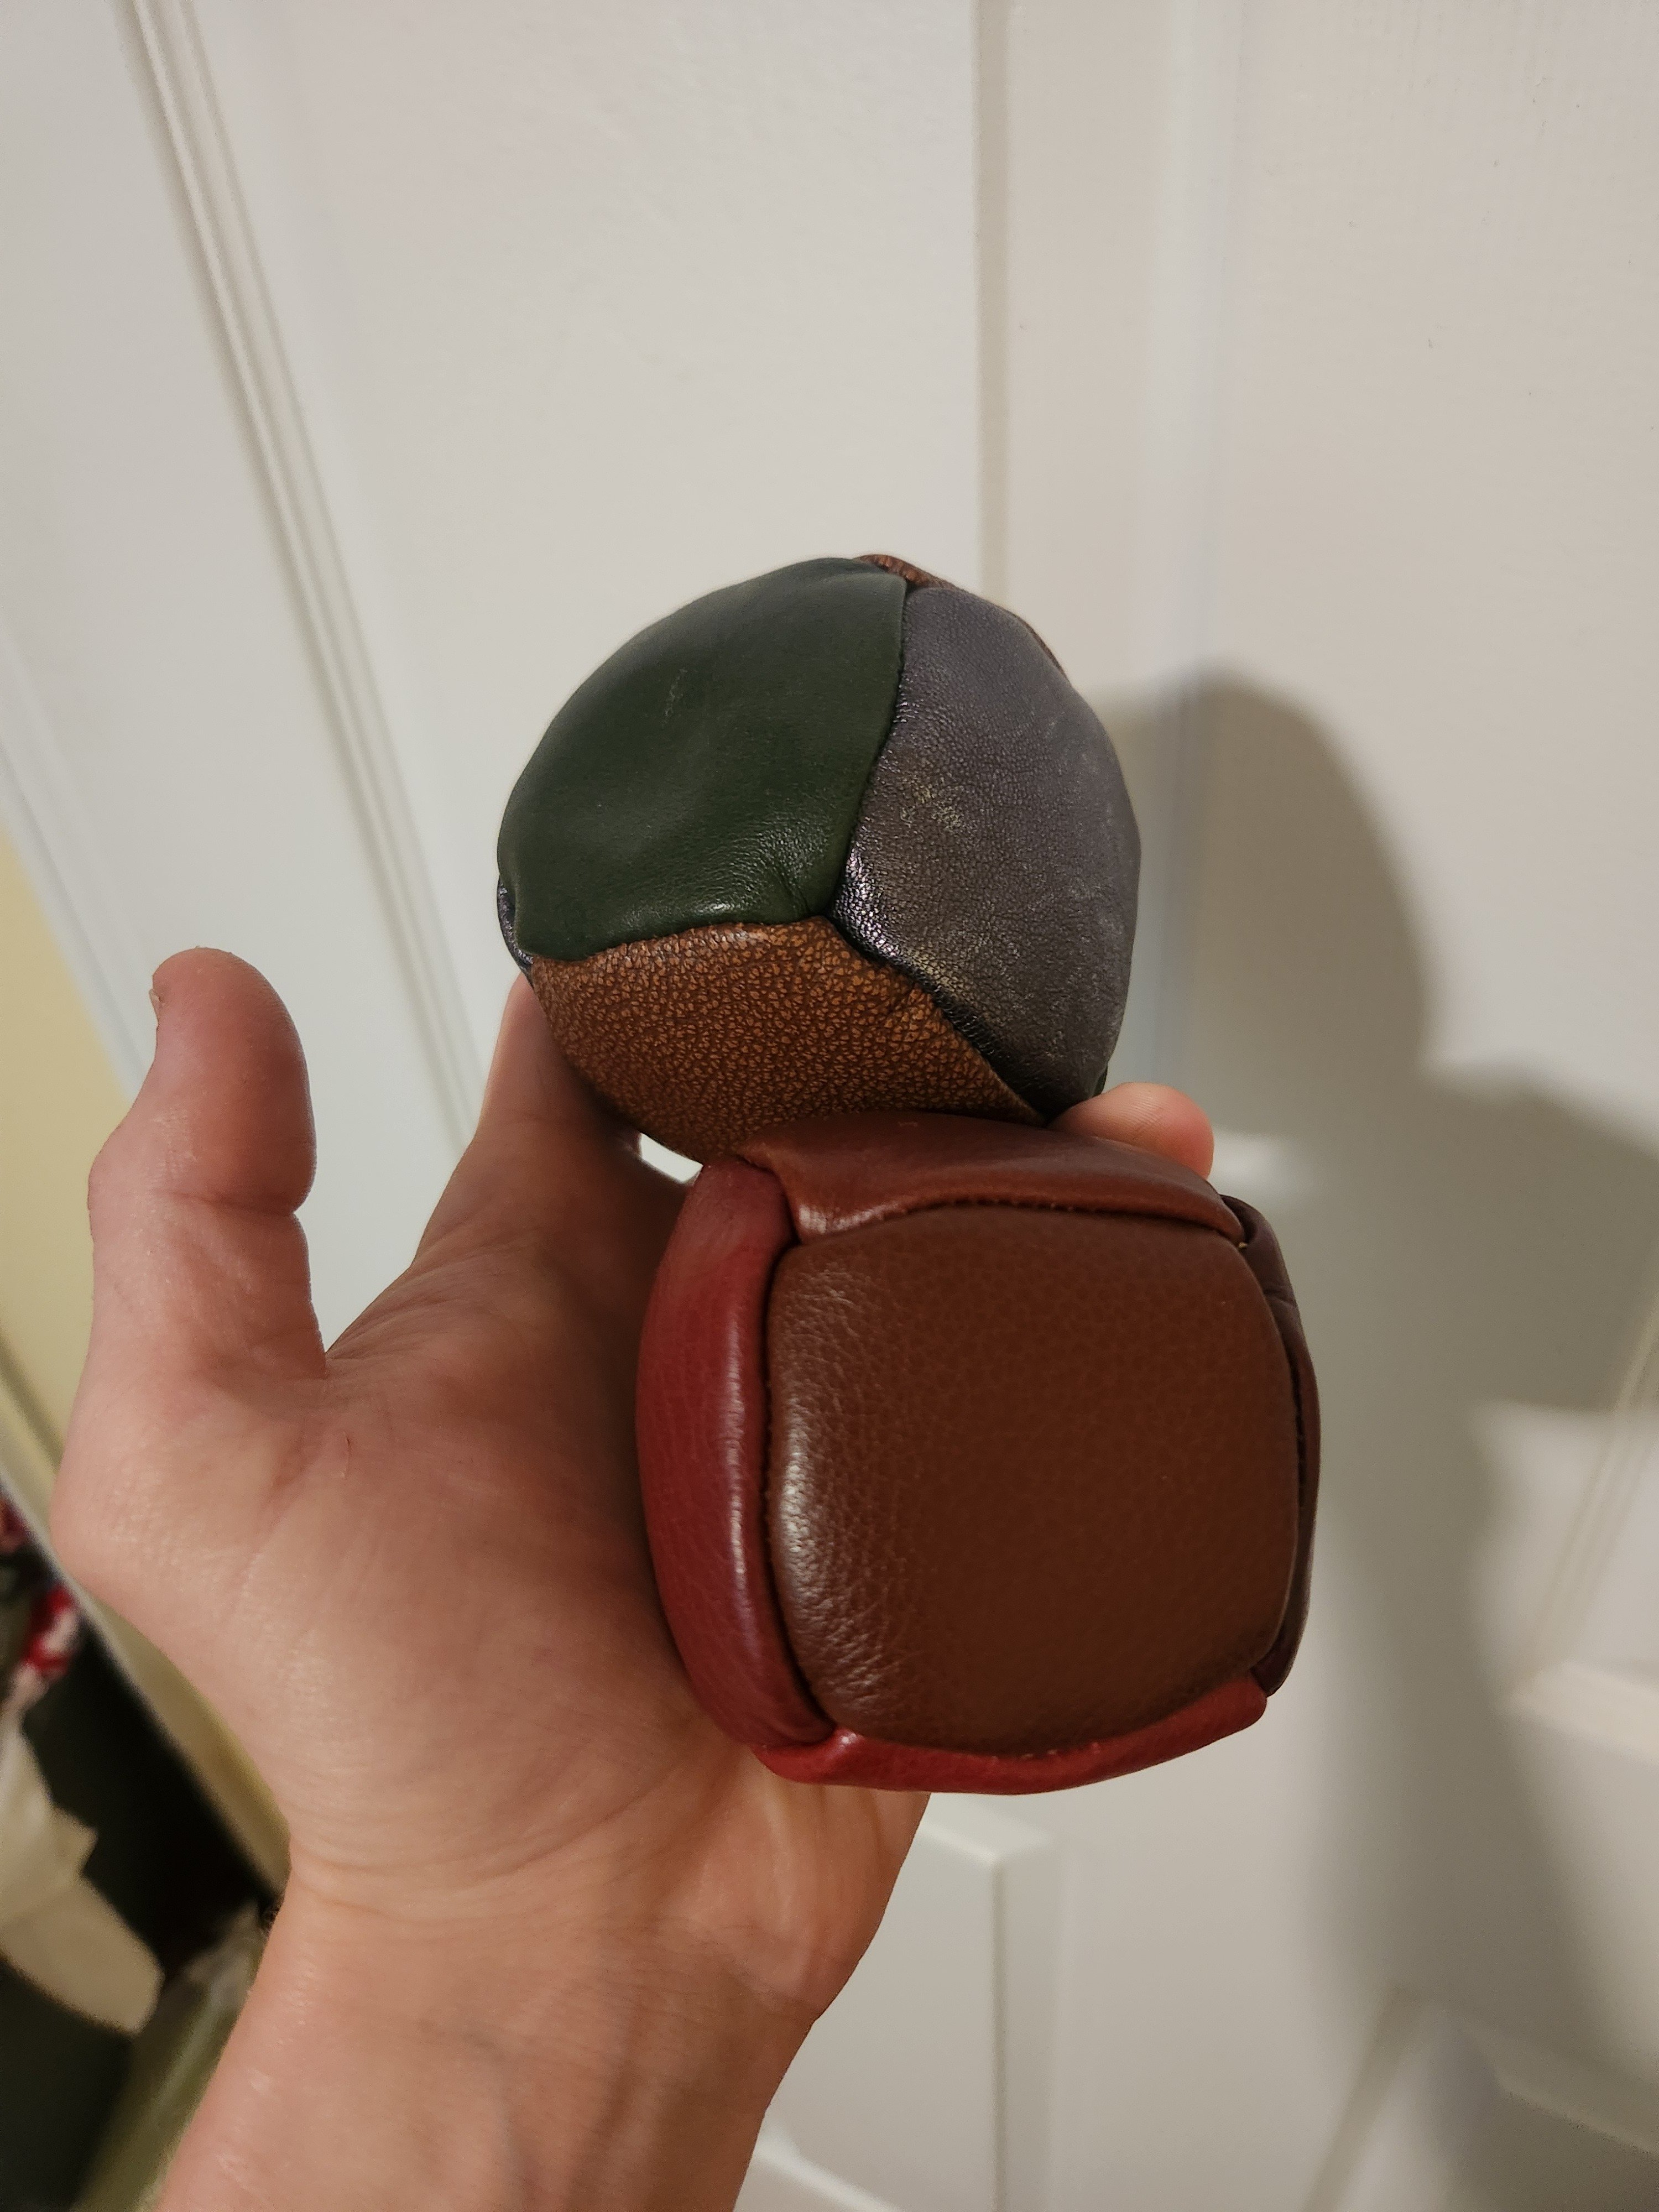
I tried to make a phone "wallet" case. I used the inside of my old one (what you press your phone into), cardboard from a an old box and some leftover vinyl flooring. I originally wanted to glue everything but ended up stapling some bits. these pics where hastily made and don't do the thing justice. Let's see how well this holds up (I seldom have it in my pocket so that helps).

cross-posted from: https://sh.itjust.works/post/22165919
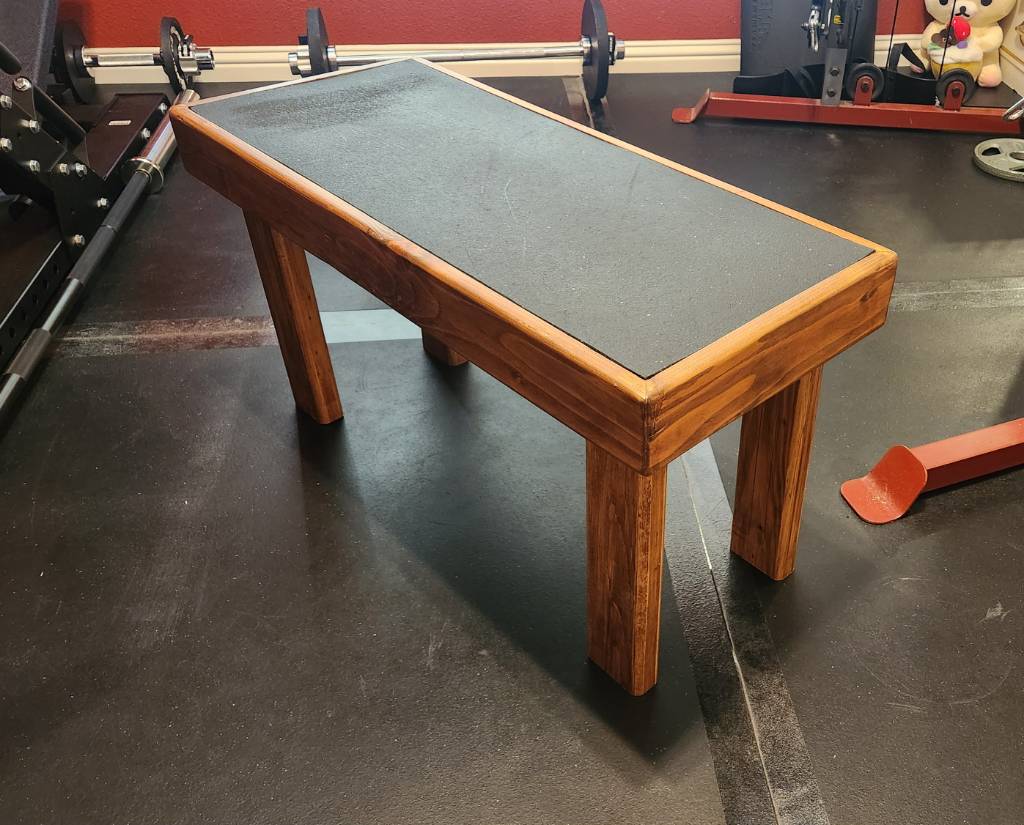
This entry of mine will not match the customary craftsmanship found in this community, but seeing as this was formerly a pile of miscellaneous, warped scrap 2x4 segments recovered from old pallets, I think I've made a reasonable show of things.
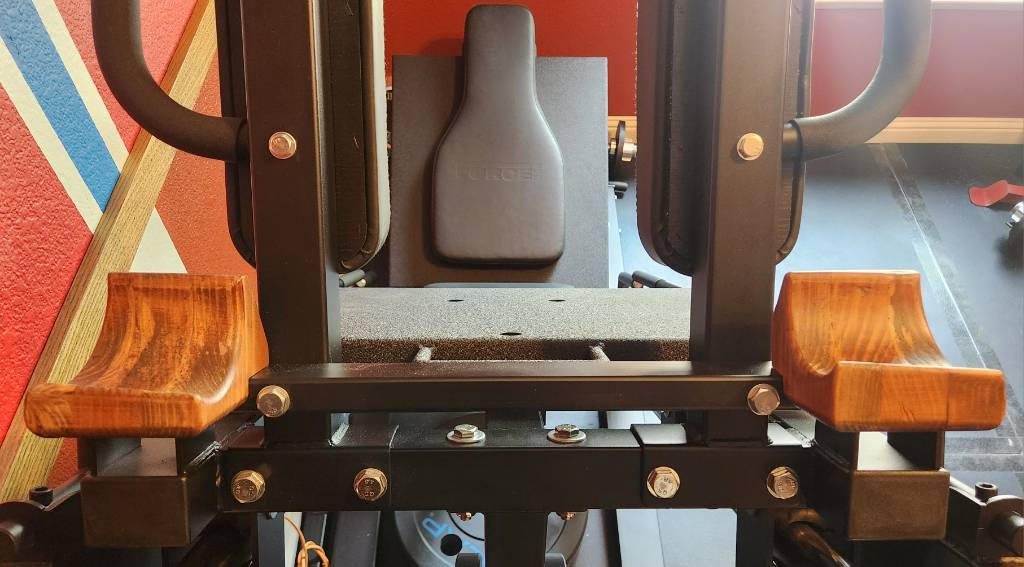
This bench is for my homegym, designed to be stood upon, which is why there's a rubber mat inlaid on the surface, a leftover of the gym floor. My design criteria called for even the edge of the top surface to support weight, so the main "box" of the bench uses 2x4 segments mitered (badly) together at 45 degrees, held together with wood glue.
I then routed the inner edge to support a 1/2" plywood sheet, which is screwed into the box. And then the rubber mat is glued down to the sheet, so there are no visible screws.
Finally, the legs are also 2x4 segments, cut so the bench sits 43 cm (~17 inch) from the floor; this is only coincidentally similar to the IPF weightlifting bench standards. I used screws instead of glue, just in case the legs needed to be shortened later.
All edges were rounded over with a 1/2" bit, as the bench is expected to be picked up and moved frequently. And everything stained in cherry and clear-coated.
Some of the annoyances from using scrap included:
- Stripping old paint off. Awful chemicals, awful scrubbing, awful disposal.
- Sanding away twists along the 2x4 segments
- Filling nail holes or arranging them so they don't draw attention
- My lack of experience with clamping and gluing wood that's not dimensionally consistent
If I were to do this again, I'd figure out a way to reduce the amount of routing needed for the inner edge, since I essentially removed 0.75 inch by 1.5 inch of material all around the edge. This took forever, and perhaps a CNC machine would have simplified things, in addition to squaring and planing the surfaces before mitering.
WIPs and Paint Tool SAI file download: https://archive.org/details/furred-beast-angel
Brand new drawing I just finished! 😃 I really wanted to draw something furry and a seraphim type of angel as opposed to an ophanim, and this was the result! I call this one "FURRED BEAST"! It was so fun to draw!!

I really wanted to draw something that was sort of the opposite of an ophanim, so I thought why not draw angel that isn’t flaming metallic rings with eyes, but something made of ice crystals which emits ice/frost? I hope you all enjoy!!
WIPs: https://imgur.com/a/13FvomA
Full Size: https://i.imgur.com/6HQ0u3h.png

It's Cosmos from Transformers! 😃 🛸 I had a ton of fun drawing it!!
WIPs: https://imgur.com/a/1prHu16
Full size: https://i.imgur.com/tVJxOyg.png

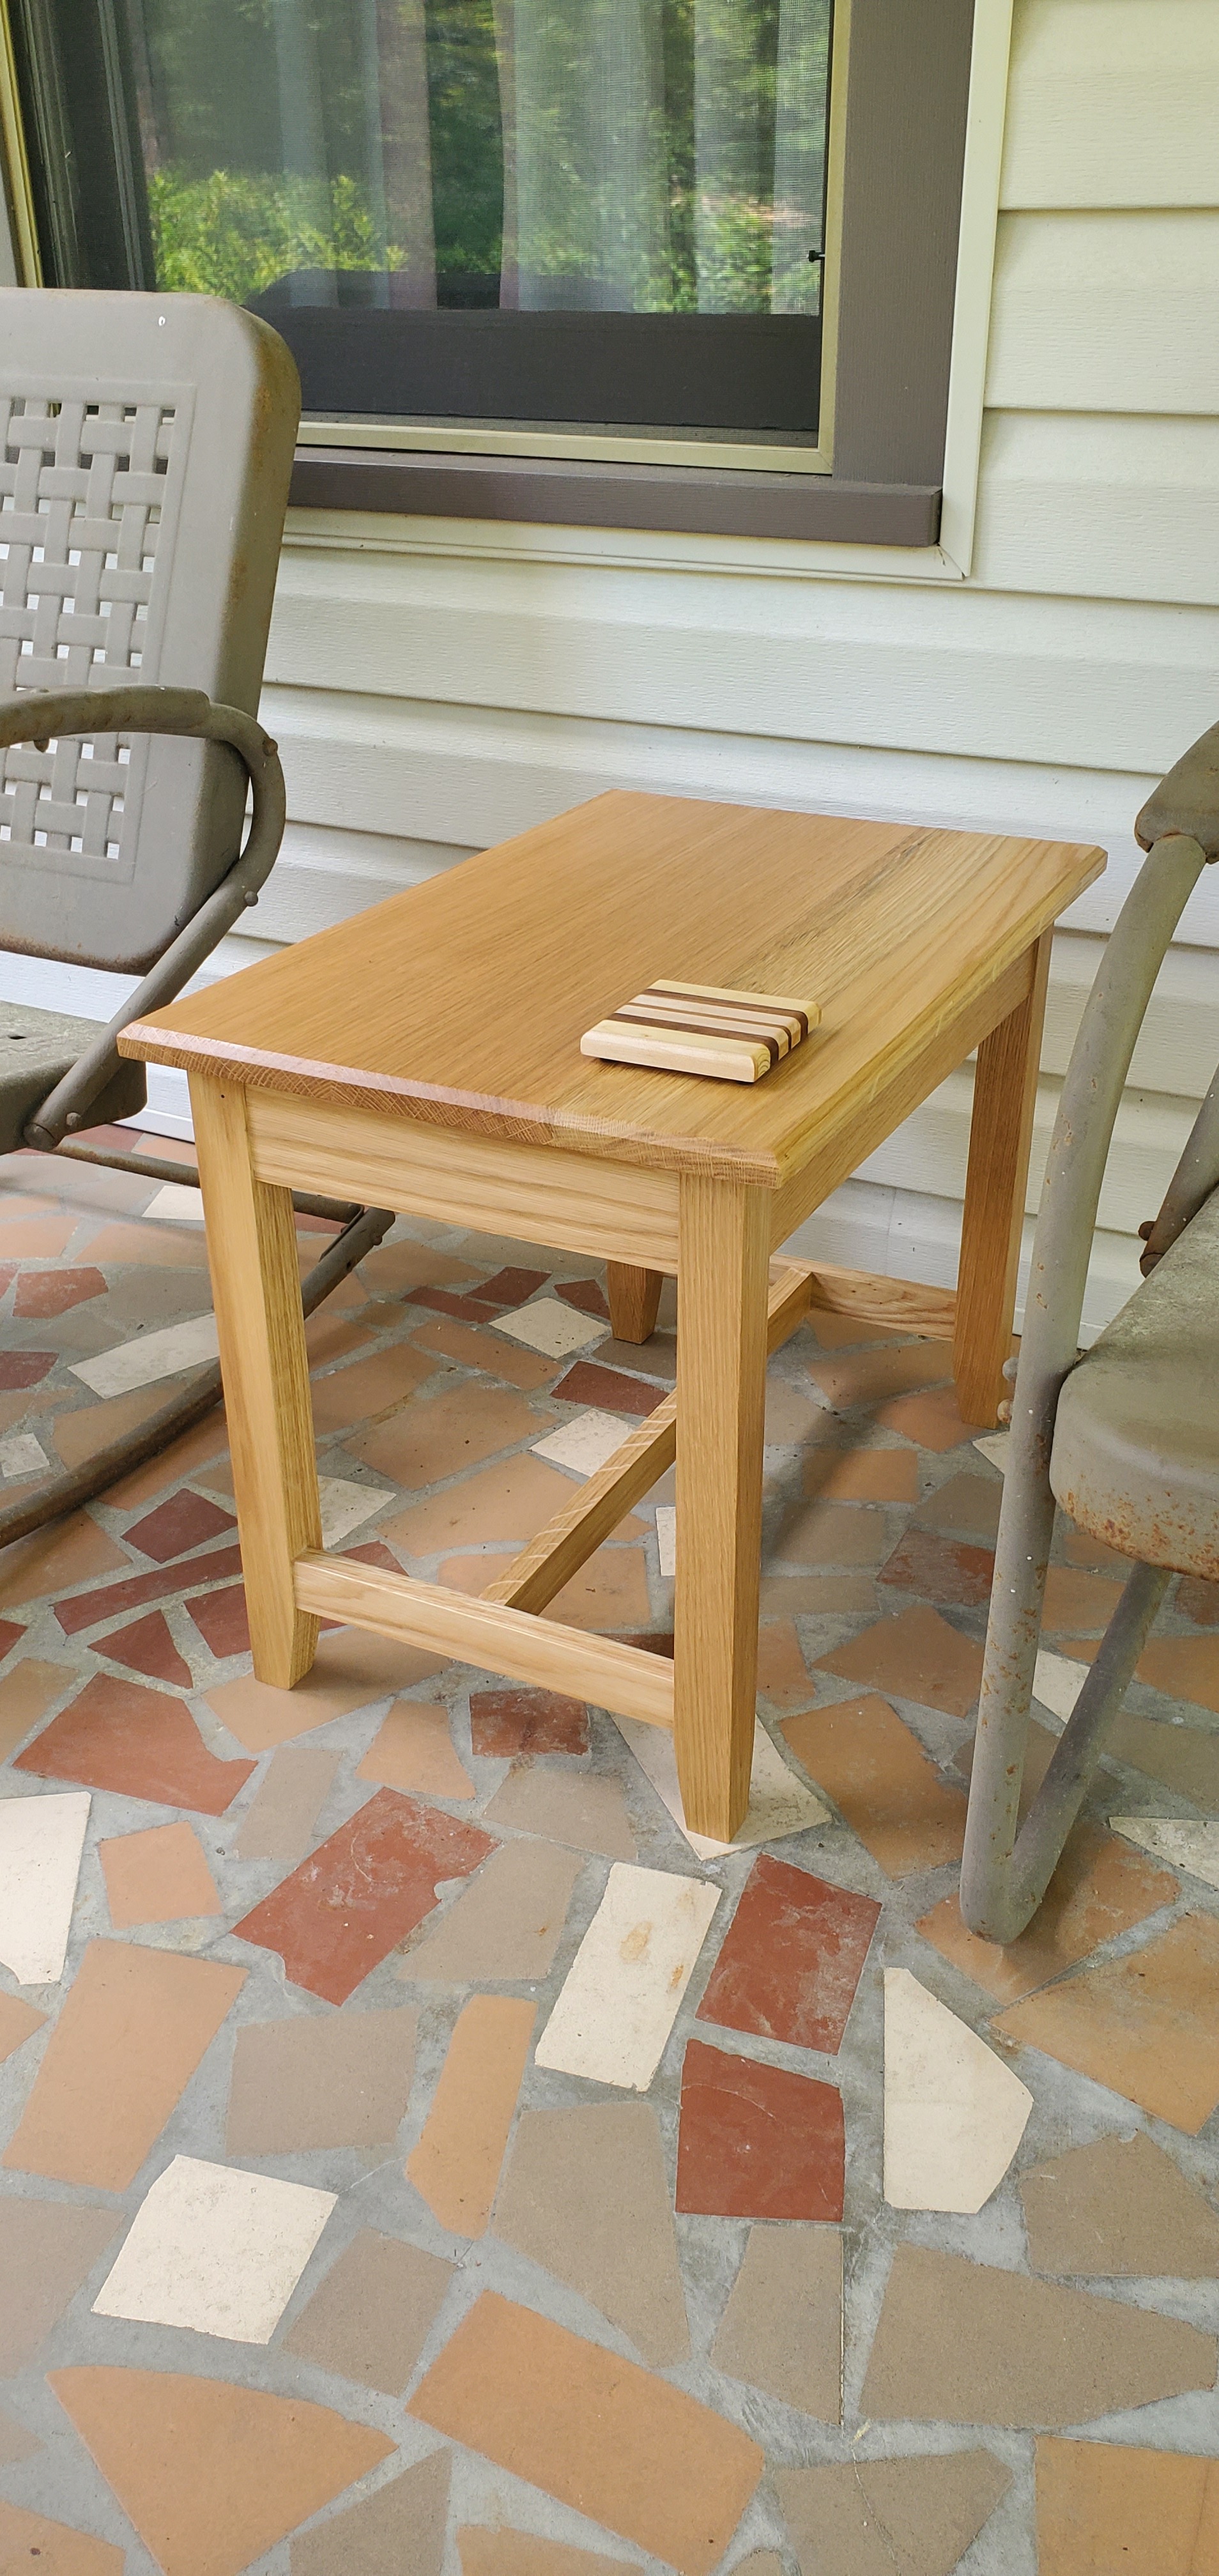
I posted this one to [email protected] too, as I do most of my furniture projects, but I'm particularly proud of how this one came out. Solid white oak with genuine mortise-and-tenon joinery.
cross-posted from: https://sh.itjust.works/post/20965205
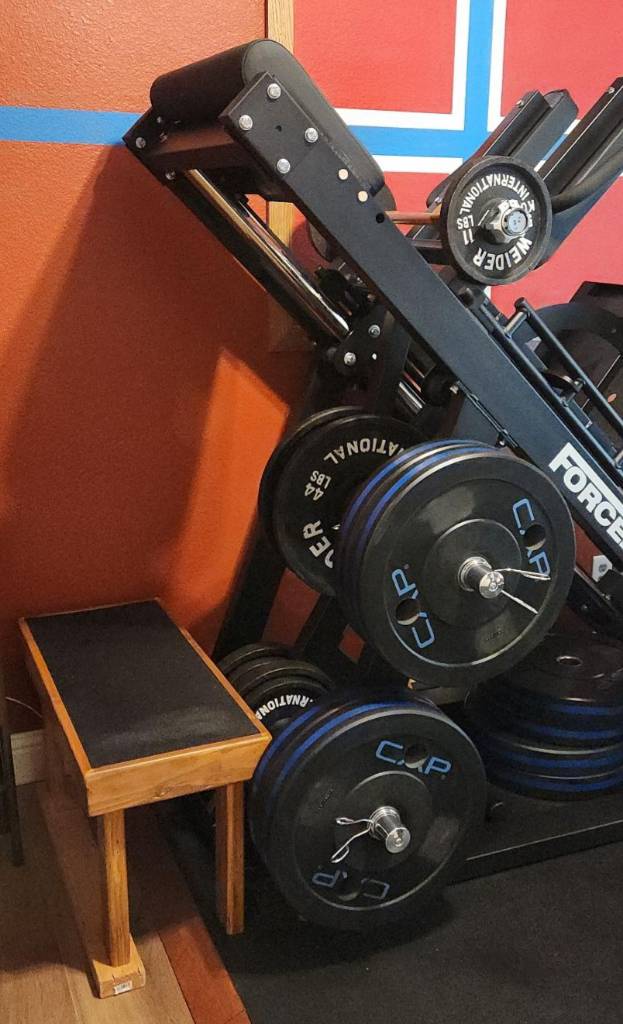
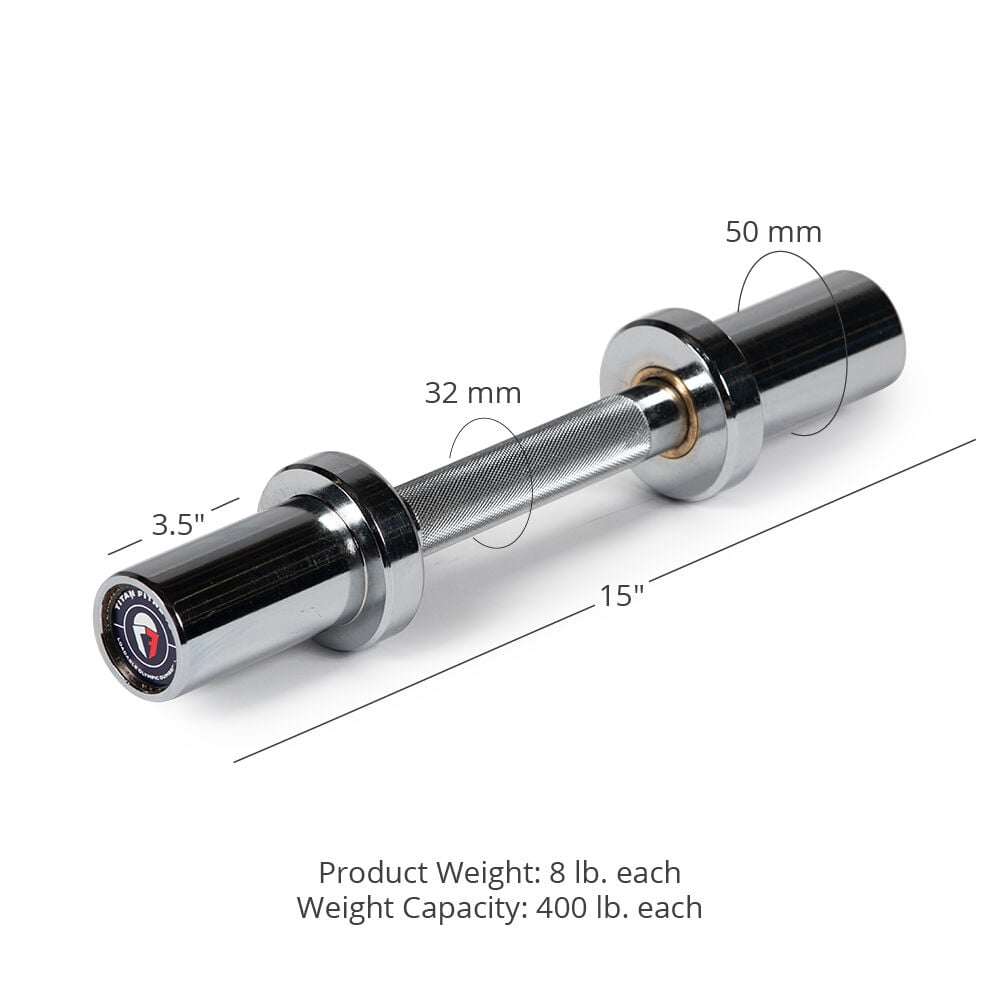
This is the story of how I turned a 15" Titan adjustable dumbbell to be 80 cm (31.5 inch) long. Why? Because I have a space-constrained home gym but still wanted a leg press, and so I had to remove its original barbell.
In its place, I built a pair of wood mounts for a normal barbell to rest upon, covered in that earlier post. However, since this machine is wall-adjacent, such a barbell would have to fit inside the width of the leg press, so about 80 cm. But must also be wider than the spacing from outside-edge to outside-edge of the wood mounts, which is 60 cm.
Such a short barbell -- or long dumbbell -- does not readily exist commercially, with the narrowest one I've seen being 48 inch barbells, which are still too wide. So I decided to build my own, using my spare Titan dumbbell as the base.
To start, the Titan dumbbells are excellent in this capacity, as the shaft diameter is 28 mm -- not 32 mm as the website would indicate -- which is a common diameter, if I am to cut short a cheap barbell to replace this dumbbell's shaft.
In keeping with my preexisting frugality, I purchased a cheap 1-inch barbell, hoping that it adopts the Olympic 28 mm shaft diameter, and not the 29 mm deadlift bar shaft diameter, as the Titan collars have small clearances. Matching neither, I find that this bar is closer to 23 mm, which although will fit into the existing collars, poses its own issues.
Nevertheless, this 7 ft barbell can conveniently be cut in half to yield two 42 inch segments. And then the included bar stops can be loped off, and then the length further refined to 77 cm, thus hiding the marks from the bar stop within the Titan collars, and also centering the (meh) knurling from the cheap bar.
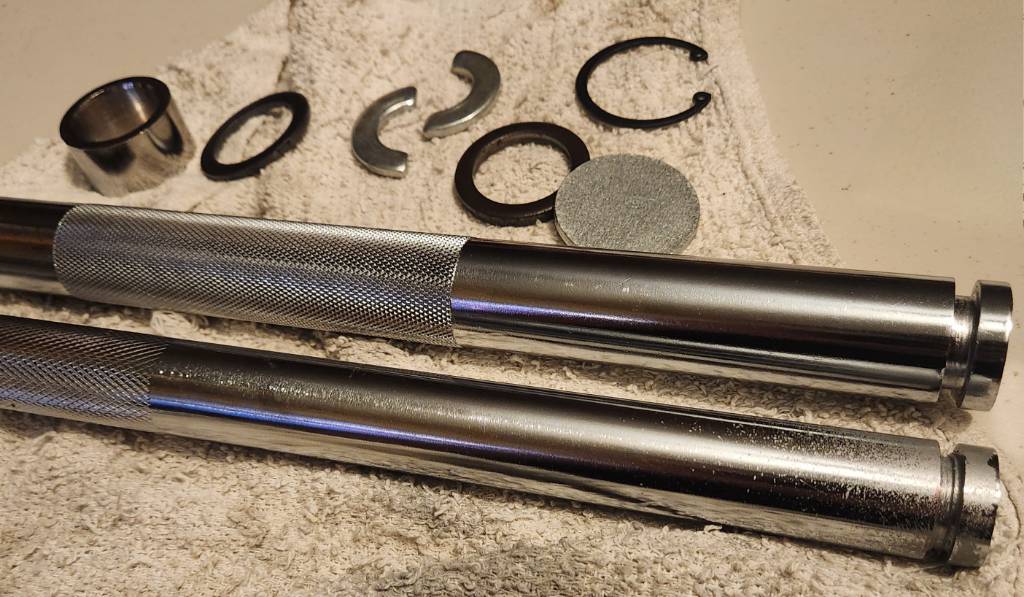
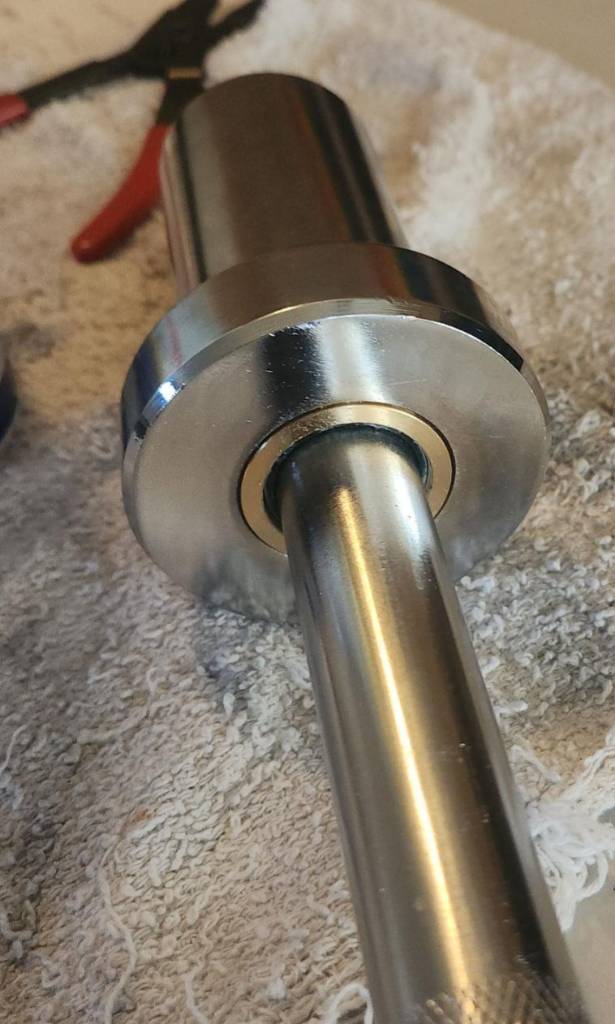
But perhaps a picture will be more explanatory. Here, the original collar is dismantled at the top, showing the original shaft with a groove cut into it, about 1/4-inch from the end. Into that groove would fit two half-rings with an inner diameter of 20.4 mm and an outer diameter of 40 mm. In fact, all the parts inside the collar use 40 mm outer diameter, except the spacer cylinder, which is smaller at 37 mm. All of these parts are held captive within the collar using the C-ring and the geometry of the collar itself.
To deal with the difference between the collar expecting 28 mm, and the cheap bar's 23 cm, I designed an ABS 3d printed part in FreeCAD to act as a bushing, upon which the original Titan brass bushing will ride upon. This ABS bushing is held captive by way of its center bulge, which fits within the dead space inside the collar.
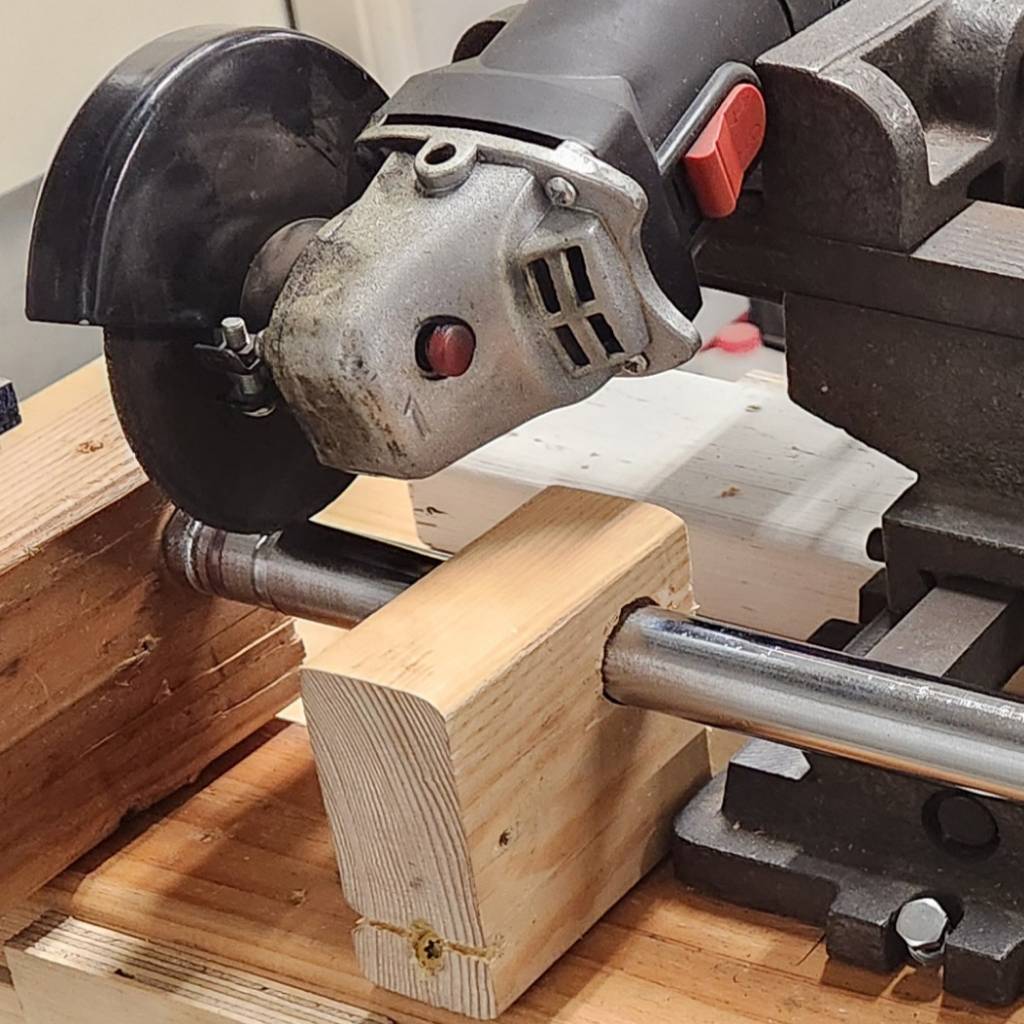
As for how I cut the groove into the end of the new shaft, I still don't own a lathe. So the next best is to mount an angle grinder onto a "cross slide vise" taken from a drill press, with the shaft secured in a wooden jig to only allow axial rotation manually. The vise allows precision control for the cutting wheel's depth, with me pausing frequently to measure how close the groove is to the desired 20.4 mm inner diameter. This is.... not a quick nor precise process. But it definitely works.
After reassembling both collars onto the new shaft and lubricating with white lithium, the final result is a long dumbbell (or short barbell) with Titan's 3.5 inch collars on the end, with 63 cm of shaft exposed and 80 cm from end to end. The ABS bushing is remarkably smooth against the brass bushing, after some sanding with 180 grit. The whole dumbbell weights 5.48 kg empty.
Here is the comparison with the stock Titan dumbbell. It's pretty amazing how the knurling conveniently lined up. It fits well onto the wood mounts of the leg press.

But why would I do all this just to add a weirdly long 3.5-inch collar dumbbell to a leg press, when it already can accept weights underneath the carriage? I will answer that in a follow-up post.
This is Goodie! He’s a mischievous little angel who is young, but has to start somewhere… He loves nothing more than confiscating precious items from the demons, including gold and magical time reversing watches!
Some WIPs: https://imgur.com/a/ShsBCyz
Full size: https://i.imgur.com/Ac5wecp.png

cross-posted from: https://lemmy.world/post/16352007
Still needs some design corrections because I just didn't know how to properly do 3D print and industrial design but it works!


cross-posted from: https://sh.itjust.works/post/20133956
With the exception of the weight stack for my functional trainer and its change plates, I wanted all my subsequent equipment to be metric. To that end, I saw some cheap 45 lbs CAP bumper plates, and figured that I could make them into metric with not too much effort.
Some rough math prior to purchasing suggested that these plates -- with a width of 68 mm -- could be slimmed down from 20.4 kg (45 lbs) to nearly 20.0 kg, by boring two 2" holes (51 mm). To keep balance, the holes should be on on diametrically opposite ends. And should be neither too close to the edge, nor too close to the center, since the plate still needs to absorb a drop without deforming. That the bored holes are 51 mm is a fantastic happenstance, nearly identical to the center hole for Olympic-spec plates.
Examining each plate before drilling, I found that the silkscreen letter A in "CAP" is well-centered diametrically, although it doesn't line up with the matching logo on the back side. Also, since these are cheap CAP plates, the initial weight tolerances are pretty poor. 45 lbs should be 20.41 kg (2 sig figs), but my first four plates registered at 20.58, 20.51, 20.64, 20.56. That's nearly an extra half pound!
To drill the holes perfectly plumb, I did the work on a drill press using a 2-inch hole saw. Because the saw wasn't deep enough to go through the full width in one pass, I started with a 1/4-inch (6 mm) pilot hole straight through the tip of the letter A in "CAP". Then I drilled from both sides with the hole saw until a ~200 gram rubber core fell out. Repeat for the second bore.
To finish, I took some sandpaper to remove the old "45 lbs" markings, then used my label maker to affix new values. All plates are still high, but ranged from 20.030 kg to 20.105 kg. Not too shabby, I think.
In a happy coincidence, the position of these bored holes is perfect for one's thumbs when grasping the plate like a steering wheel, making it easier to pick up when laid flat on the floor. I also added a strip of blue electrical tape around the perimeter to make it easy to identify these as 20 kg.
In the end, I got the cheap metric plates I wanted, and it came with a usability improvement as well. I've not dropped these yet, so time will tell how they hold up.

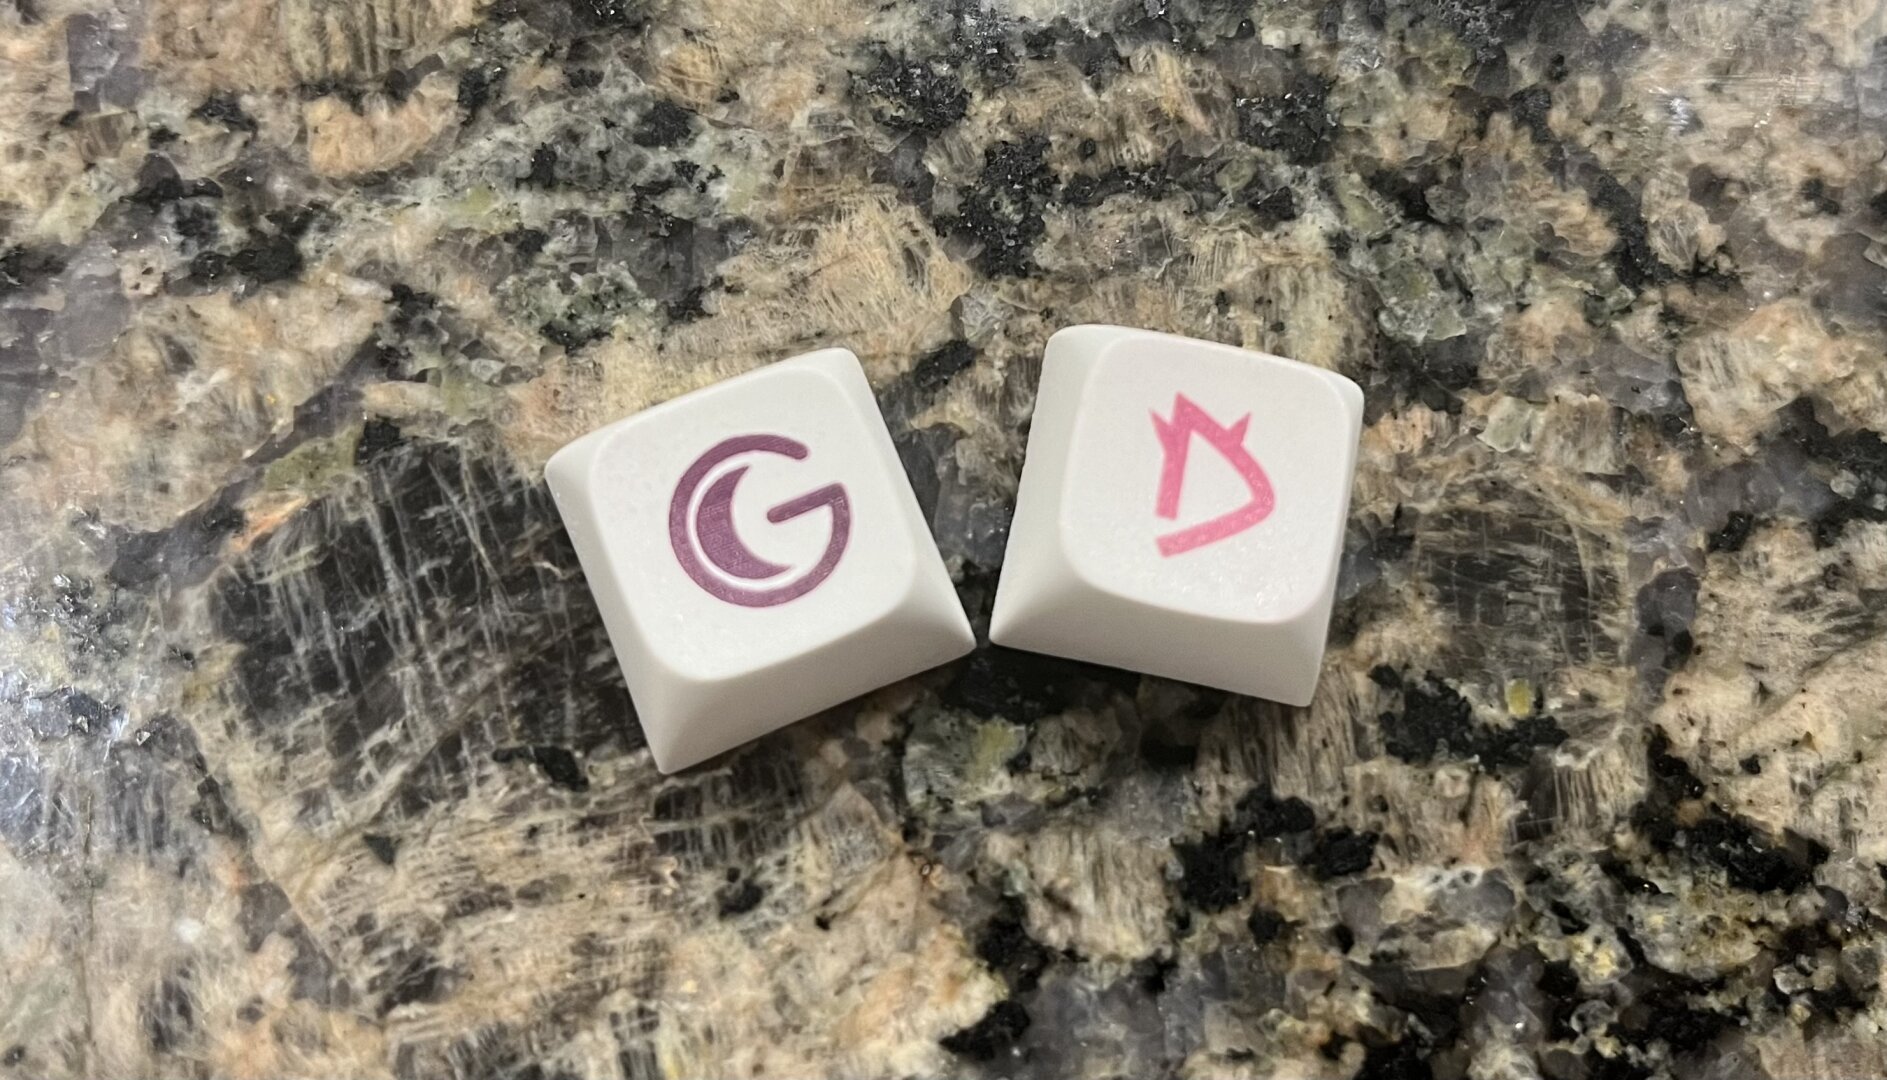
If you use the right ink, the right plastic keycaps made for mechanical keyboards, and the right settings on your laser, you can effectively dye-sublimate any design you want.
Don't worry, this little angel respawns whenever he's eaten, and tastes like raspberry!

Had to upload this in .jpg form because Lemm.ee kept saying it's too large, I hope the quality isn't eaten too much!
Some WIPs:
The hardest part was by far getting the metal rings to look right!

cross-posted from: https://feddit.nl/post/14562342
Small 1:72 F4U Corsair model built in a weekend
Full album can be found at: https://www.scalemates.com/profiles/mate.php?id=118436&p=albums&album=111437&view=thumbs

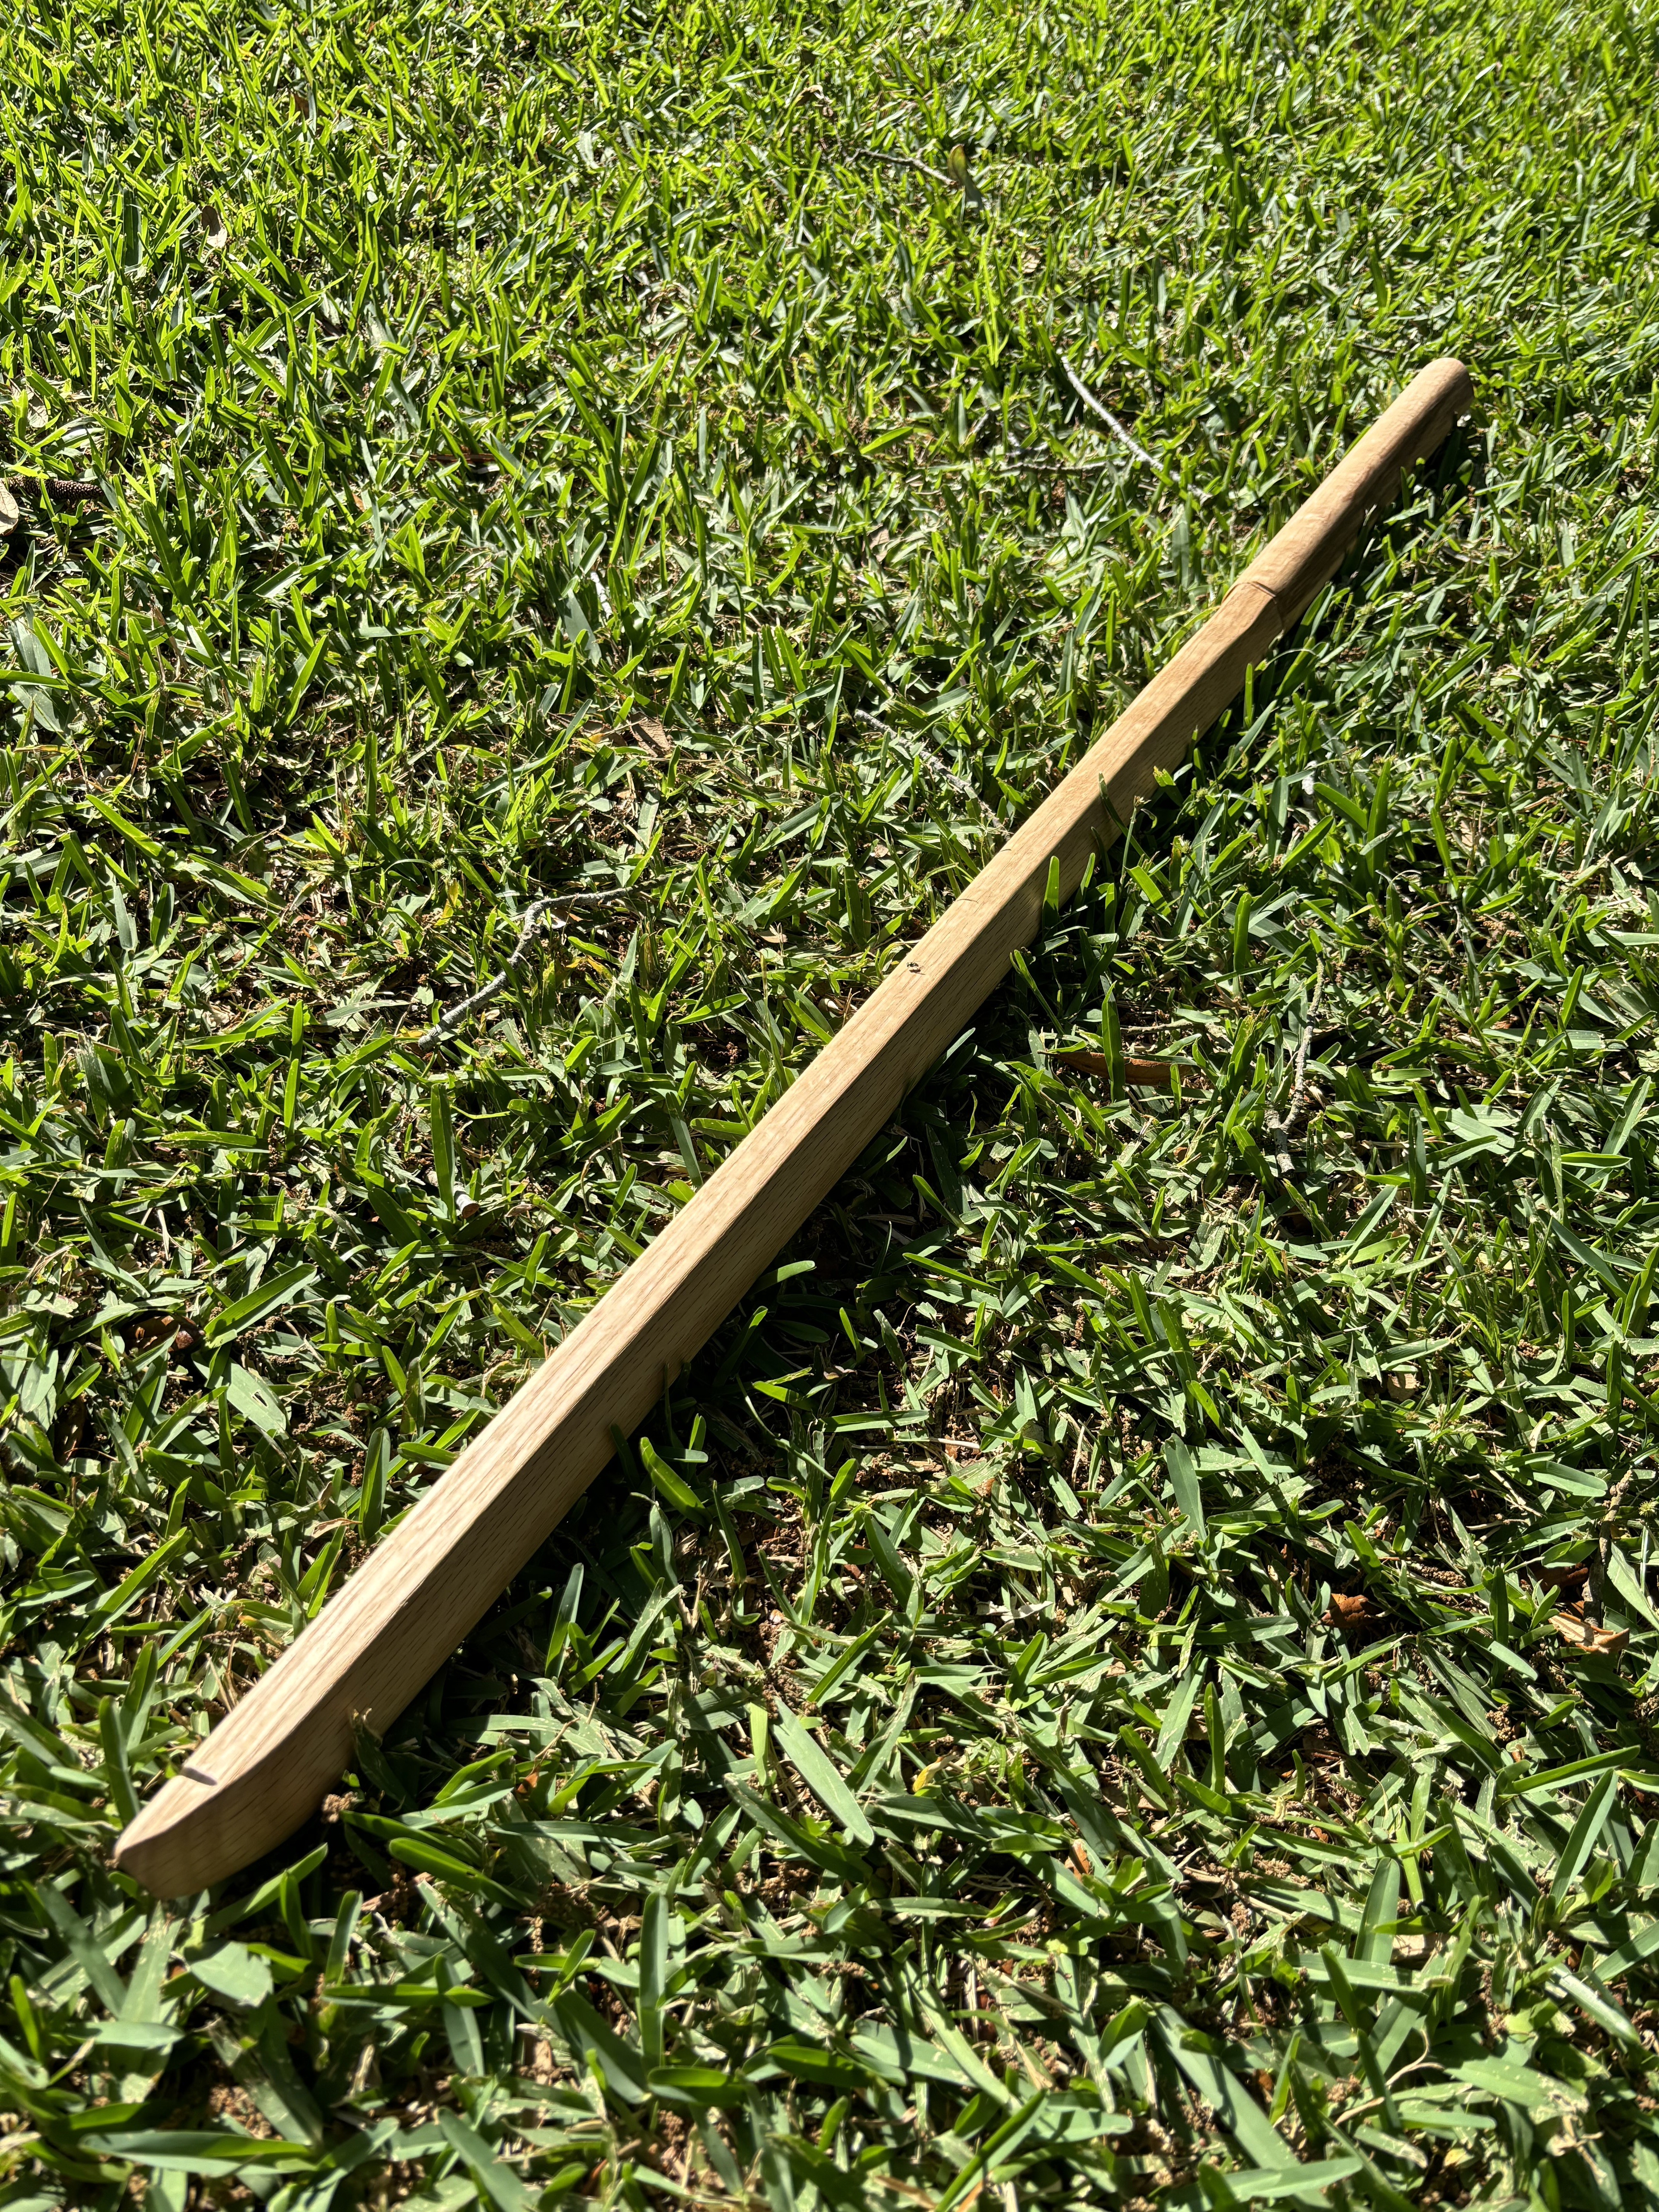
Table saw to get straight sides. Belt sander to get a curve to the blade tip.
The spine doesn’t have a curve like a traditional bokken, but that doesn’t keep me from tucking this bad boy into my belt loop and walking around the house like a samurai :)


