3DPrinting

15897 readers
74 users here now

3DPrinting is a place where makers of all skill levels and walks of life can learn about and discuss 3D printing and development of 3D printed parts and devices.

The r/functionalprint community is now located at: or [email protected]

There are CAD communities available at: [email protected] or [email protected]

Rules

If you need an easy way to host pictures, https://catbox.moe may be an option. Be ethical about what you post and donate if you are able or use this a lot. It is just an individual hosting content, not a company. The image embedding syntax for Lemmy is ![](URL)

Moderation policy: Light, mostly invisible

founded 2 years ago
MODERATORS
1
7
submitted 11 hours ago* (last edited 11 hours ago) by [email protected] to c/[email protected]


Are there any reviewers on YouTube/Rumble/etc. or independent blogs that don't post affiliate links, aren't sponsored by the printer company, or had one sent out by the company? Those to me all seem like a conflict of interest.

Yes people need to make money, I'm not blind to that, but they can advertise other things that aren't a direct conflict of interest.

I'm looking to get my first printer and would like to get info from an unbiased source. I just don't know enough to weed through the million 3D printer channels.

The Sovol SV06 Ace seems nice with little research as it is large enough to print the project I have in mind and uses open source firmware (Klipper) which is a must for me.

2


I run half a dozen Duet but one of them started to give me a lot of headaches and only this one (unique hardware + configuration so no other to compare to).

issue: tool head 3 heater is always enabled. The software detects a thermal runaway but the heater stays enabled. The only option to stop the machine from catching fire is to remove the main power.

Hardware:

  • Duet 2 wifi
  • Due5X

troubleshooting done (hardware):

  • measuring the mosfets => good
  • checking the driver for obvious issues with a multimeter => no issue found
  • moving toolheads hotends around. Issue persists on #3 spot (4th toolhead) so it is unrelated to the tool head. disconnecting it entirely also causes the heater to stay on
  • removing the SD-card => issue is gone.
  • sometimes it works like it should. Most of the time it doesn't.
  • on this particular unit there were some other minor anomalies regarding the WIFI earlier (wouldn't connect to the network) but those fixed themselves after a few rounds of resetting the wifi module, adding it to the wifi network again, waiting a few days for it fail once more.

**TL;DR Is my assumption correct that this indicated an issue with the Firmware from Duet which isn't just on this device but also on the newer Duet 3?

Did anybody has run into a similar issue and was able to resolve it?

In the wider picture: Is every duet product unsafe?** This is an older Duet 2 but it runs the same/similar firmware as the current generation Duet 3. So one of the big questions is if all of the Duet products are unsafe. Would be bad as this has been my controller of choice meaning a lot of work to replace all of them.

Btw. If you buy a duet: don't expect ANY support from the manufacturer.

Here is the main config file:

spoiler


; Configurat; Configuration file for Duet WiFi / Ethernet ; executed by the firmware on start-up

; General preferences M111 S0 ; Debugging off G21 ; Work in millimetres G90 ; Send absolute coordinates... M83 ; ...but relative extruder moves M555 P2 ; Set firmware compatibility to look like Marlin

; Network ; Read https://duet3d.dozuki.com/Wiki/Gcode#Section_M587_Add_WiFi_host_network_to_remembered_list_or_list_remembered_networks M550 P"ToolChanger" ; Set machine name M552 S1 ; Enable Networking M586 P0 S1 ; Enable HTTP M586 P1 S0 ; Disable FTP M586 P2 S1 ; Enable Telnet M667 S1 ; Select CoreXY mode

; Endstops M574 X1 Y1 S3 ; Set X / Y endstop stall detection M574 Z1 S2 ; Set Z endstop probe M558 C"zstop" P8 X0 Y0 Z2 H3 F360 I0 T20000 ; Set Z probe type to switch, the axes for which it is used and the dive height + speeds G31 P200 X0 Y0 Z-0.10 ; Set Z probe trigger value, offset and trigger height M557 X10:290 Y20:180 S20 ; Define mesh grid

; Drive direction M569 P0 S0 ; Drive 0 X M569 P1 S0 ; Drive 1 Y M569 P2 S1 ; Drive 2 Z M569 P3 S0 ; Drive 3 E0 M569 P4 S1 ; Drive 4 E1 M569 P5 S1 ; Drive 5 E2 M569 P6 S1 ; Drive 6 E3 M569 P7 S0 ; Drive 7 COUPLER M569 P8 S0 ; Drive 8 UNUSED M569 P9 S0 ; Drive 9 UNUSED

M584 X0 Y1 Z2 C7 E3:4:5:6 ; Apply custom drive mapping M208 X-35:328.5 Y-49:243 Z0:300 C0:260 S0 ; Set axis maxima & minima M350 C8 I0 ; Configure microstepping without interpolation M350 X16 Y16 Z16 E16:16:16:16 I1 ; Configure microstepping with interpolation M92 X100 Y100 Z1600 C100 E655:655:655:655 ; Set steps per mm M566 X400 Y400 Z30 C2 E300:300:300:300 ; Set maximum instantaneous speed changes (mm/min) "was 2 before" M203 X35000 Y35000 Z1200 C5000 E3600:3600:3600:3600 ; Set maximum speeds (mm/min) M201 X6000 Y6000 Z400 C400 E600:600:600:600 ; Set accelerations (mm/s^2) M906 X2000 Y2000 Z1330 C400 E500:500:500:600 I30 ; Set motor currents (mA) and motor idle factor in percent M84 S120 ; Set idle timeout

;Stall Detection M915 C S5 F0 H200 ; Coupler

;Stall Detection M915 X Y S3 F0 H400 R2 ; X / Y Axes ;M915 X Y S5 F0 H400 ; OLD X / Y Axes

; Heaters M308 S0 P"bedtemp" Y"thermistor" A"Bed" T100000 B4725 C7.06e-8 ; Set thermistor M950 H0 C"bedheat" T0 ; Bed heater M140 H0 ; Add heater to bed after RRF3.01 RC10 M143 H0 S200 ; Set temperature limit for heater 0 to 225C

M308 S1 P"e0temp" Y"thermistor" A"T0" T500000 B4723 C1.19622e-7 ; Set thermistor M950 H1 C"e0heat" T1 ; Extruder 0 heater M143 H1 S350 ; Set temperature limit for heater 1 to 300C

M308 S2 P"e1temp" Y"thermistor" A"T1" T100000 B4725 C7.06e-8 ; Set thermistor M950 H2 C"e1heat" T2 ; Extruder 0 heater M143 H2 S300 ; Set temperature limit for heater 2 to 300C

M308 S3 P"e2temp" Y"thermistor" A"T2" T100000 B4725 C7.06e-8 ; Set thermistor M950 H3 C"duex.e2heat" T3 ; Extruder 0 heater M143 H3 S300 ; Set temperature limit for heater 3 to 300C

M308 S4 P"e3temp" Y"thermistor" A"T3" T100000 B4725 C7.06e-8 ; Set thermistor M950 H4 C"duex.e3heat" T4 ; Extruder 0 heater M143 H4 S300 ; Set temperature limit for heater 4 to 300C

; Tools M563 P0 S"T0" D0 H1 F2 ; Define tool 0 G10 P0 X0 Y0 Z0 ; Reset tool 0 axis offsets G10 P0 R0 S0 ; Reset initial tool 0 active and standby temperatures to 0C

M563 P1 S"T1" D1 H2 F4 ; Define tool 1 G10 P1 X0 Y0 Z0 ; Reset tool 1 axis offsets G10 P1 R0 S0 ; Reset initial tool 1 active and standby temperatures to 0C

M563 P2 S"T2" D2 H3 F6 ; Define tool 2 G10 P2 X0 Y0 Z0 ; Reset tool 2 axis offsets G10 P2 R0 S0 ; Reset initial tool 2 active and standby temperatures to 0C

M563 P3 S"T3" D3 H4 F8 ; Define tool 3 G10 P3 X0 Y0 Z0 ; Reset tool 3 axis offsets G10 P3 R0 S0 ; Reset initial tool 3 active and standby temperatures to 0C

; Fans

M950 F1 C"fan1" M950 F2 C"fan2" M950 F3 C"duex.fan3" M950 F4 C"duex.fan4" M950 F5 C"duex.fan5" M950 F6 C"duex.fan6" M950 F7 C"duex.fan7" M950 F8 C"duex.fan8"

M106 P0 S0 ; UNUSED M106 P1 S255 H1 T70 ; T0 HE M106 P2 S0 ; T0 PCF M106 P3 S255 H2 T70 ; T1 HE M106 P4 S0 ; T1 PCF M106 P5 S255 H3 T70 ; T2 HE M106 P6 S0 ; T2 PCF M106 P7 S255 H4 T70 ; T3 HE M106 P8 S0 ; T3 PCF

M593 F42.2 ; cancel ringing at 50Hz (https://forum.e3d-online.com/threads/accelerometer-and-resonance-measurements-of-the-motion-system.3445/) ;M376 H15 ; bed compensation taper

;tool offsets ; !ESTIMATED! offsets for: ; V6-tool: X-9 Y39 Z-5 ; Volcano-tool: X-9 Y39 Z-13.5 ; Hemera-tool: X-37.5 Y43.5 Z-6

G10 P0 X-9 Y39 Z-5.0 ; T0 G10 P1 X-9 Y38.7 Z-4.7 ; T1 G10 P2 X-8.9 Y38.5 Z-4.8 ; T2 G10 P3 X-9.1 Y38.5 Z-4.7 ; T3

;deselect tools T-1

M572 D0 S0.02 ; pressure advance T0 M572 D1 S0.02 ; pressure advance T1 M572 D2 S0.02 ; pressure advance T2 M572 D3 S0.02 ; pressure advance T3 M575 P1 S1 B57600 M501; load config-override.g

config-overwrite:

spoiler


; config-override.g file generated in response to M500 at 2021-04-13 12:07 ; This is a system-generated file - do not edit ; Heater model parameters M307 H0 R1.331 C160.969:160.969 D2.79 S1.00 V24.4 B0 M307 H1 R2.634 C271.153:235.156 D6.07 S1.00 V24.3 B0 M307 H2 R1.953 C229.435:178.815 D5.00 S1.00 V24.3 B0 M307 H3 R1.858 C222.604:195.090 D5.31 S1.00 V24.4 B0 M307 H4 R1.612 C251.412:217.040 D7.48 S1.00 V24.4 B0 ; Workplace coordinates G10 L2 P1 X0.00 Y0.00 Z0.00 C0.00 G10 L2 P2 X0.00 Y0.00 Z0.00 C0.00 G10 L2 P3 X0.00 Y0.00 Z0.00 C0.00 G10 L2 P4 X0.00 Y0.00 Z0.00 C0.00 G10 L2 P5 X0.00 Y0.00 Z0.00 C0.00 G10 L2 P6 X0.00 Y0.00 Z0.00 C0.00 G10 L2 P7 X0.00 Y0.00 Z0.00 C0.00 G10 L2 P8 X0.00 Y0.00 Z0.00 C0.00 G10 L2 P9 X0.00 Y0.00 Z0.00 C0.00 M486 S-1
3


I accidentally got the PETG filament instead of the PLA which I normally work with. I have an Elegoo Neptune 3 Pro.

Here's what was weird:

  • The test strip went across the bottom of the board instead of the side. It went back to the side when I put the PLA back in.

  • The temperture melting point changed automatically from 200 F to 220 and then back again when I switched back to PLA.

Does the printer know what kind of filament I'm using and if so, how?

ETA: The filaments have all been the Elegoo brand filaments.

4
18
Dust. (lemmy.ml)
submitted 1 day ago* (last edited 1 day ago) by [email protected] to c/[email protected]


I really want to buy a printer (resin or filament), but I'm concerned about the health aspects concerning inhaling the dust.

Is it really safe to have a printer indoors? Should I rig up something on my balcony instead? What room do you have yours in?

How do you guys deal with the dust? Do enclosures work? Any complaints from family members?

5


I've been at it again.

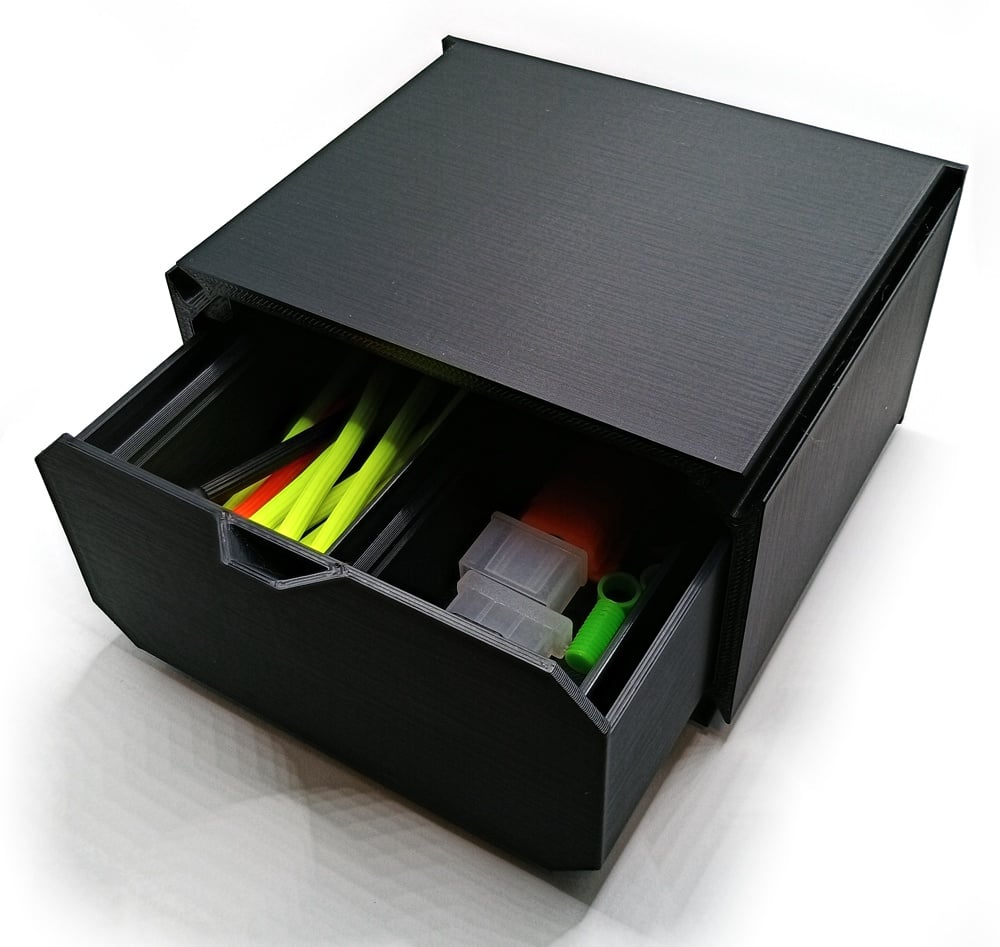
I've been using the hell out of these drawer thingies, what with you fill with Gridfinity bins and store ~~pocketknives~~ various things in.

Well, I screwed myself over and it turns out I need a stack of drawers one cell narrower than stock. The original author posted sources in Onshape but I will be buggered if I'm signing up for Yet Another Account just for that.

So I reconstructed the entire thing -- my way -- in FreeCAD. Because obviously that's the less insane option. (I guess this also allowed me to excise the magnet ears from the drawers, which is a worthless increase in print time and small waste of material for me since I don't use magnets with my Gridfinity bins)

Anyway, here it is.

This is my dinky 2x2 test print. Which is very nearly but not quite completely useless. (For instance, it fits Nite-Ize cable ties very well, as you can see.) If it makes you feel any better, the generator absolutely will make you a 1x1, 1u tall drawer assembly if you ask it to which truly will be fully useless...

6
279
3D Printing is Fun! (lemmy.world)
submitted 3 days ago* (last edited 3 days ago) by [email protected] to c/[email protected]


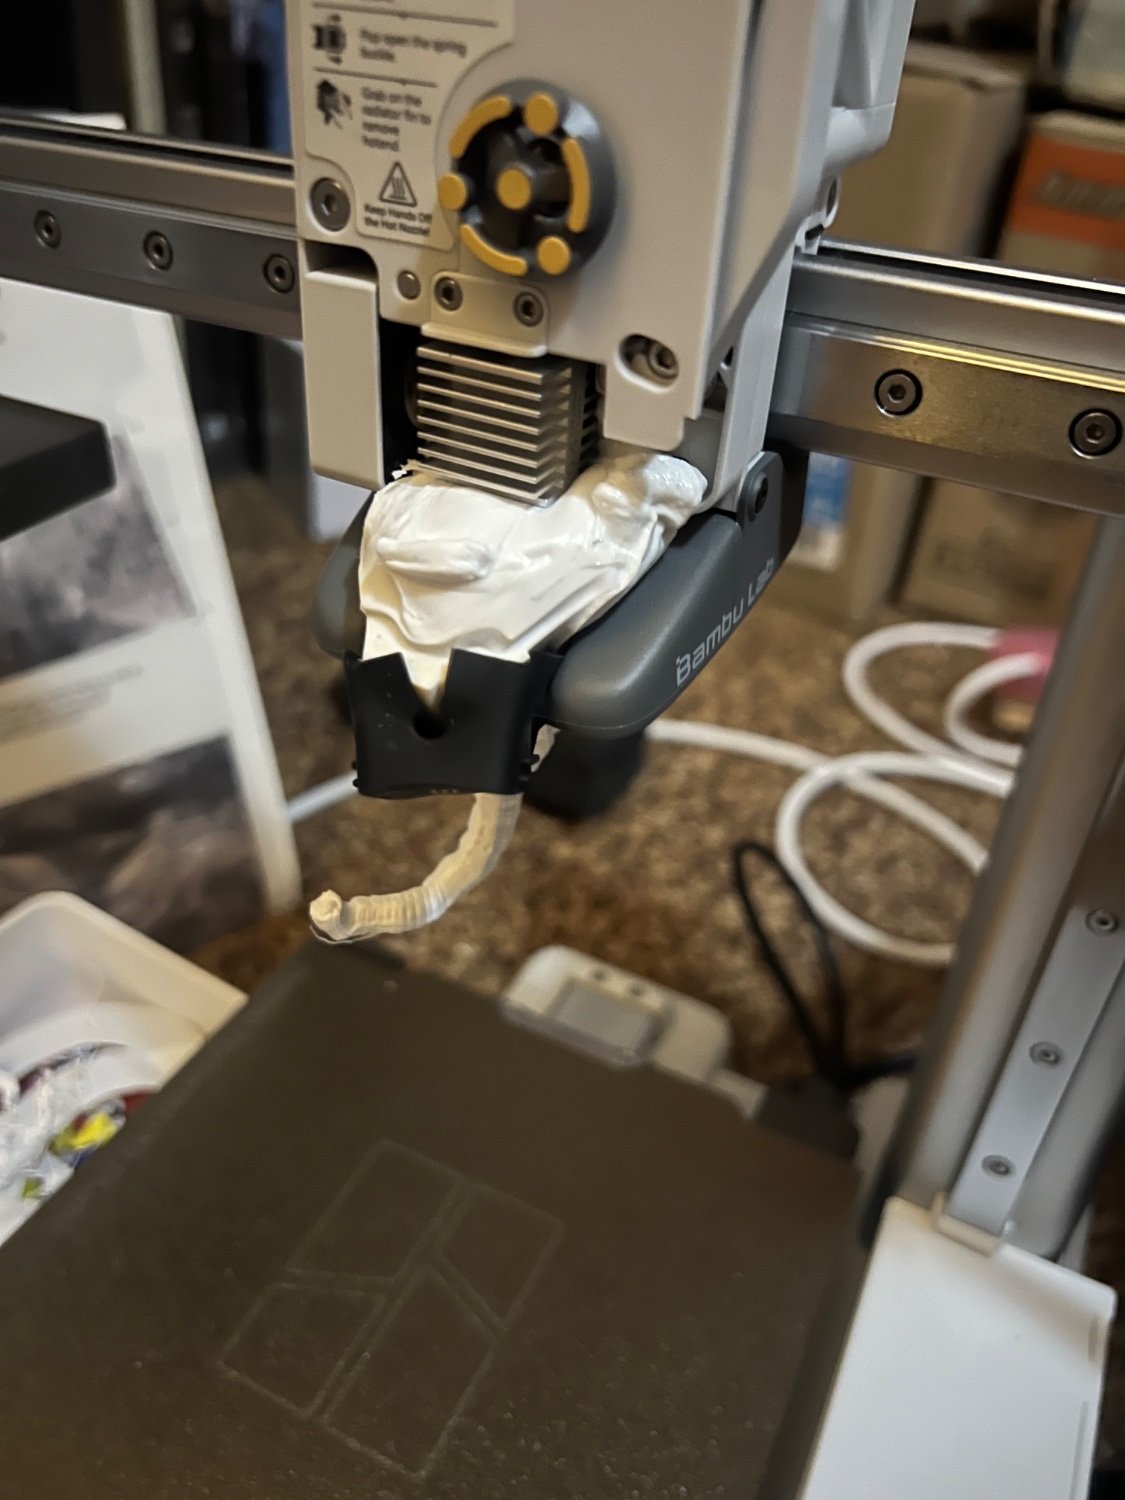
Fourth try on a print. Tried to add some adhesive to the bed to get it to stick better. Watched the first two layers and went to bed. Woke up to a printer on strike.

7


What could cause the strange part on the right? The whole surface should be the same, it's a 90° wall, so nothing that should look like this. Can't see anything strange in OrcaSlicer. BambuLab A1 Mini with Creality PLA+

8


I could edit the firmware but I like this just in case there are thermocouple issues.

I can also point a heat gun at it for a minute.

9


Snowflake Tie fighter card kit looks good in this blue clear PETG.

https://www.printables.com/model/91927-snowflake-tie-fighter-kit-card-ornament

10


After immersing myself in 3D printer content on YouTube and Lemmy, I'd talked myself all the way up to spending AU$2000 which is just absurd for a first timer, but then talked myself into the Sovol3D S06 ACE as a decent starting point, haha

Anyhow, I'll be running this in my garage (garage door open) and I think the first batch of filament in the pack is either PLA or PETG, which seems beginner friendly

I've been wondering about 3D printer profiles and calibration in slicer apps... is there a way to print as many benchies that will fit on the bed, but each which different profile parameters, so I can see which profiles do or don't work best? Or do current slicer apps always produce a plan that uses the same parameters for the entire job?

Note that I'm 100% on Linux (no Windows here), so I'm probably limited to https://github.com/prusa3d/PrusaSlicer or https://github.com/SoftFever/OrcaSlicer (or maybe https://github.com/GladiusSlicer/GladiusSlicer if I'm in the mood for contributing my own code)

I've consumed probably too much YouTube at this point, but any especially important hints and tips for a first timer would be appreciated!

P.S. oh, just noticed, https://lemmy.ml/post/23597074 thanks!

11


Glasses case in blue/clear PETG. Stl - https://www.printables.com/model/1105484-flexi-glasses-case

It did not like the cold garage. There are some barely noticeable layer separations in the upright sections.

12
 
 
13


Yikes. Gonna have to work with this material a bunch to learn how to use it.

Model - https://www.thingiverse.com/thing:1545913

14
181
submitted 1 week ago* (last edited 1 week ago) by [email protected] to c/[email protected]


VSO.

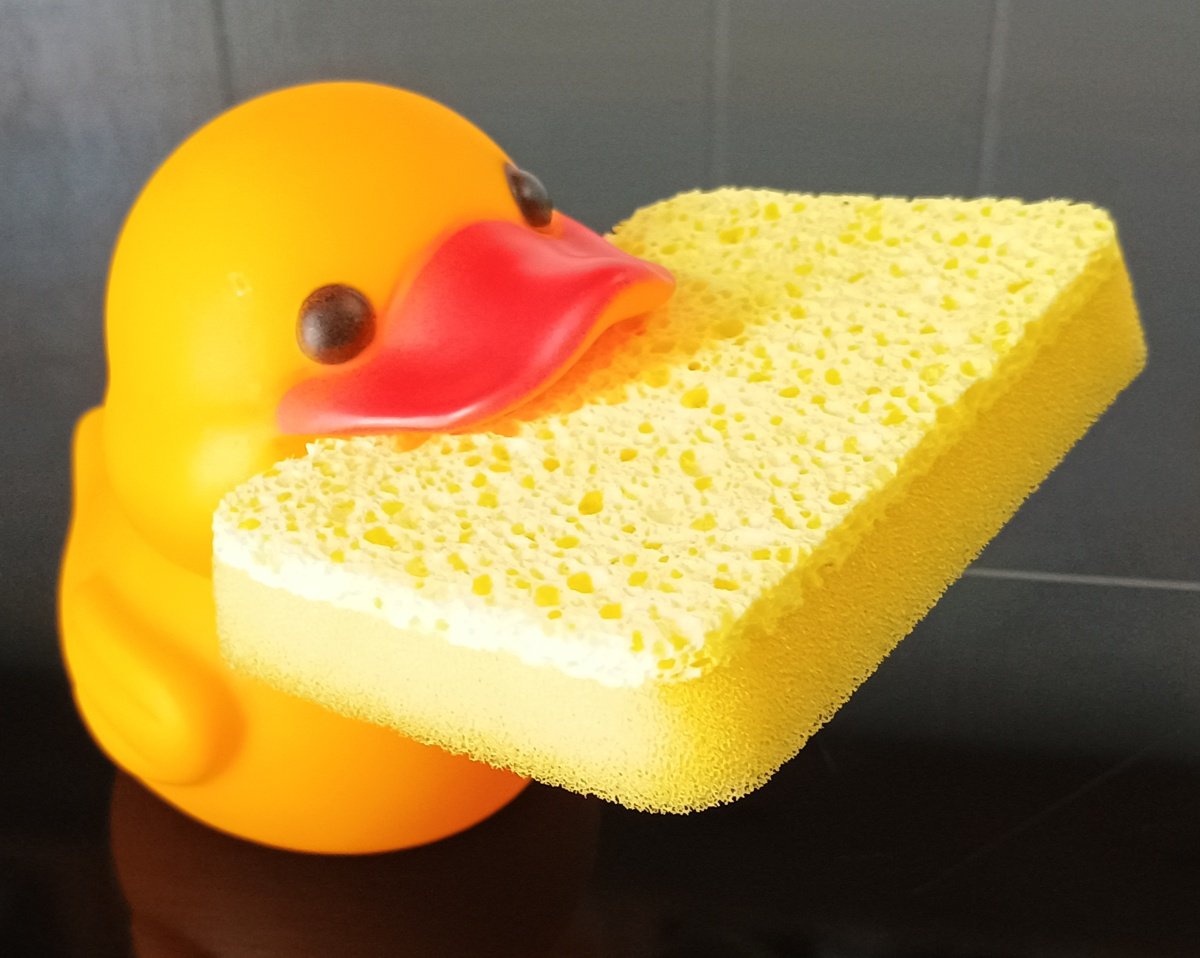
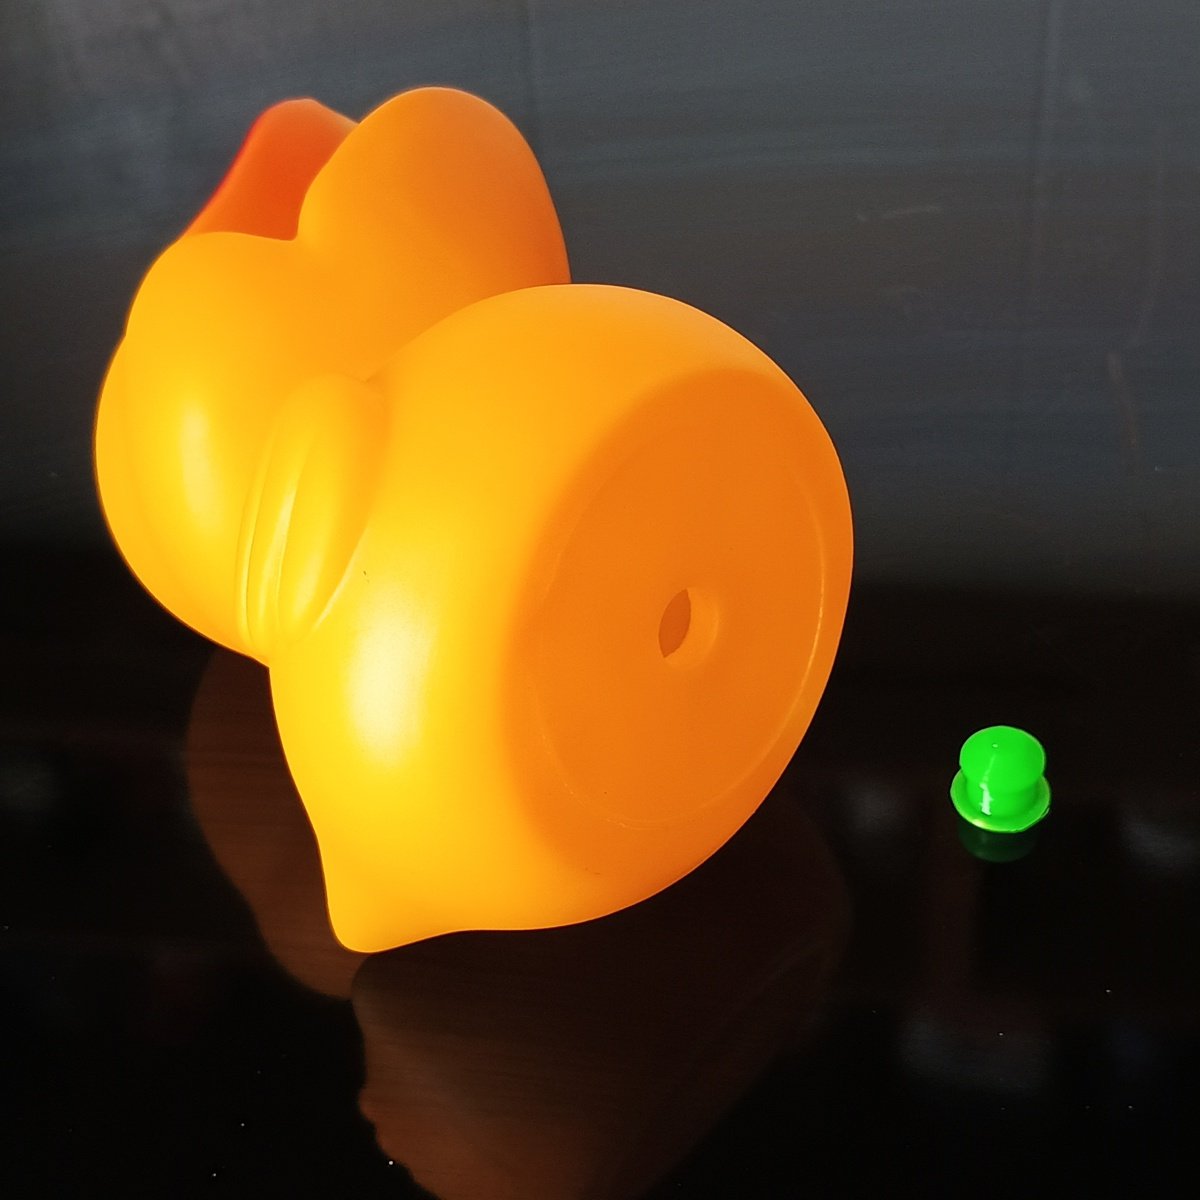
So we got one of these rather silly sponge holder ducks.

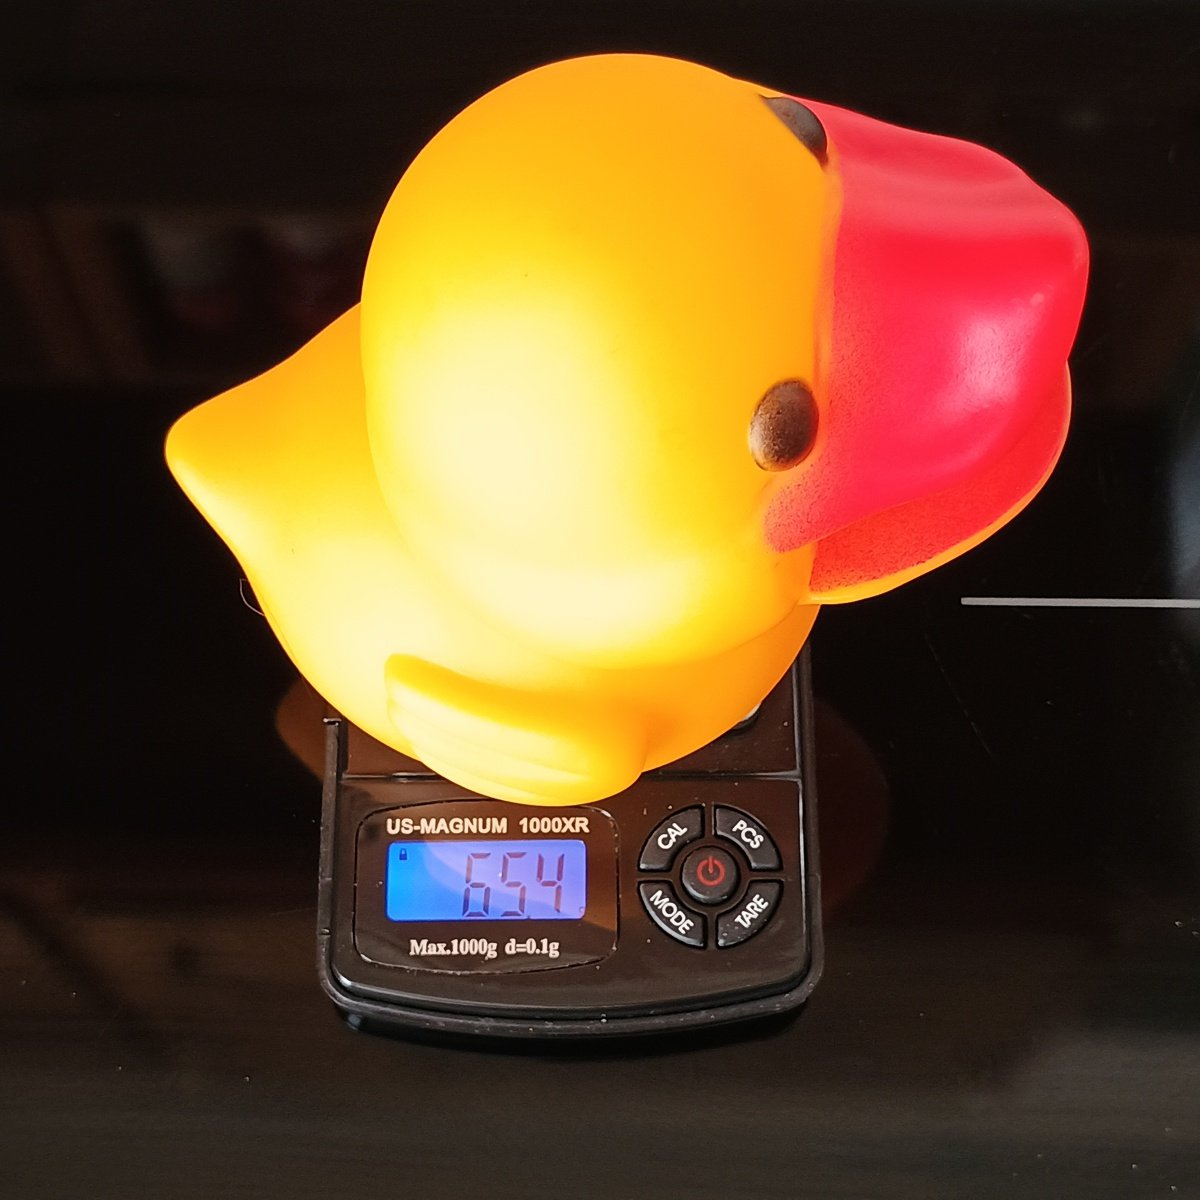
The only problem is that Mr. Quacks here doesn't quite weigh enough. With a sponge his beak -- especially one that's laden with water -- he's prone to falling over into the sink. The sponge is held quite a ways outboard, and altogether the entire duck only weighs 65.4 grams.

I tried one other gimcrack solution before this, which was to glue a suction cup to his butt. That didn't work very well.

Instead, I opted to fill him up with some ballast. These will do nicely.

Yes, all of these pictures were just taken on my grubby stovetop. No, I am not going to pull out all the stops to perform my usual level of photography on, let's not put too fine a point on it, a butt plug for a rubber duck. I used a very short (less than a meter) scrap of left over TPU I had lying around to make a... cork... so I could fill the duck with ballast and then keep it all inside.

I am also given to understand that I should have perhaps made such at thing corkscrew shaped, but I am very sorry to inform you that I didn't do this, either.

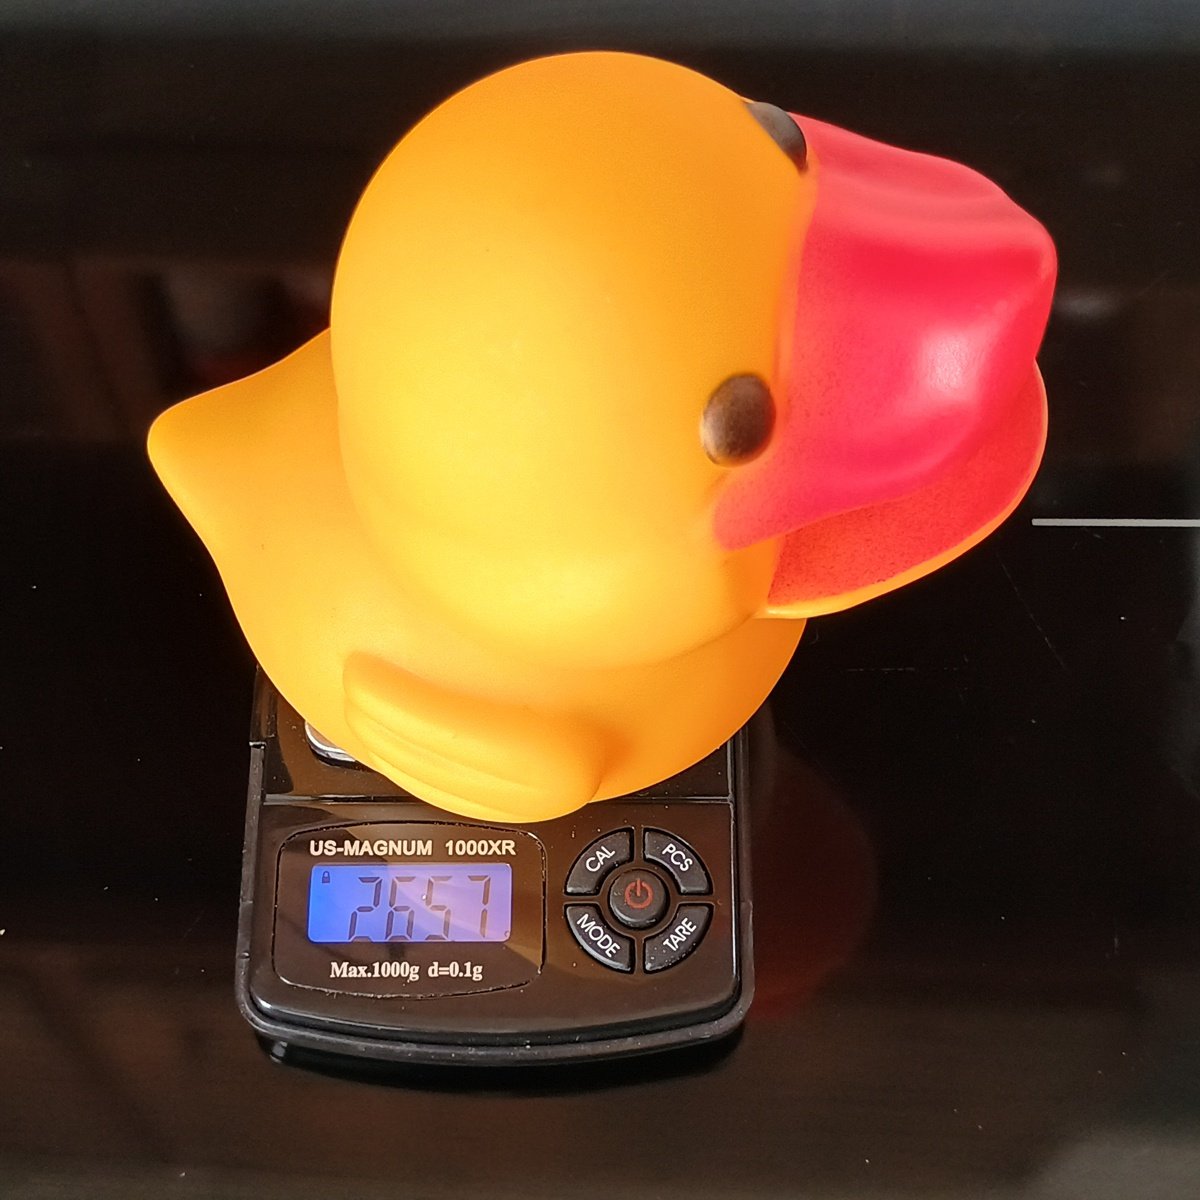
I didn't count how many BB's I used. Two fillings of that speed loader that came with my Crosman M4, is what it was. I'll let you do the math: Now he weighs a much more suitable 265.7 grams, a little over four times the original weight, and acts rather like a weeble-wobble. With this you can tip him over so far the sponge falls out before he topples over himself. And can also shake him like a maraca, if you're really bored.

15


So my dad broke the septic clean out cap with the lawn mower. He cannot find a replacement that is lower to the ground so I am printing a new one. Should I use PETG? Or another material. Also I hope this is not violating some form of regulation in the U.S.

16


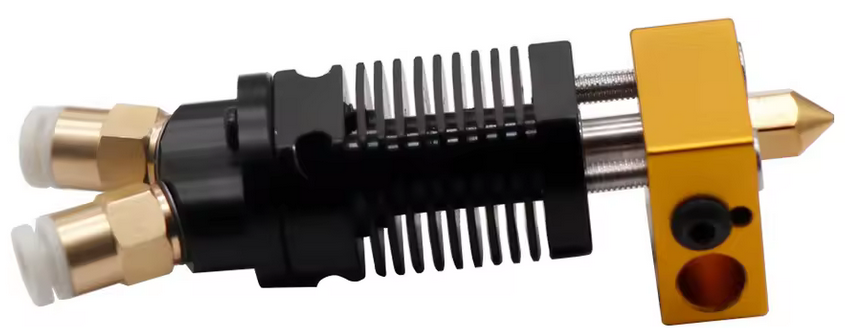
Question: If you have tried a dodgy dual input hotend, what were your experiences?

Background: As with anyone else who have a single extruder, I've been contemplating upgrading to something with a bit more flexibility. But the idea of getting a whole new printer doesn't appeal as much to my wallet, as it does to my mind :-)

Scouring aliexpress for weird filaments with the mrs - you know, normal Saturday-evening-and-the-kids-are-sleeping couple activities - we fell upon a dual input hotend for creality cr10. It looks an awful lot like the hotend we have, and it comes with either 24v or 12v heater. It's only about 15€ so I might just give it a try, but it's pretty stupid when I don't even have a plan for an extra extruder as well. And I don't know how I would go about wiring that part up on my cr6 at the moment.

17


Anyone else in this boat? It was said by a Bamboo user when I was chatting about my modded Maker Select and the Voron I'm about to build.

I do use the printer a lot for designing and making projects like the sensors I just launched or the Twystlock for Steam Deck, etc.

But I like tinkering/making more. For example I used to mod video game consoles more than I played them, so the comment made sense to me.

18
51
submitted 2 weeks ago* (last edited 2 weeks ago) by [email protected] to c/[email protected]


I'm just getting into 3d printing and I'm looking for some recommendations. My budget is $400 and I've narrowed it down to the sv06+ or the Ender-3 V3. I like that the print size is bigger on the sv06+ but all reviews point to the Ender, do you guys have any recommendations for me?

Also maybe the bambu a1? Or a1 mini? I don't like that the firmware isn't open source though.

I'm OK tinkering but just want some insight.

Thanks!

19


Hi everyone,

recently, my brother asked me to print some tabletop miniatures for him on my Prusa MK4S. I know miniatures are most commonly printed with SLA printers, but I found some workable advice and so far my first attempts look decent enough.

However, I noticed most models I find are optimized for SLA printing or at least not optimal for printing with FDM due to difficult forms such as sloping and cavities that are hard to support. Also, I mainly print construction and replacement parts and would like to avoid swapping nozzles often. So I started researching SLA printers.

Owning a Prusa printer and liking it very much, I first looked at their SL1S and fell over backwards when I saw the price tag. Having owned an Ender 3 by Creality before, I checked their offers, which are a lot more budget friendly. However, on the other hand, having owned an Ender 3 I know that you get what you pay for: The bare minimum.

Therefore, my main question is: What is a good starter model for printing miniatures using SLA?

My follow-up question is regarding slicing software. I remember reading a couple of years back that SLA printers have no universal format like gcode and therefore slicing software compatibility is a bit of an issue. Is this still the case?

20
 
 
21
59
submitted 2 weeks ago* (last edited 1 week ago) by [email protected] to c/[email protected]


Stl - https://www.printables.com/model/654491-pixel-christmas-tree-large-with-led-tea-light-hold

The tree is vase mode so it shows a lot of light. I like it.

Edit - it's LED, not flame.

22
55
NEMA34 upgrade (lemmy.ml)
submitted 2 weeks ago* (last edited 2 weeks ago) by [email protected] to c/[email protected]


Upgraded from a NEMA24 to a NEMA34.

Before going out and milling or buying it in metal it is always a good idea to testprint it.

Probably will use the plastic part for a while as 3mm wall-thickness PETG seems might already be good enough.

23


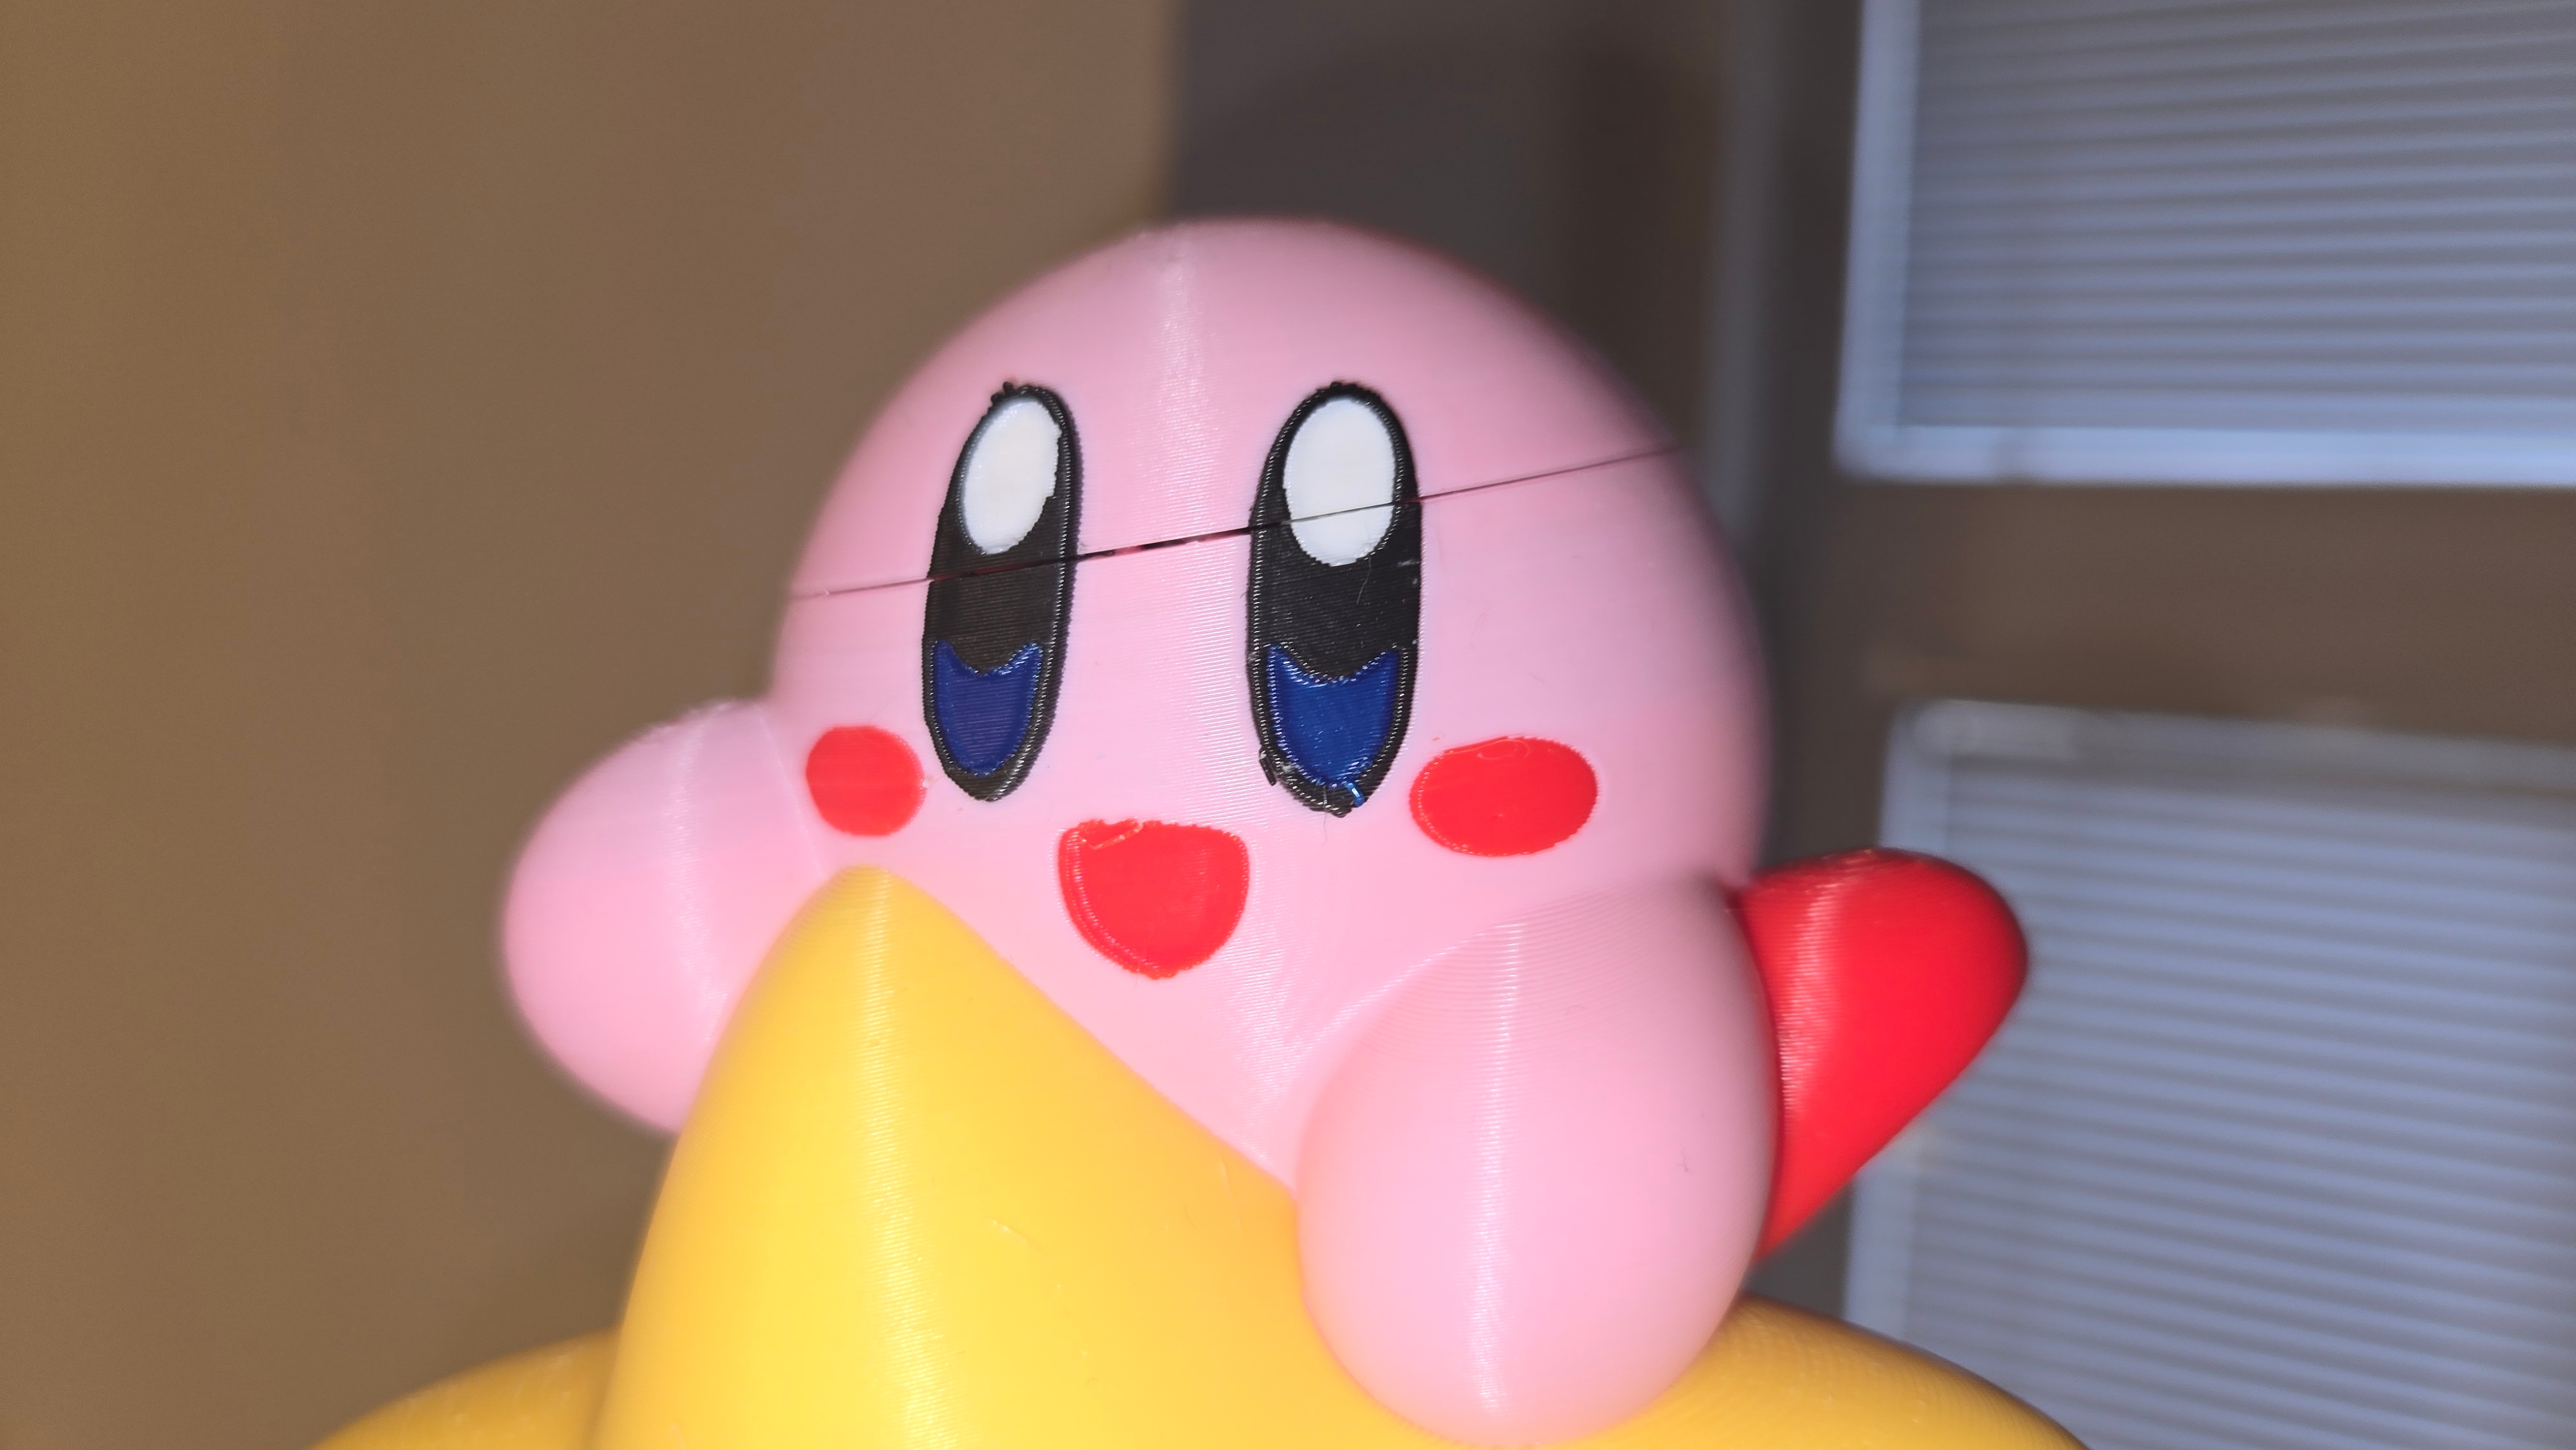
The nozzle crashed into the print and tipped it over so I printed the top part separately and glued it there. Any tips how to hide the line where it's glued on? It's all PLA.

24


I'm pretty new to 3D Printing and just learned that apperantly PLA and PETG don't like sticking together. I have printed with both of them before without much issue tho?

Given that I plan on doing a Massive 4 Colour Print for Christmas, which will use Black & White PETG HF, Red PLA Basic and PLA Metal, I was wondering if this really is as Worrysome as people make it out to be? What are your experiences with mixing Filament Types like this?

25


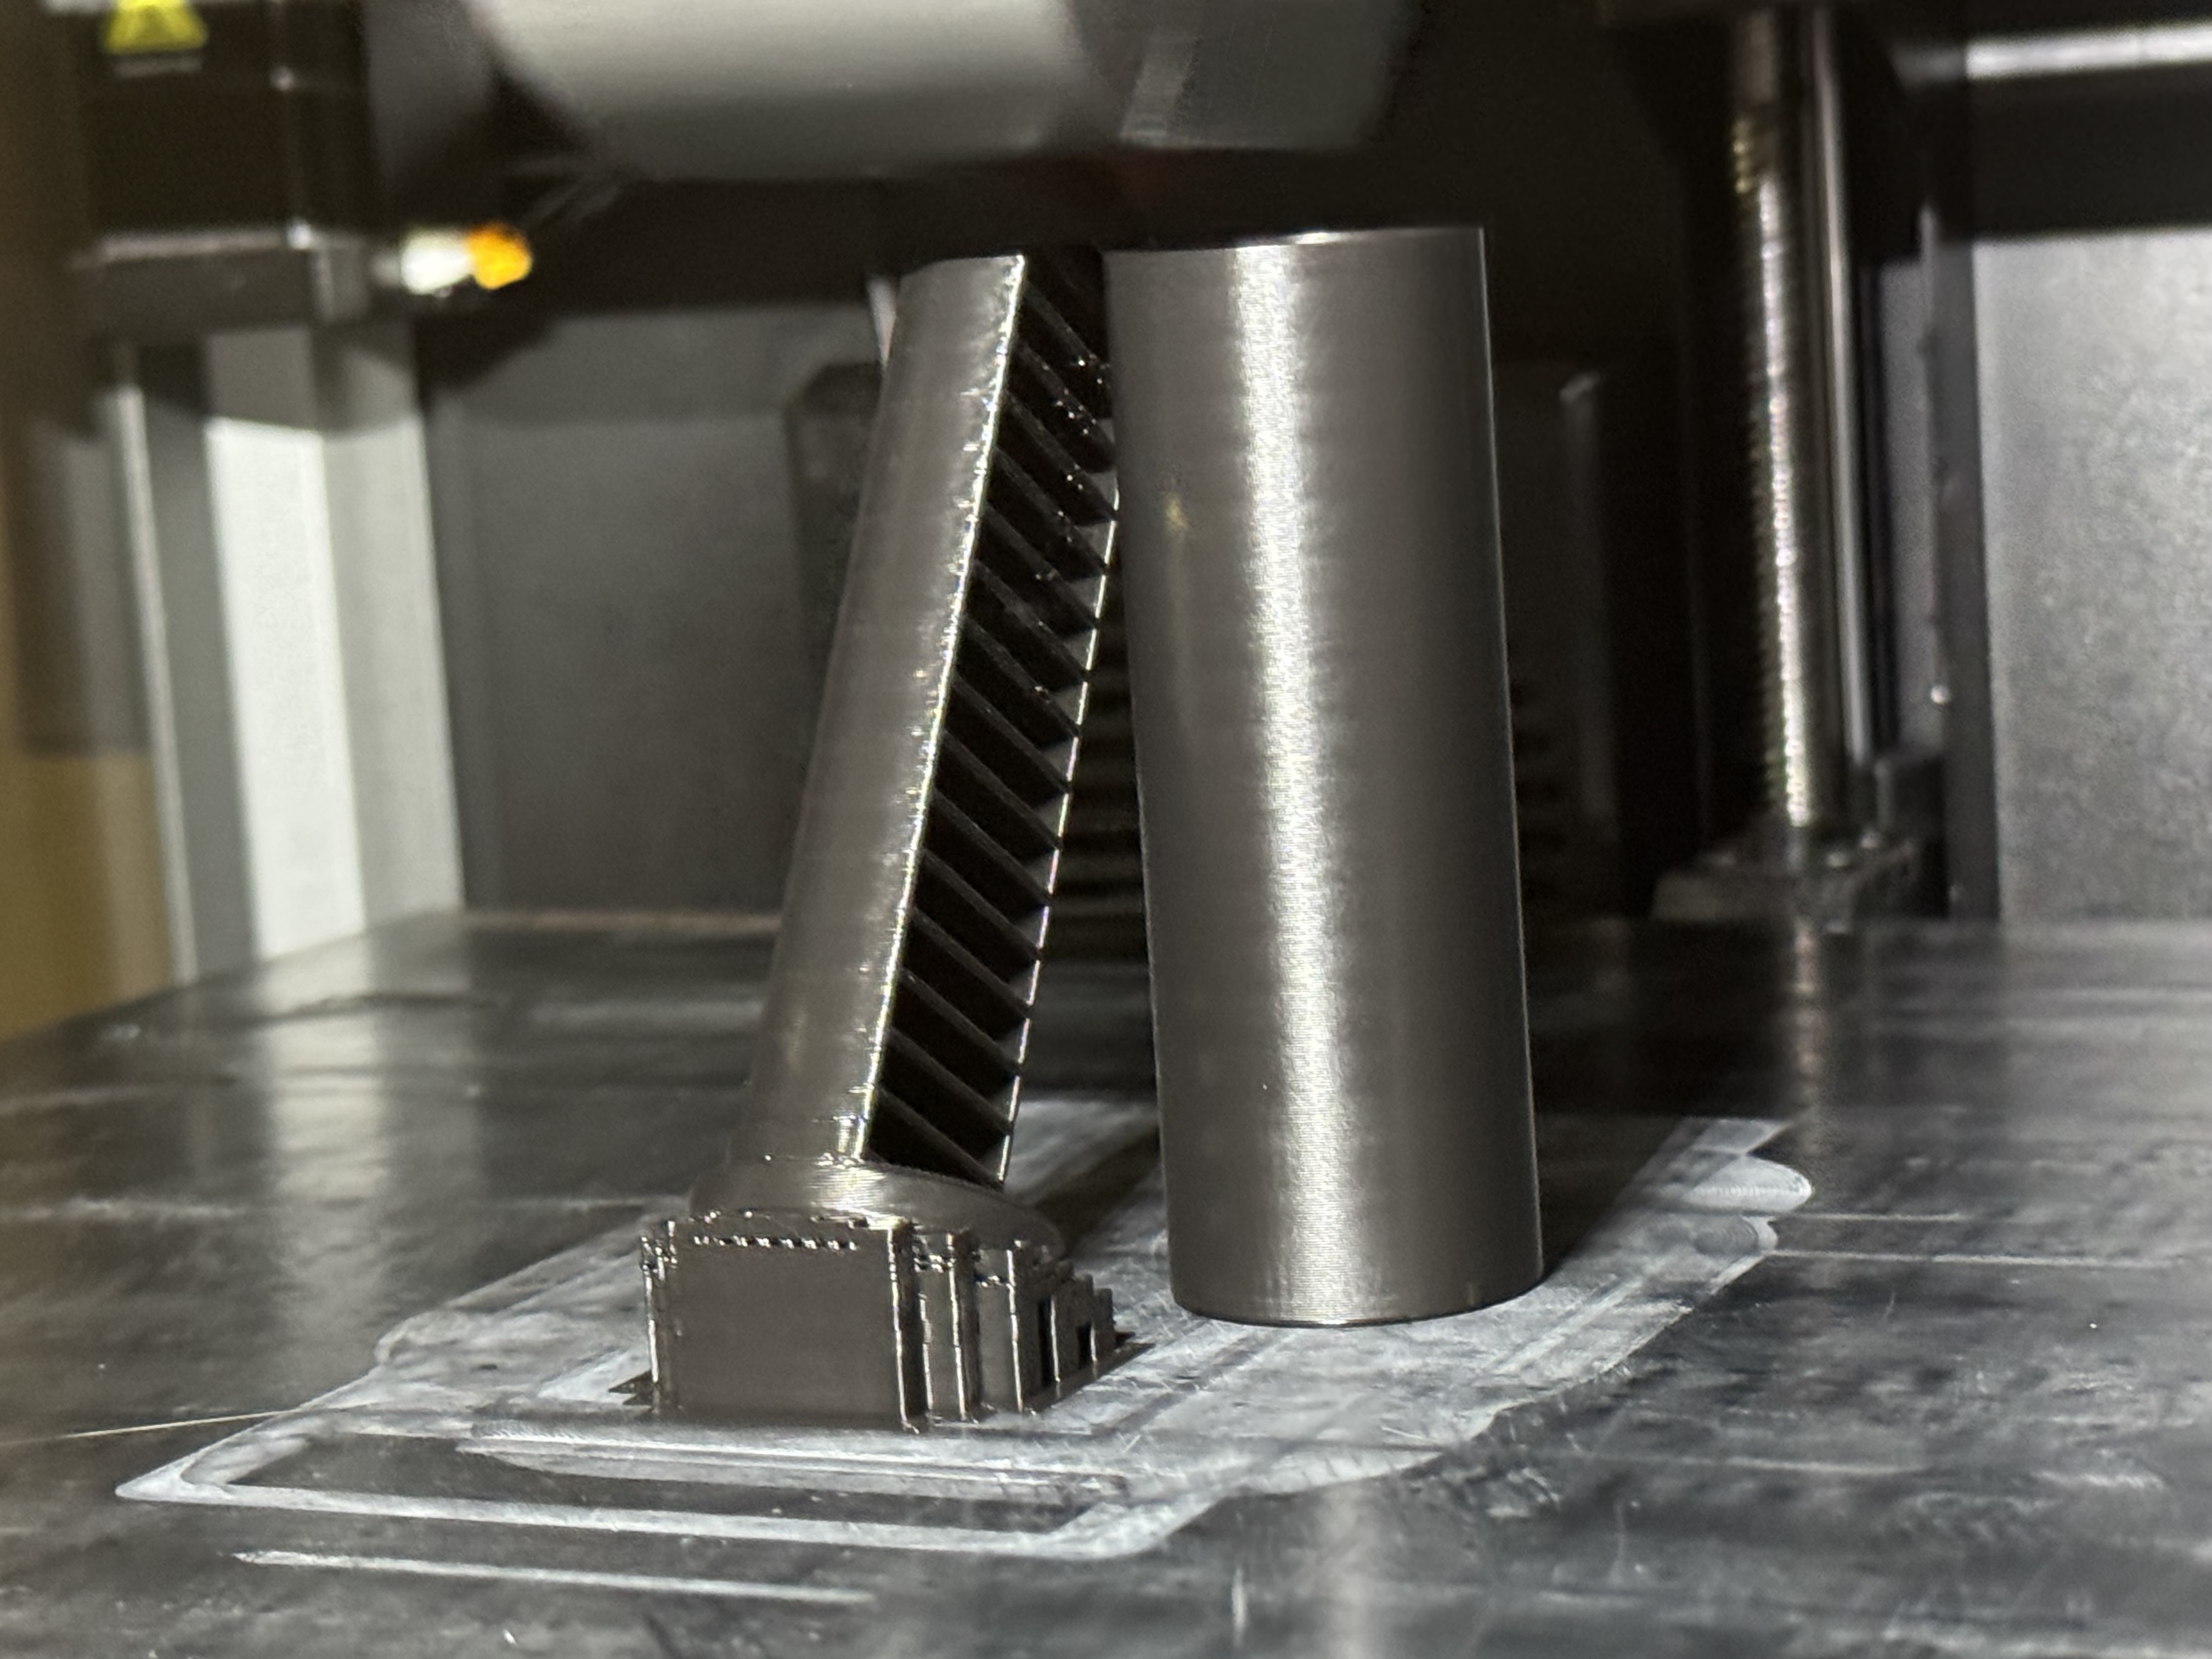
This is a battery cell case that was a pain last time I printed it with supports

Model: https://www.thingiverse.com/thing:5240533/files

view more: next ›